
Foam rollers, slightly soft cylinders of foam that are typically 36 inches long and six inches in diameter, are the go-to tool for self-massage. And we’re not just talking about athletes who need to iron out post-exercise kinks. Rolling is for everyone: It “allows the body to release long-held tension and improve ailments such as chronic pain, joint compression, posture, digestion, sleep problems, stress, and anxiety,” says Sue Hitzmann, creator of the Melt Method, a foam rolling technique taught in gyms and fitness studios across the country.
Draping yourself over a roller and rocking away tension in your glutes, traps, or wherever feels good in the moment and long after, according to Hitzmann. By gently applying pressure, such as your own body weight, to target areas through rolling, you increase circulation to those body parts. Old cells are flushed out and the body becomes more hydrated. The fascia—a cobweb-like material wrapping around and connecting all muscles—becomes more pliant, causing muscles to glide past one another rather than tighten and knot up. Any tension you’ve been feeling (like tight quads after a run or stiff shoulders after a long workweek) can disappear. Suddenly, you have a lot more range of motion, which scientific research supports, including a 2014 study published in the Journal of Sport Rehabilitation and this 2013 report in the International Journal of Sports Physical Therapy.
Hitzmann suggests the following four exercises for anyone looking for full-body relief. She advises her Melt students to use a softer foam roller and to ease up if there is any pain. When rolling, spend no more than 10 minutes on any one body part and drink plenty of water to help get rid of toxins being released. Use your roller three times a week for best results.
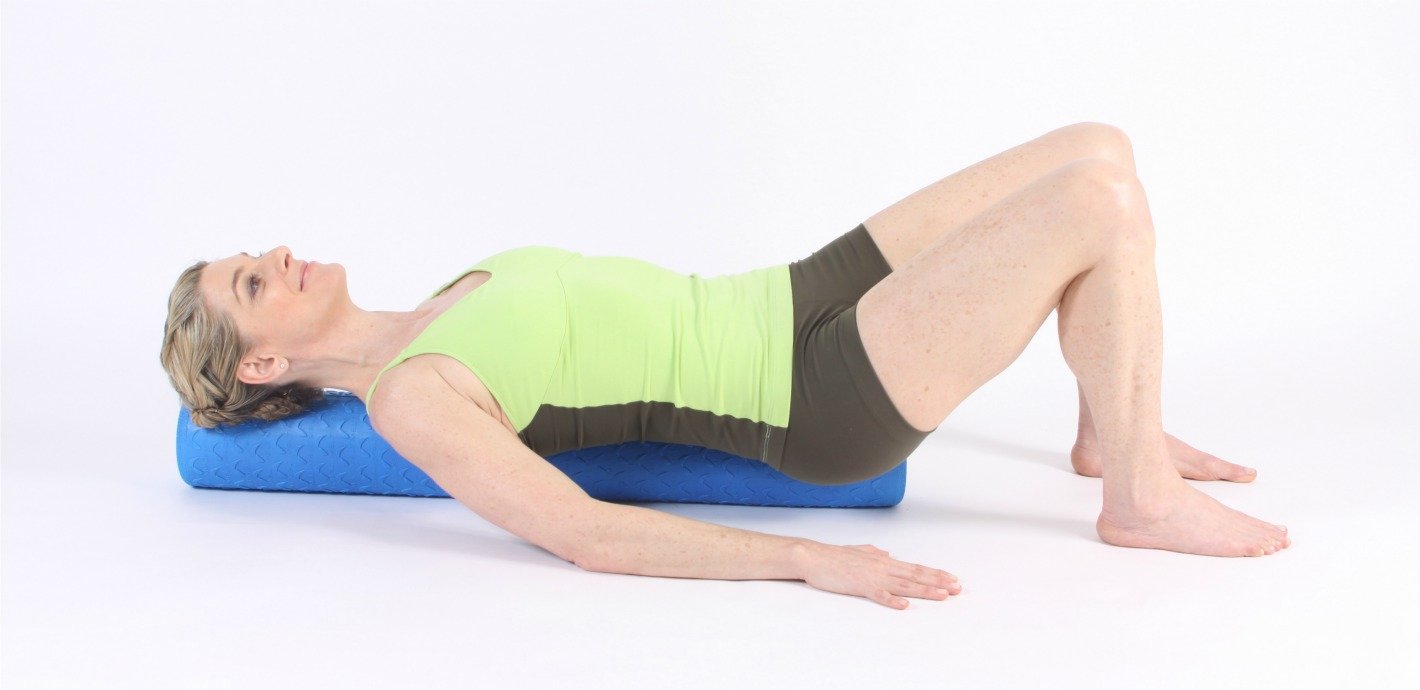
1. Roll Your Spine
Sit on one end of the roller with knees bent, feet flat on the floor. Slowly lie back on the roller so it’s under your hips, spine, and the back of your head. Rest your forearms on the ground. Gently rock side to side, for 30 seconds, keeping your spine on the roller.
Reach your arms up to the ceiling. Keeping your arms straight, let the weight of your arms sink your shoulder blades around the roller. From this position, move your arms in a scissor-like motion (as your right arm moves up by your ear, your left swings down by your hip) in front of your body. Switch arms for one rep. Keep your core engaged and don’t let your ribs lift up. Do 3 reps.
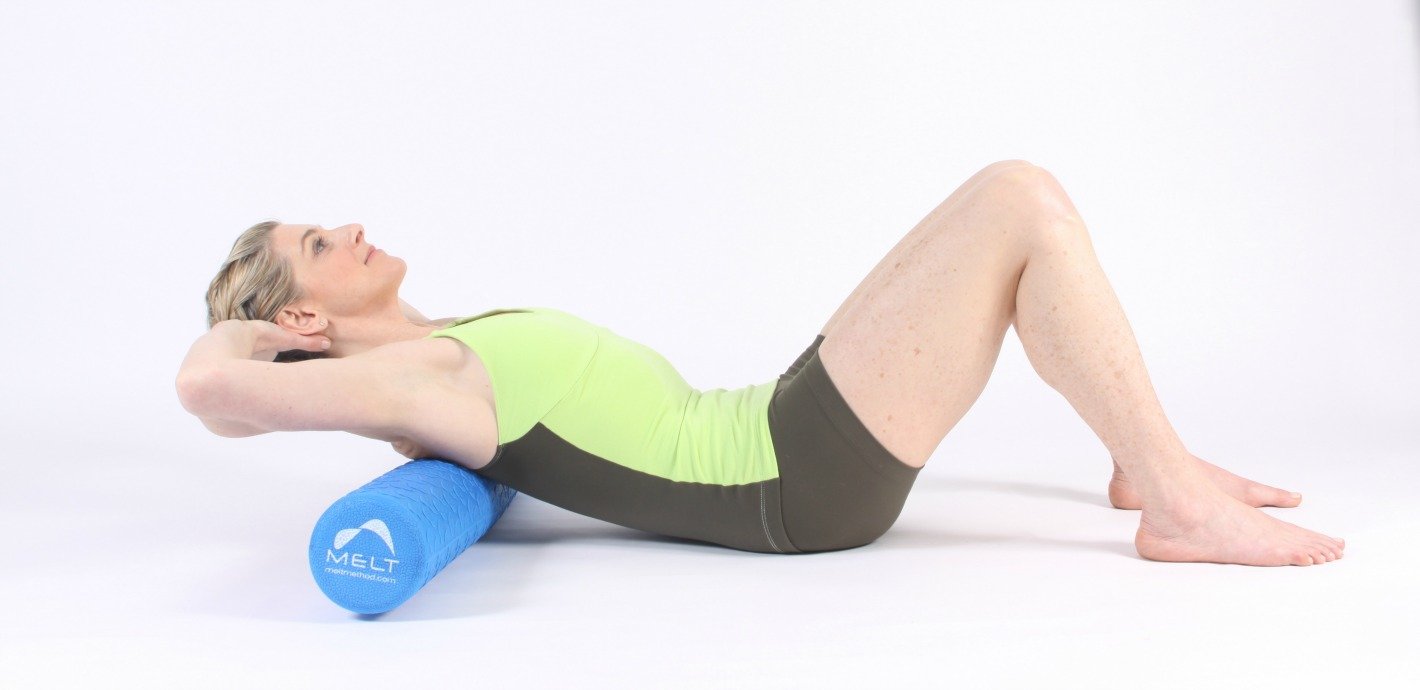
2. Stretch Your Spine and Chest
Sit on the floor with your knees bent and your feet flat. Lie back and rest your shoulder blades on the roller, holding your head with your hands, elbows wide to the side. Tuck your pelvis so the top of the pelvis and the bottom of the rib cage are heavy. Take a deep breath. As you exhale, keep your tuck and extend your ribs over the roller, moving only your upper back. Take 2 deep breaths. As you exhale, slowly side bend to the right, drawing your right elbow toward your right hip. Take 2 deep breaths. Repeat on the other side.
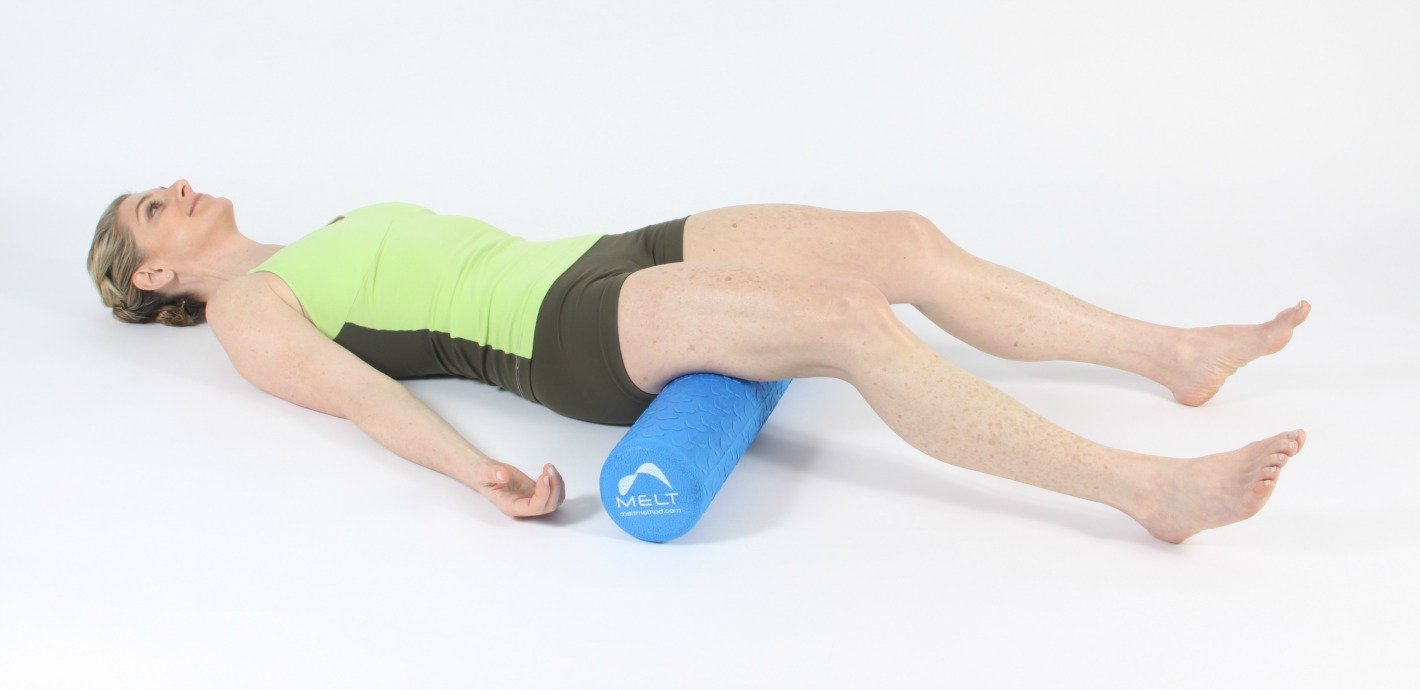
3. Roll Your Hamstrings
Lie on the floor face-up with the roller under your upper thighs. Straighten your legs, keeping them relaxed. Slowly drag your legs together and apart like you’re doing jumping jacks. Do 5 reps. Straighten and relax your legs again, taking 2 deep breaths. Move the roller halfway down your thighs and repeat the technique. Then move it just above your knees and repeat.
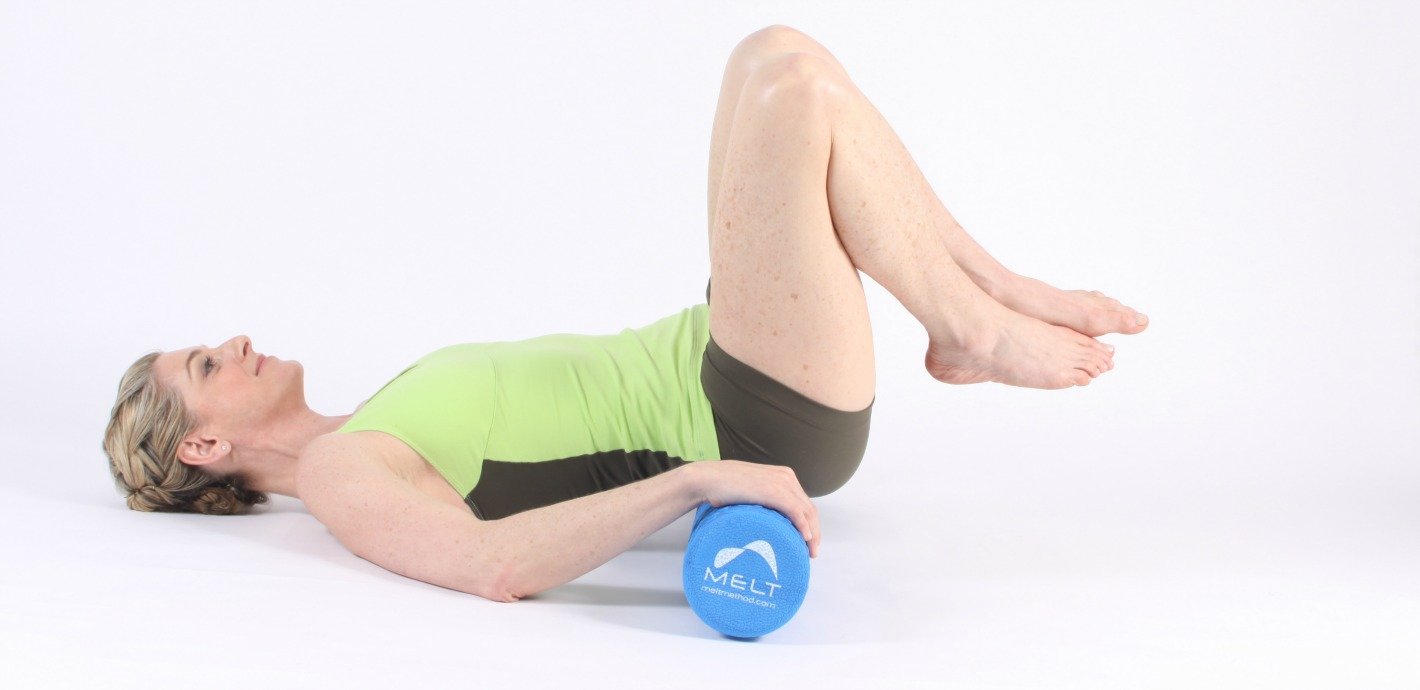
4. Roll Your Hips and Stretch Your Hip Flexors
Lie on the floor face-up with the roller under your hips (make sure that the roller isn’t in your lower back). Bring your knees in toward your chest so they are over your belly button. Keeping your knees together, slowly rock them to the right and to the left. Pause on the right side (about 1 o’clock) and make small circles with your knees. Make 3 clockwise and 3 counter-clockwise circles. Hold the position and take 2 deep breaths, then switch sides.
Return to center and interlace your hands over your left shin. Keeping your right knee bent, slowly lower the right foot to the floor, just under your knee. Make sure the right knee stays over your right foot. Press the right foot into the floor as you tuck your pelvis. This will stretch your hip flexors and the fronts of your thighs. Hold for 3 breaths. Switch sides and repeat.


Comments (0)