It’s commonly taught that students should “draw the shoulder blades down the back” in most poses. While this does help to alleviate certain issues, it should certainly not be the end goal. The shoulder actions described in this sequence help to articulate how in most postures with arms overhead, you’re trying to achieve both external rotation as well as scapular elevation (extending the arms further upward). For the vast majority of the population, getting the arms completely alongside the ears while maintaining that shoulder position is not possible. If they do achieve this, it’s usually by thrusting the ribcage forward and back bending to compensate. So, when practicing this sequence, which well help open the wrists and draw strength in the core, keep your arms as far forward in front of your ears as you need (while your arms are extended overhead in order to keep a straight spine and shoulders integrated.
Child’s Pose
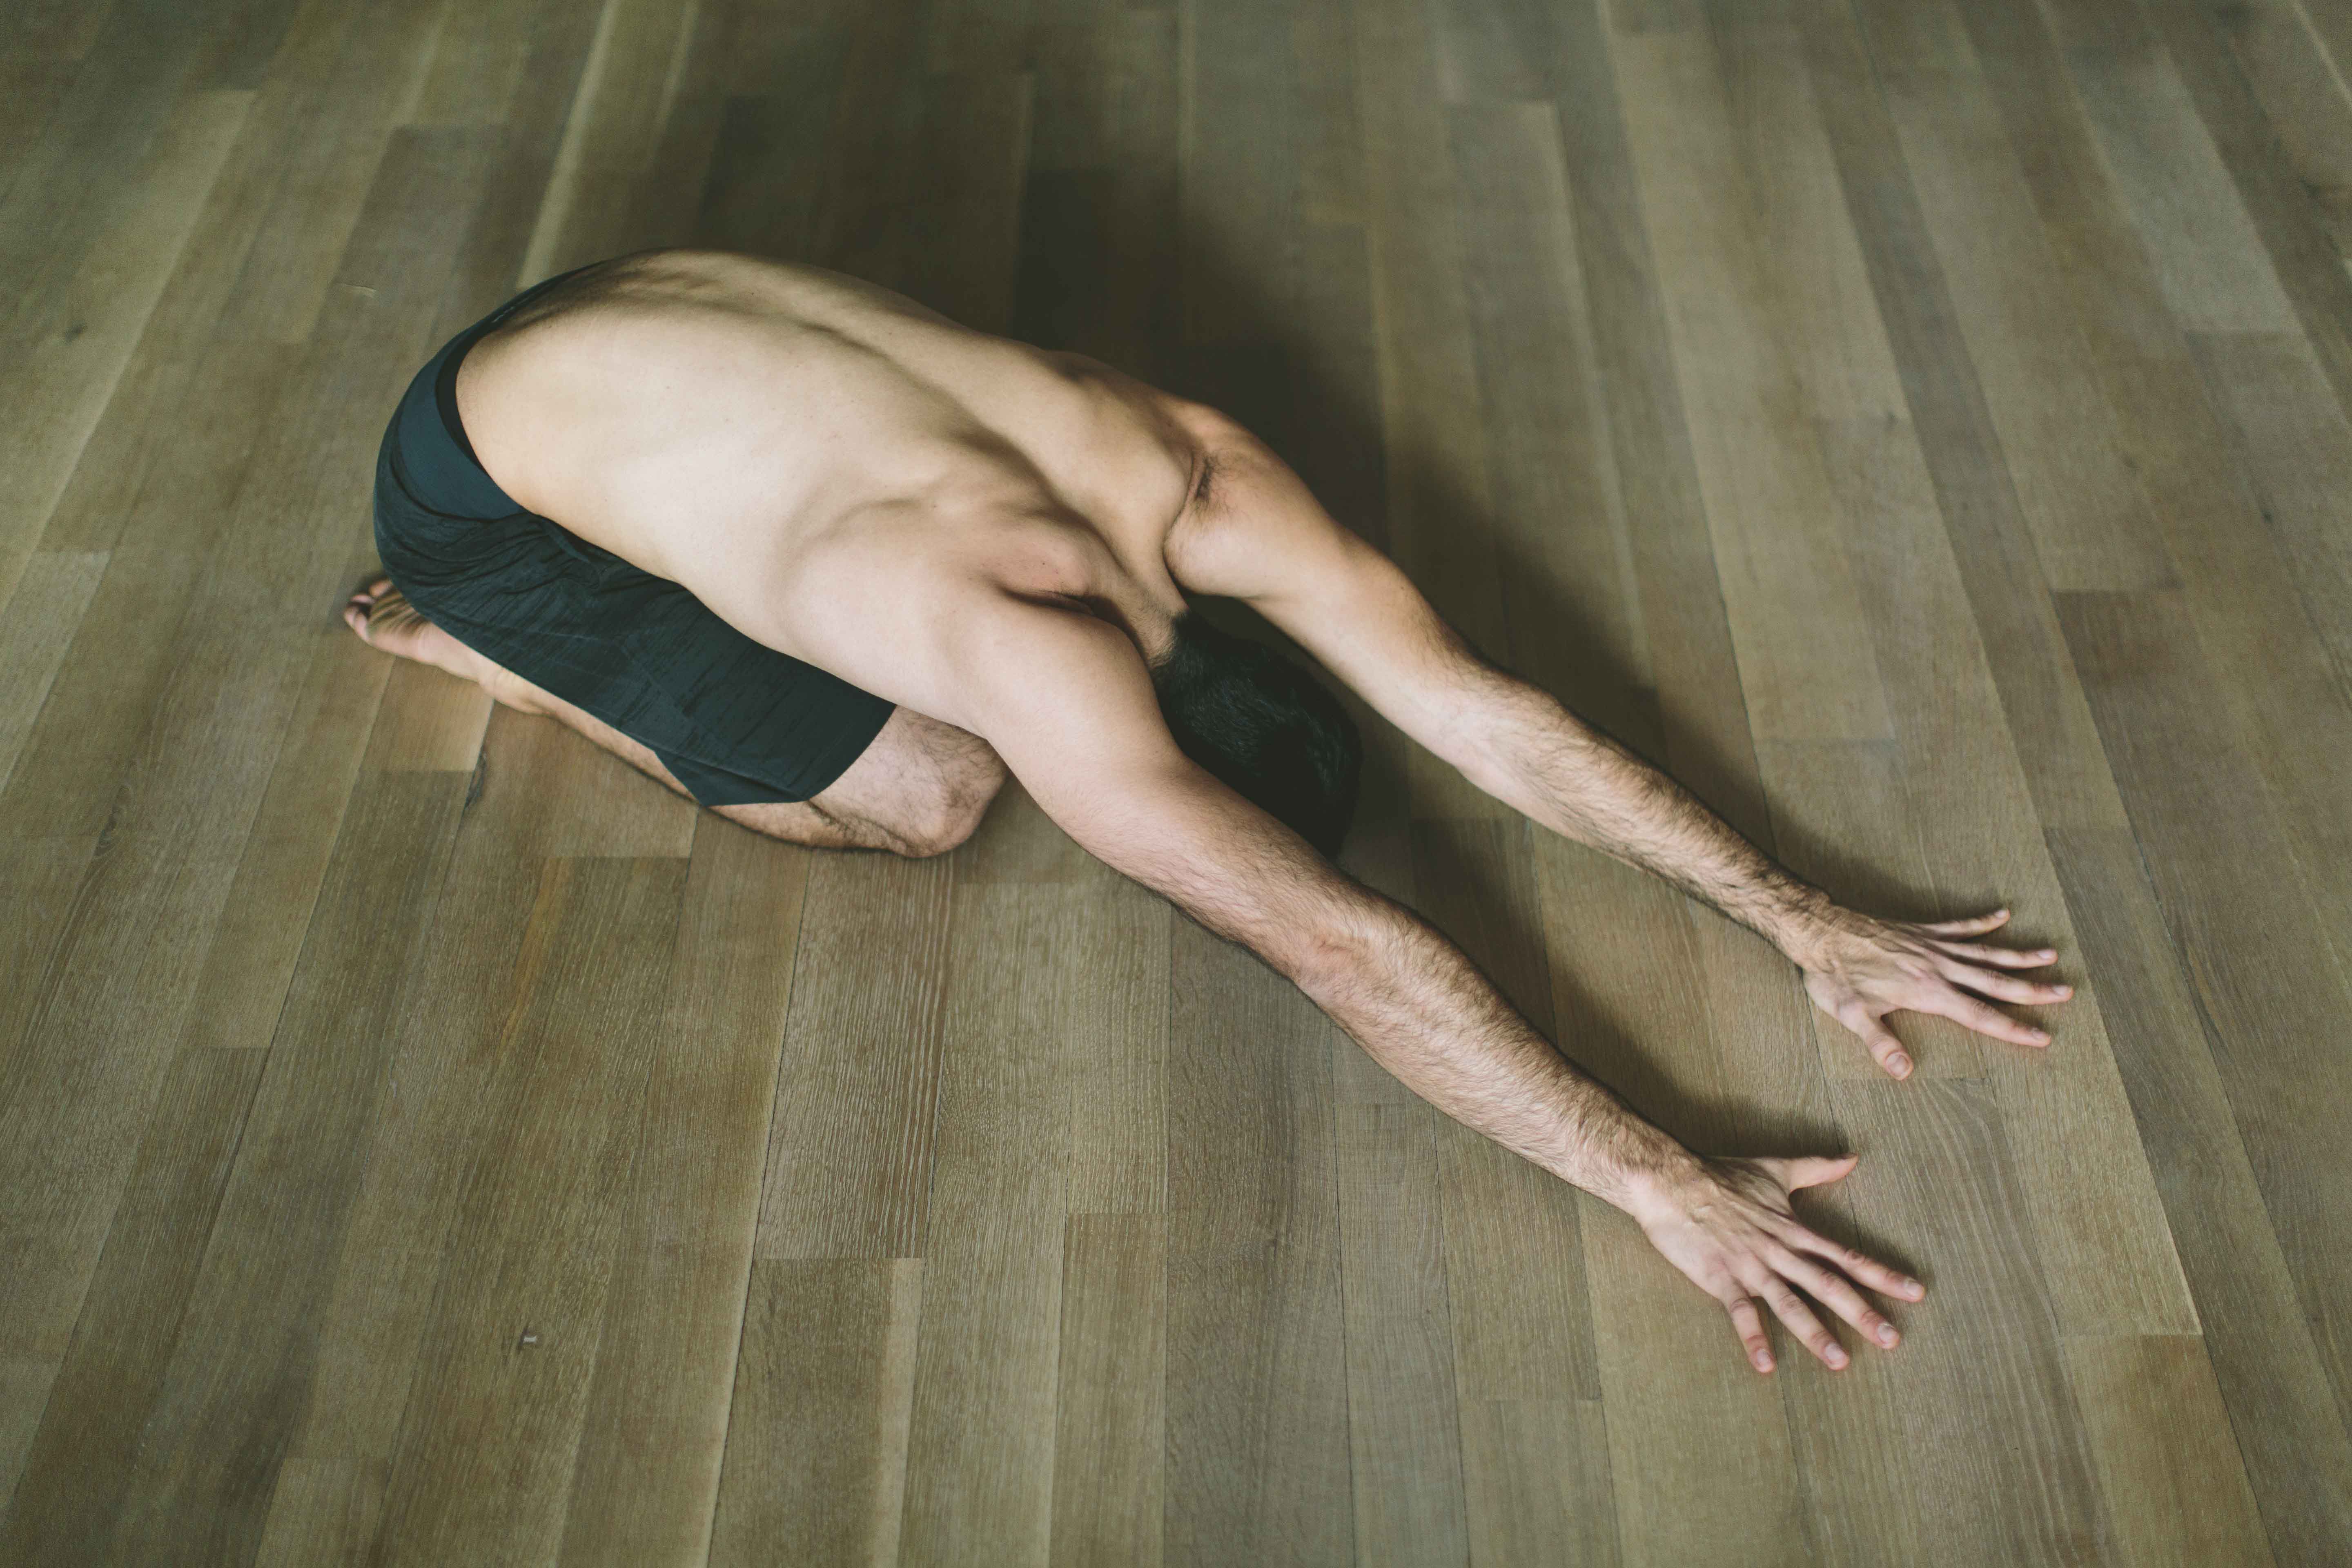
Begin in Child’s Pose with your knees together so that you can rest your chest on your thighs rather than in between them. Extend your arms out in front of you and lift up on to your fingertips so that your palms are elevated off the floor. Bring your head off the floor so that your ears are in line with your upper arms, and lift even higher on the tips of the fingers in an effort to elevate the arms further away from the floor.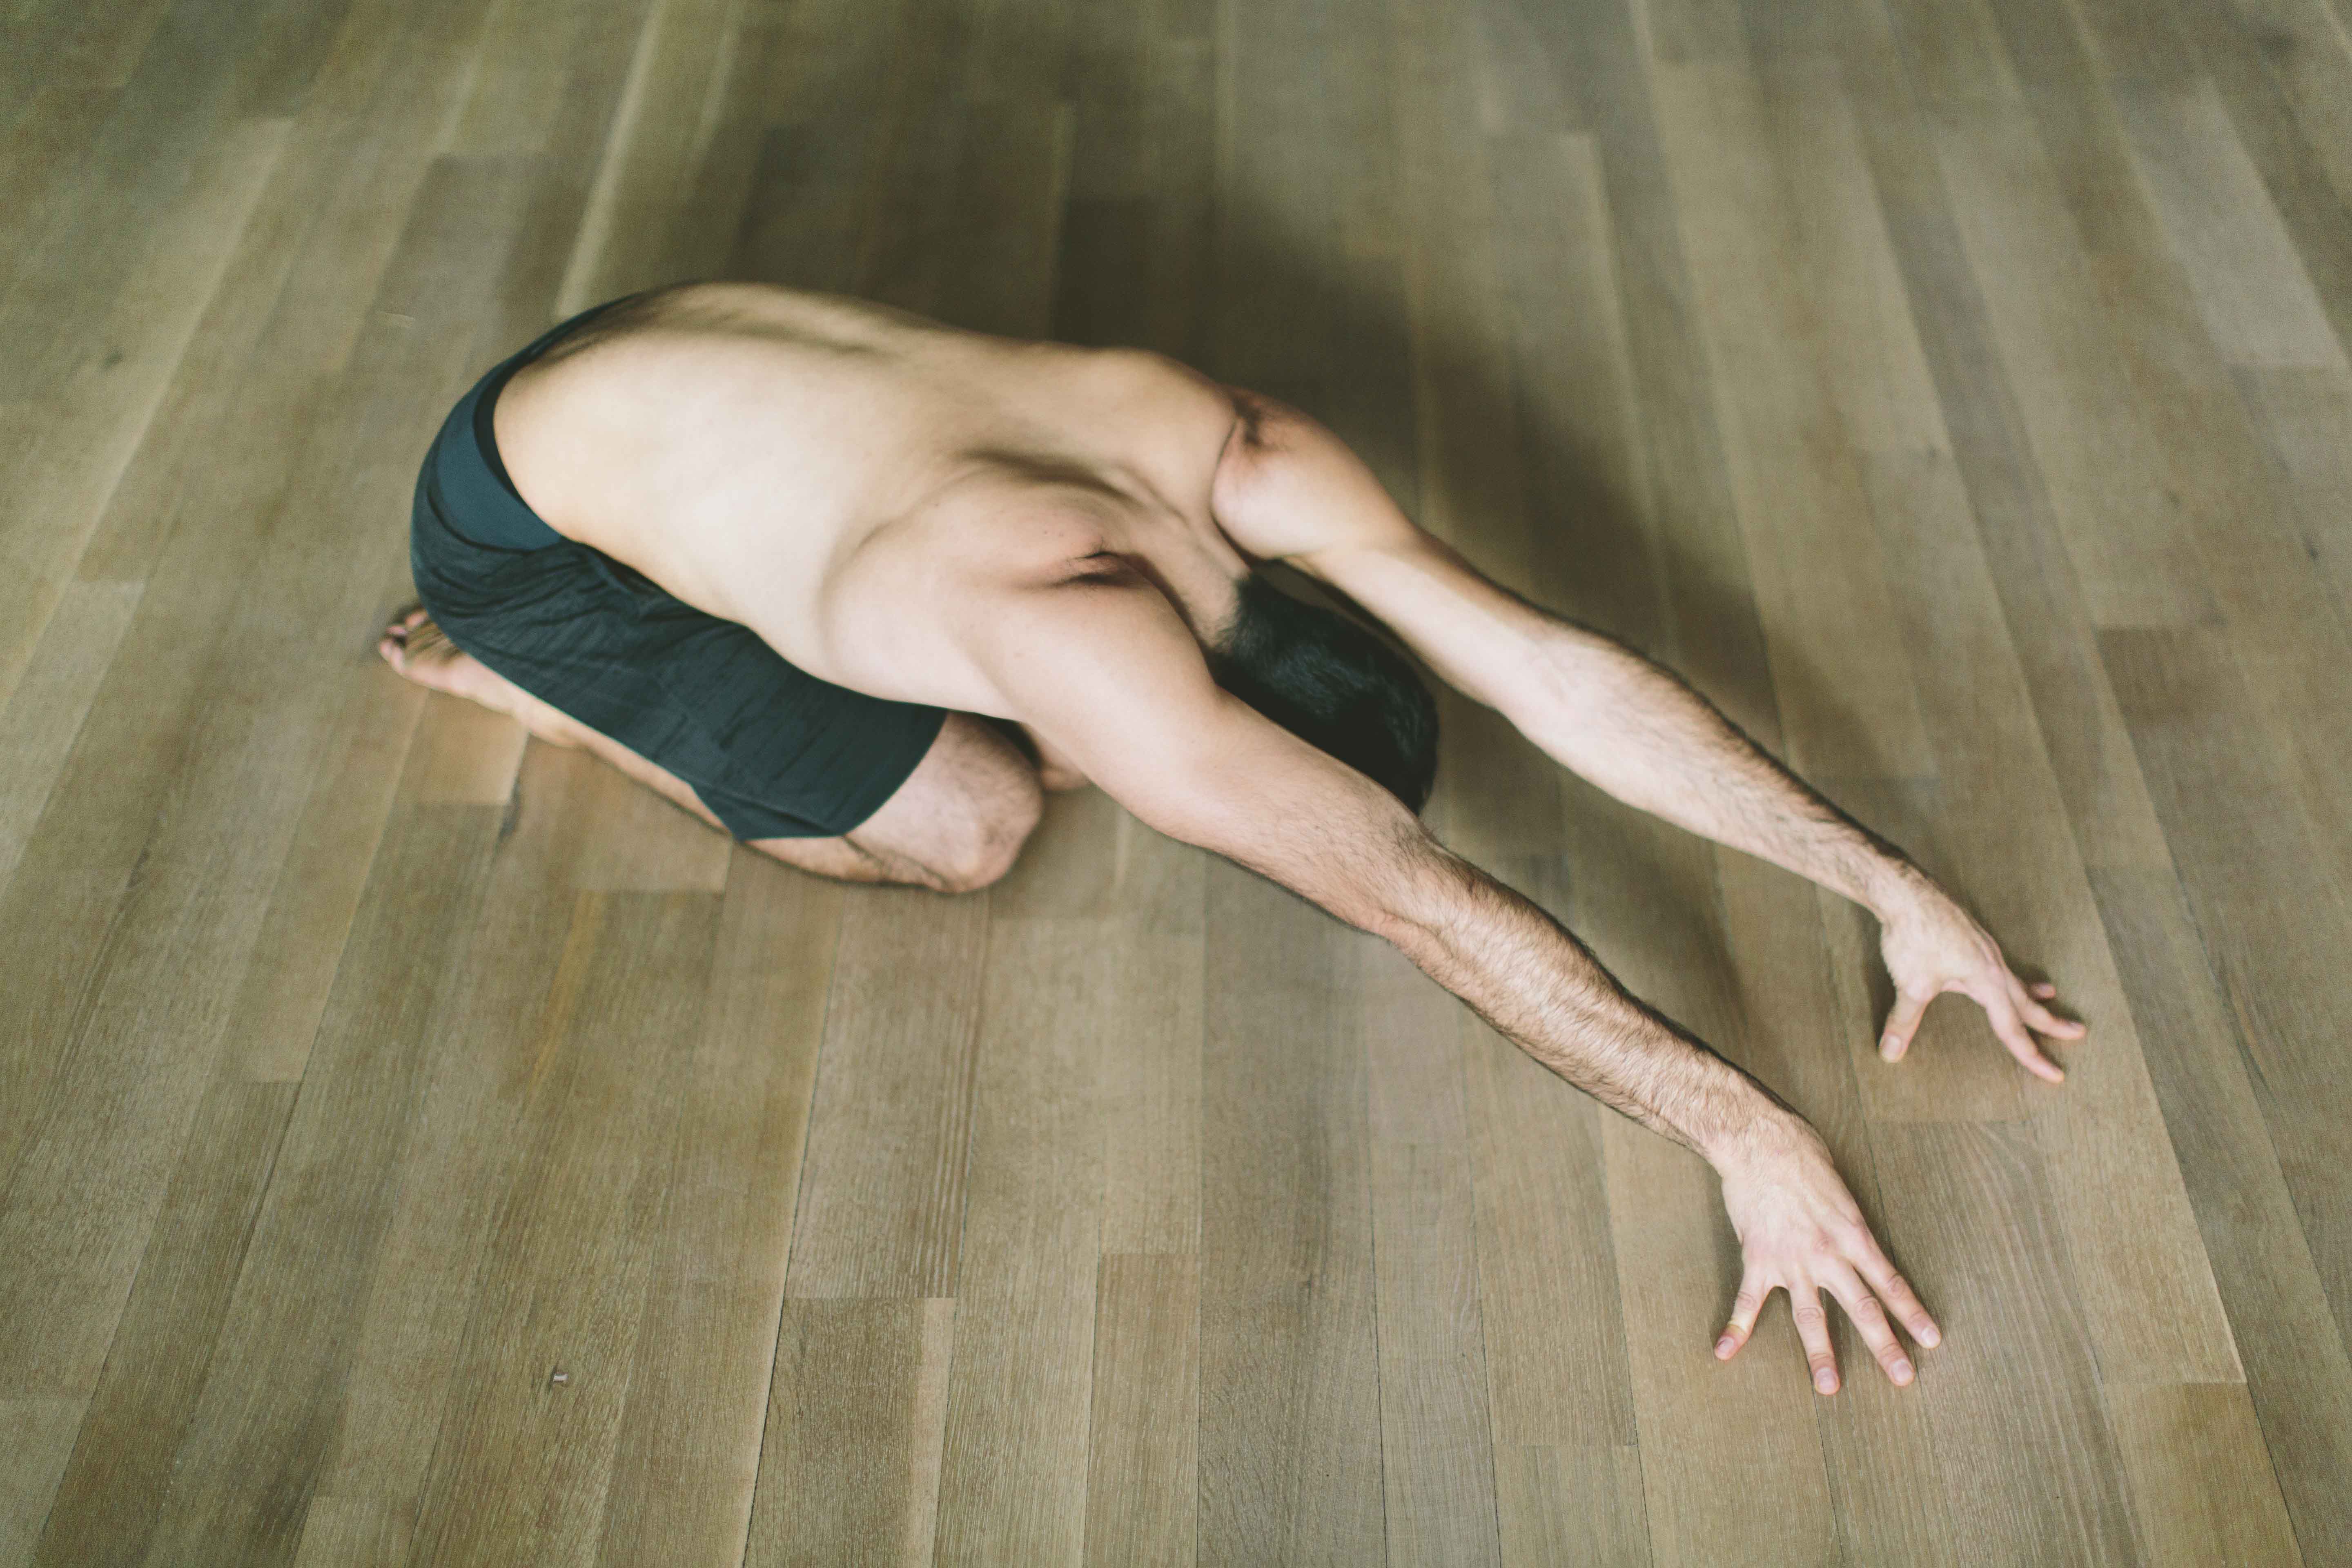
Keep your ribs on your thighs and strongly activate your triceps to keep the arms completely straight. Keep reaching your fingertips further away from you along the floor, lengthening the line from your hips to your wrists, while maintaining external rotation at the shoulders. As you reach out, the tendency for most will be to engage the upper fibers of the trapezius and internally rotate at the shoulder joint. Try to maintain a sense of width across the shoulders even as you lengthen the arms further out in front of you.
If you’re unsure as to whether you are engaging the muscles correctly, you can ask someone to feel superior-medial aspect of the trapezius (the top of the shoulder closer to the neck) and see if those muscles are soft—they should be! If not, work again on lifting the upper arms away from the floor again so that the armpits are hollowed out and not flat. And only once you can hold that with the traps soft, then work again on reaching the arms further out in front of you gaining more length. This is the foundational shoulder movement for both Downward Facing Dog and Handstand. It is imperative that you can achieve and hold this action in the arms and shoulders in a non weight-bearing position (such as this one) before expecting to hold it with increasing weight-bearing demand.
Wrist Stretching
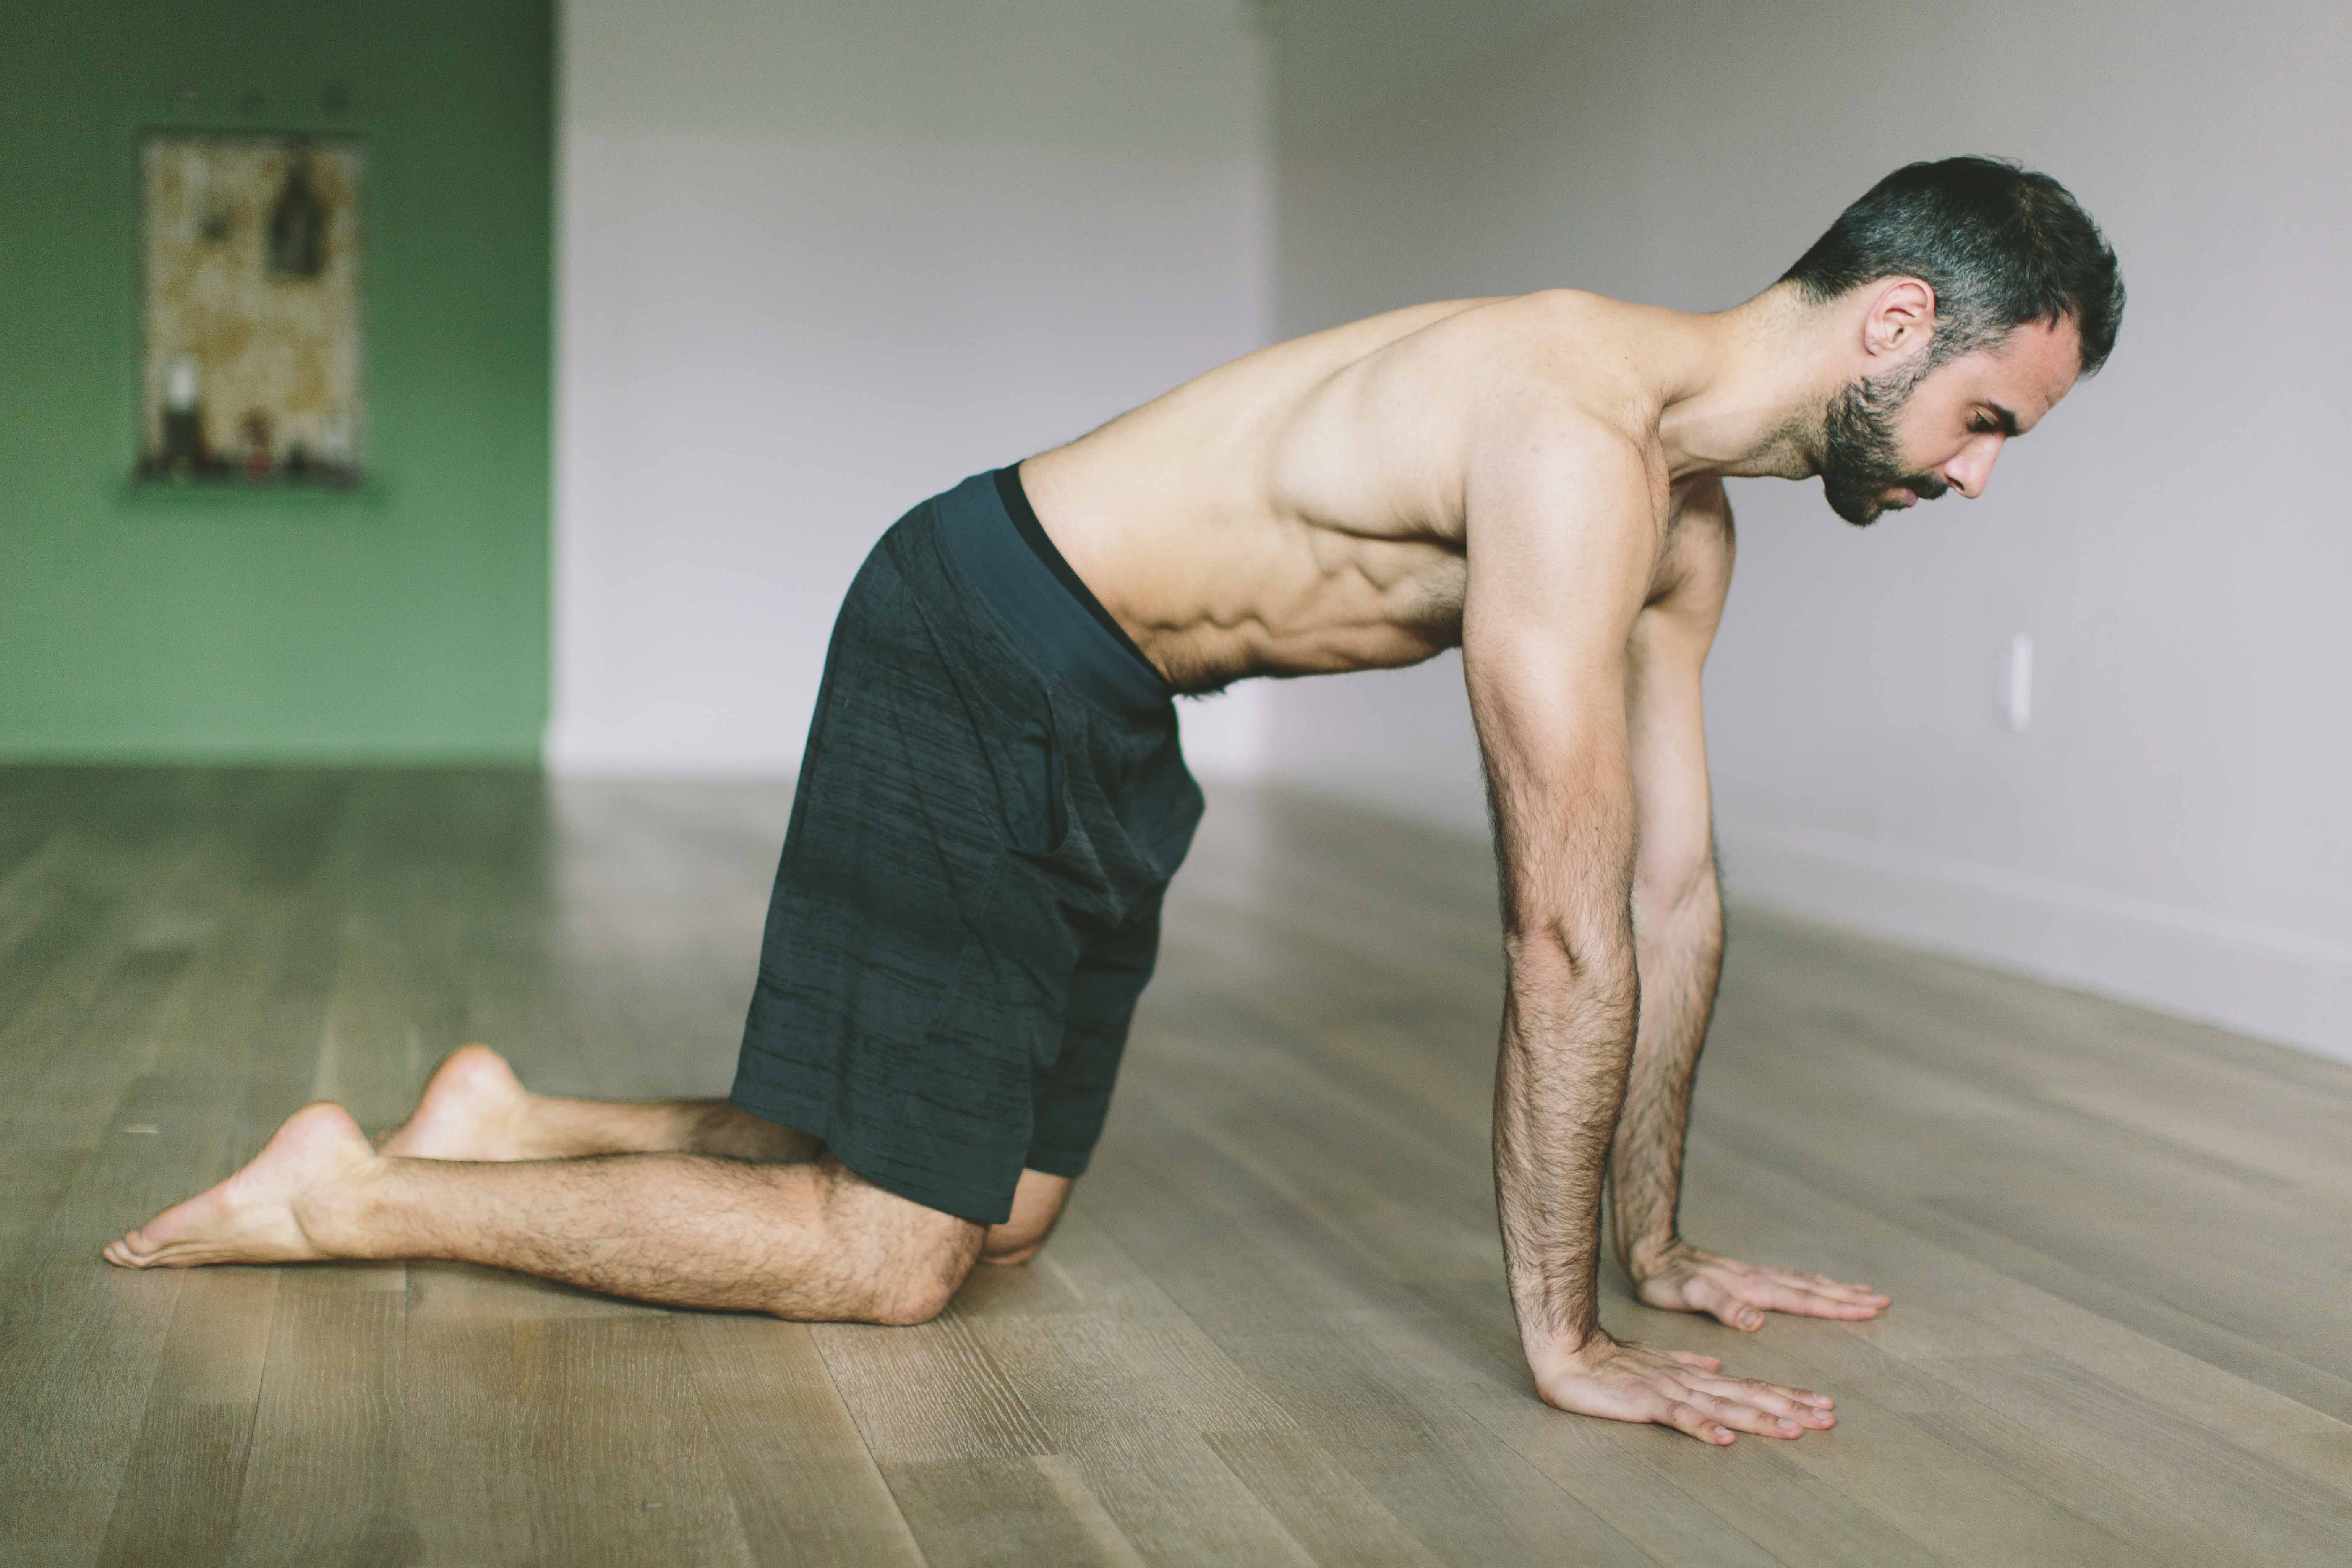
Start on your hands and knees with your shoulders directly above your wrists and hips right above your knees. Start to lean the weight back and forth from one wrist to the other (like a cat kneading its paws on your favorite cashmere sweater), gently rocking your weight from side to side. As you do this, start to turn both of your arms that your fingers turn out away from each other (externally rotating at the shoulder) until you can go no further. Continue transferring the weight from hand to hand and internally rotate the arms until the fingers turn inward as far as you can go. Continue this for several repetitions.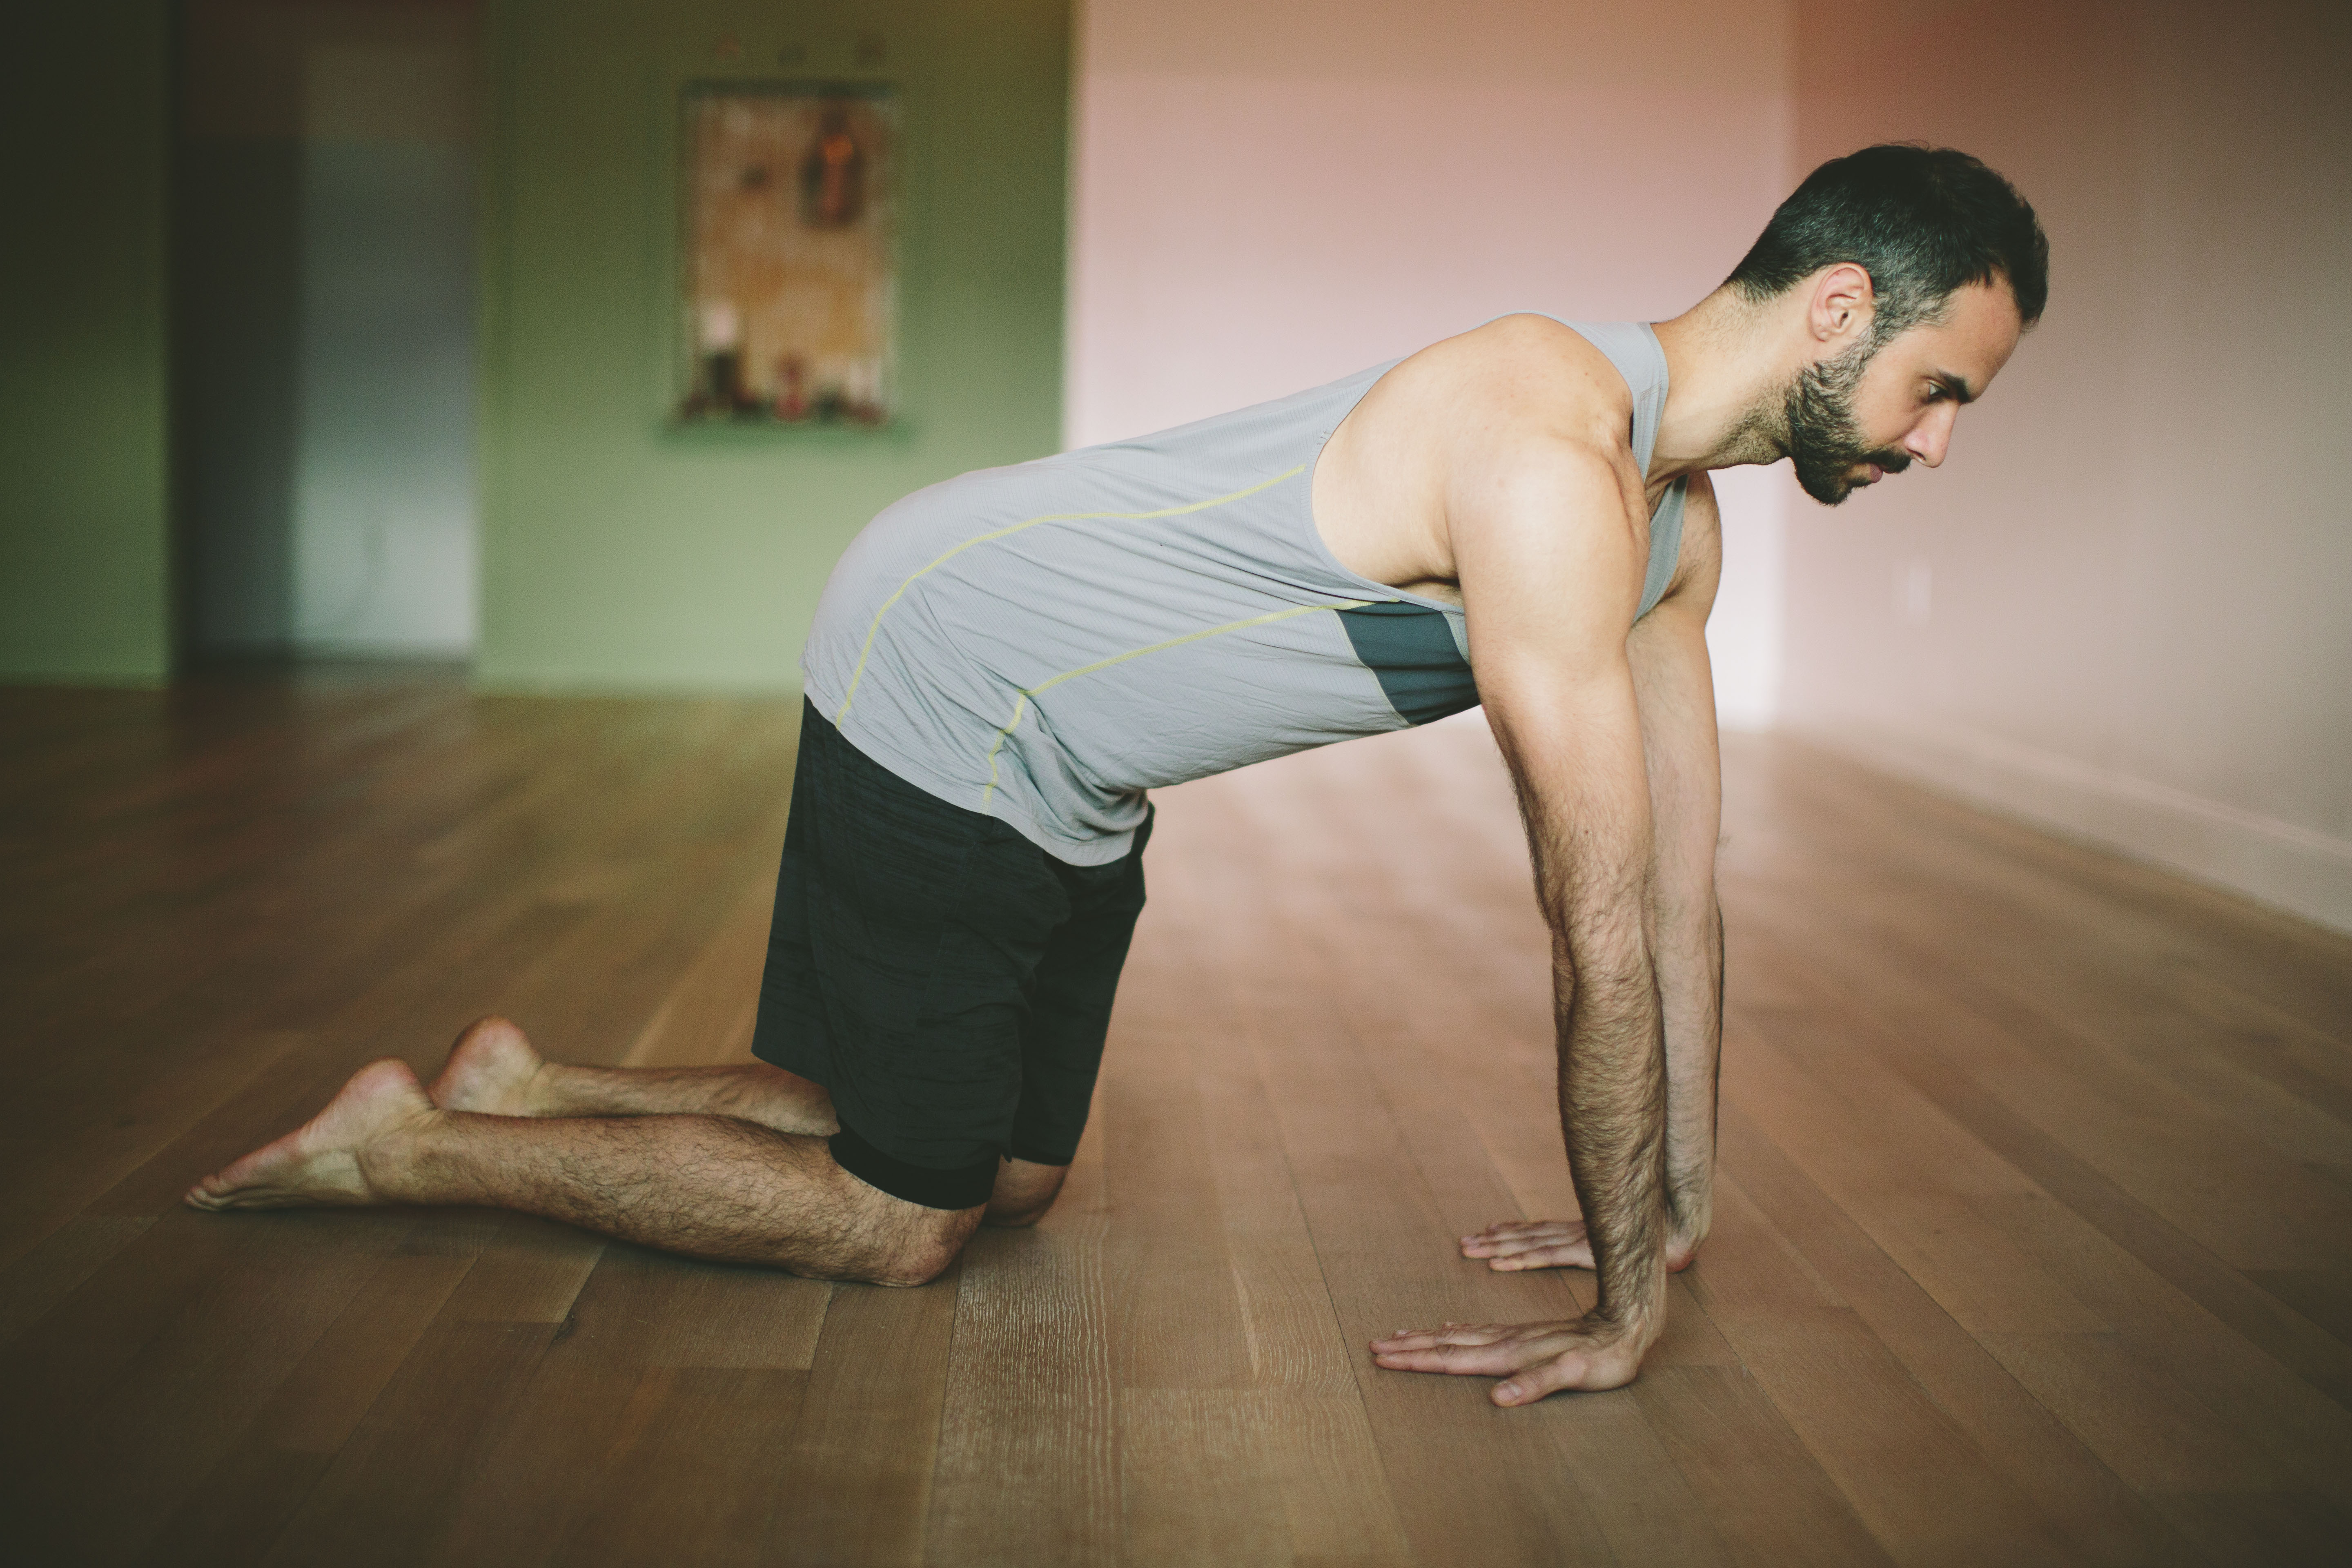
Starting in the same position as above, externally rotate the arms so that the fingers face backwards toward your knees. This time you’re just working on a static hold, no rocking. The first step is to get you the creases of your wrists parallel to the front edge of the yoga mat (if you’re using one), or look to see that they are fully rotated 180 degrees. Likewise, the middle fingers should be pointing straight back to the knees. If this is not possible, walk your knees in a few inches toward your hands, and lean your shoulders far enough forward over the wrists that you can get the last few degrees of rotation to achieve the 180-degree turn.
If you’re comfortable in this position, begin to work on moving the hips and shoulders backward toward the wall behind you, thereby increasing the angle between the front of the arm and the floor. Then relax the neck to let your head drop down and start to push the floor away from you with your hands to spread the scapula away from each other on the back (like Cat Pose).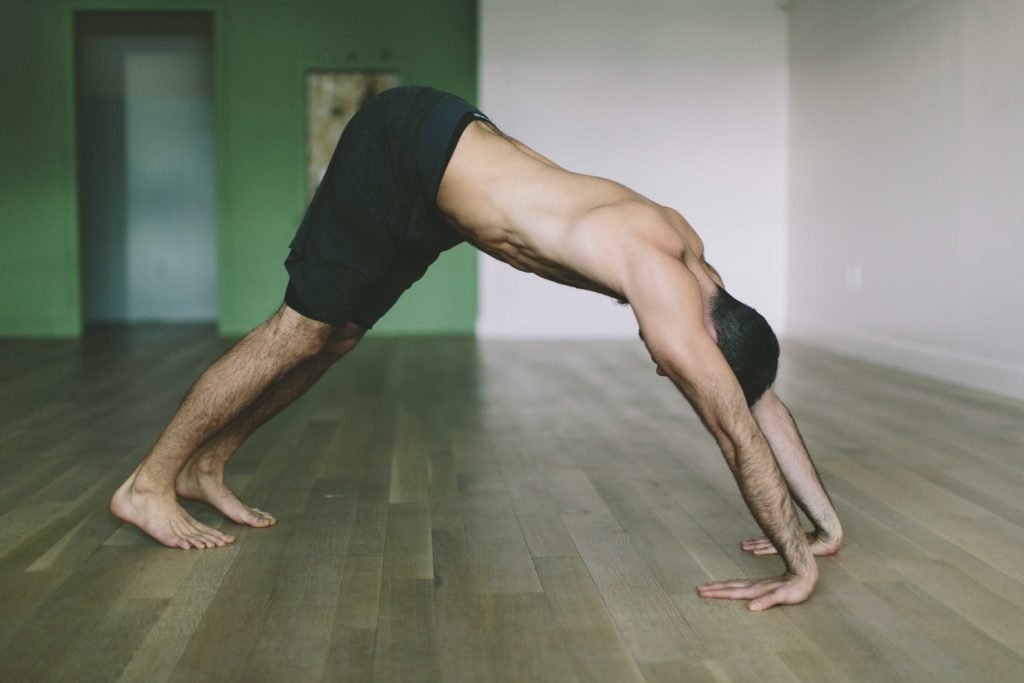
The last step, if you’re comfortable with all of the preceding exercises, is to keep the wrists flipped and move in to Downward Facing Dog.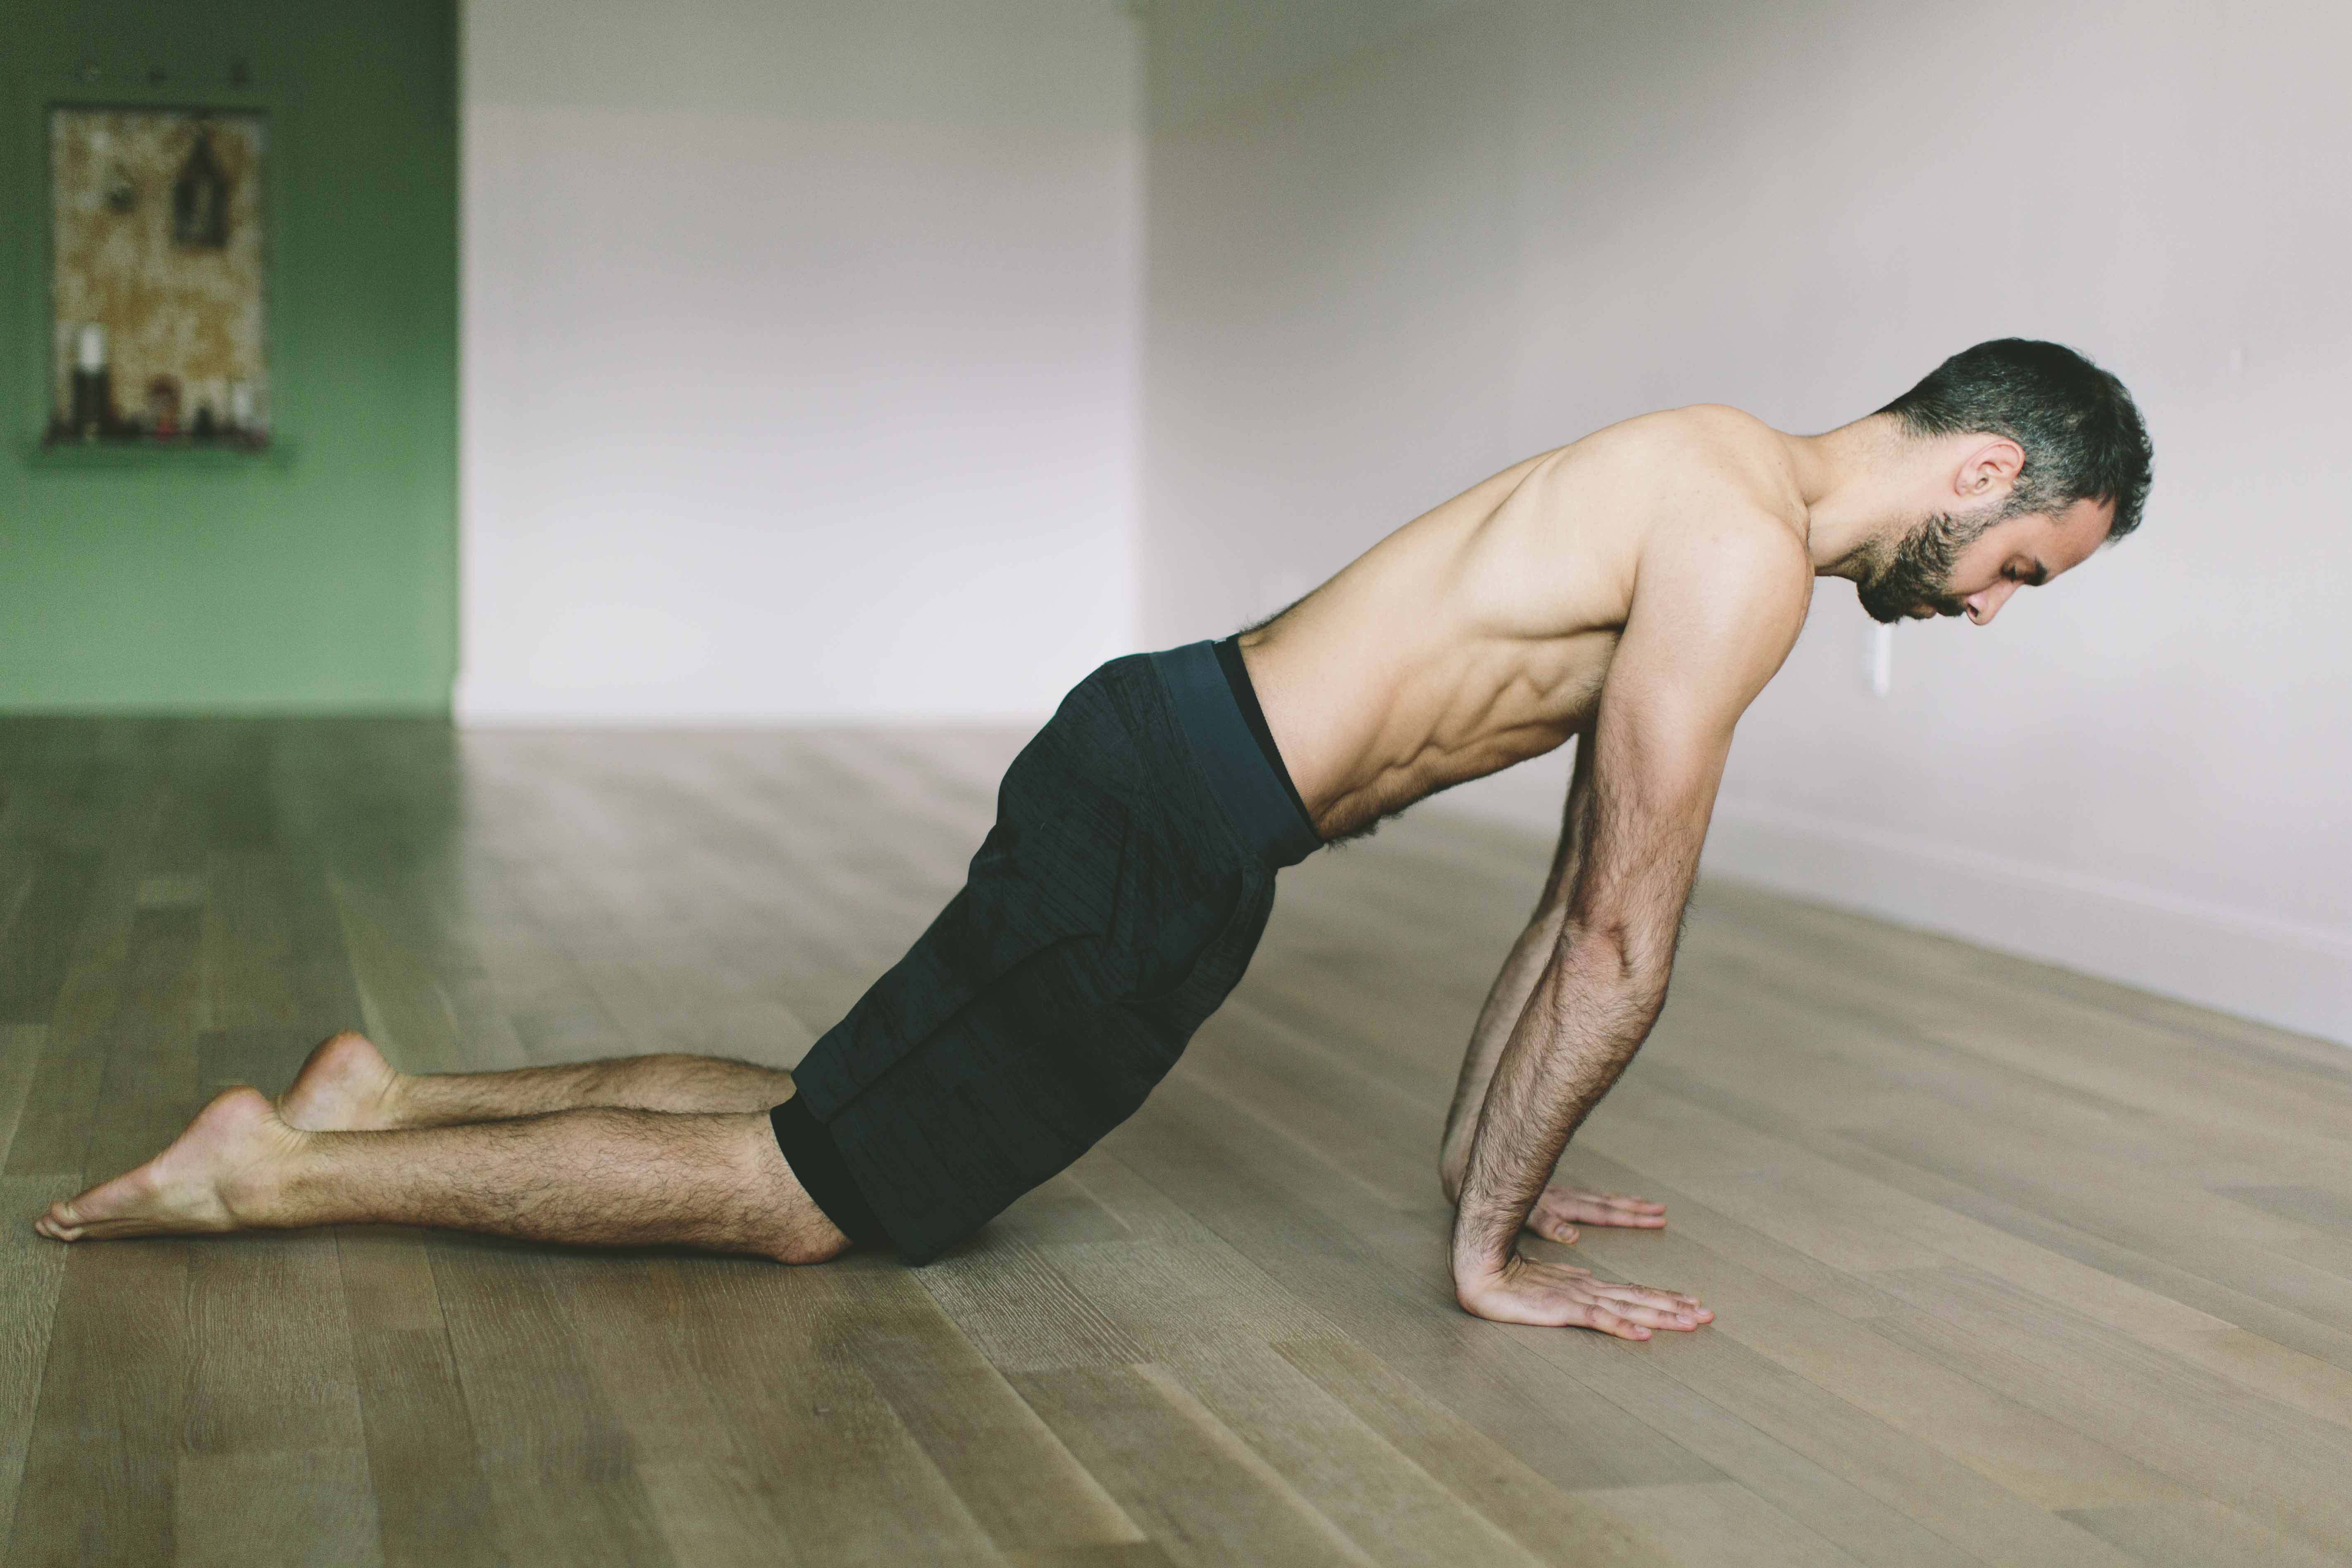
From either plank or hands and knees, start to lean your shoulders forward in front of your wrists. Be sure to keep the shoulder blades protracting/pressing away from one another. Continue to lean forward progressively more and more with each round and hold for a few seconds each time.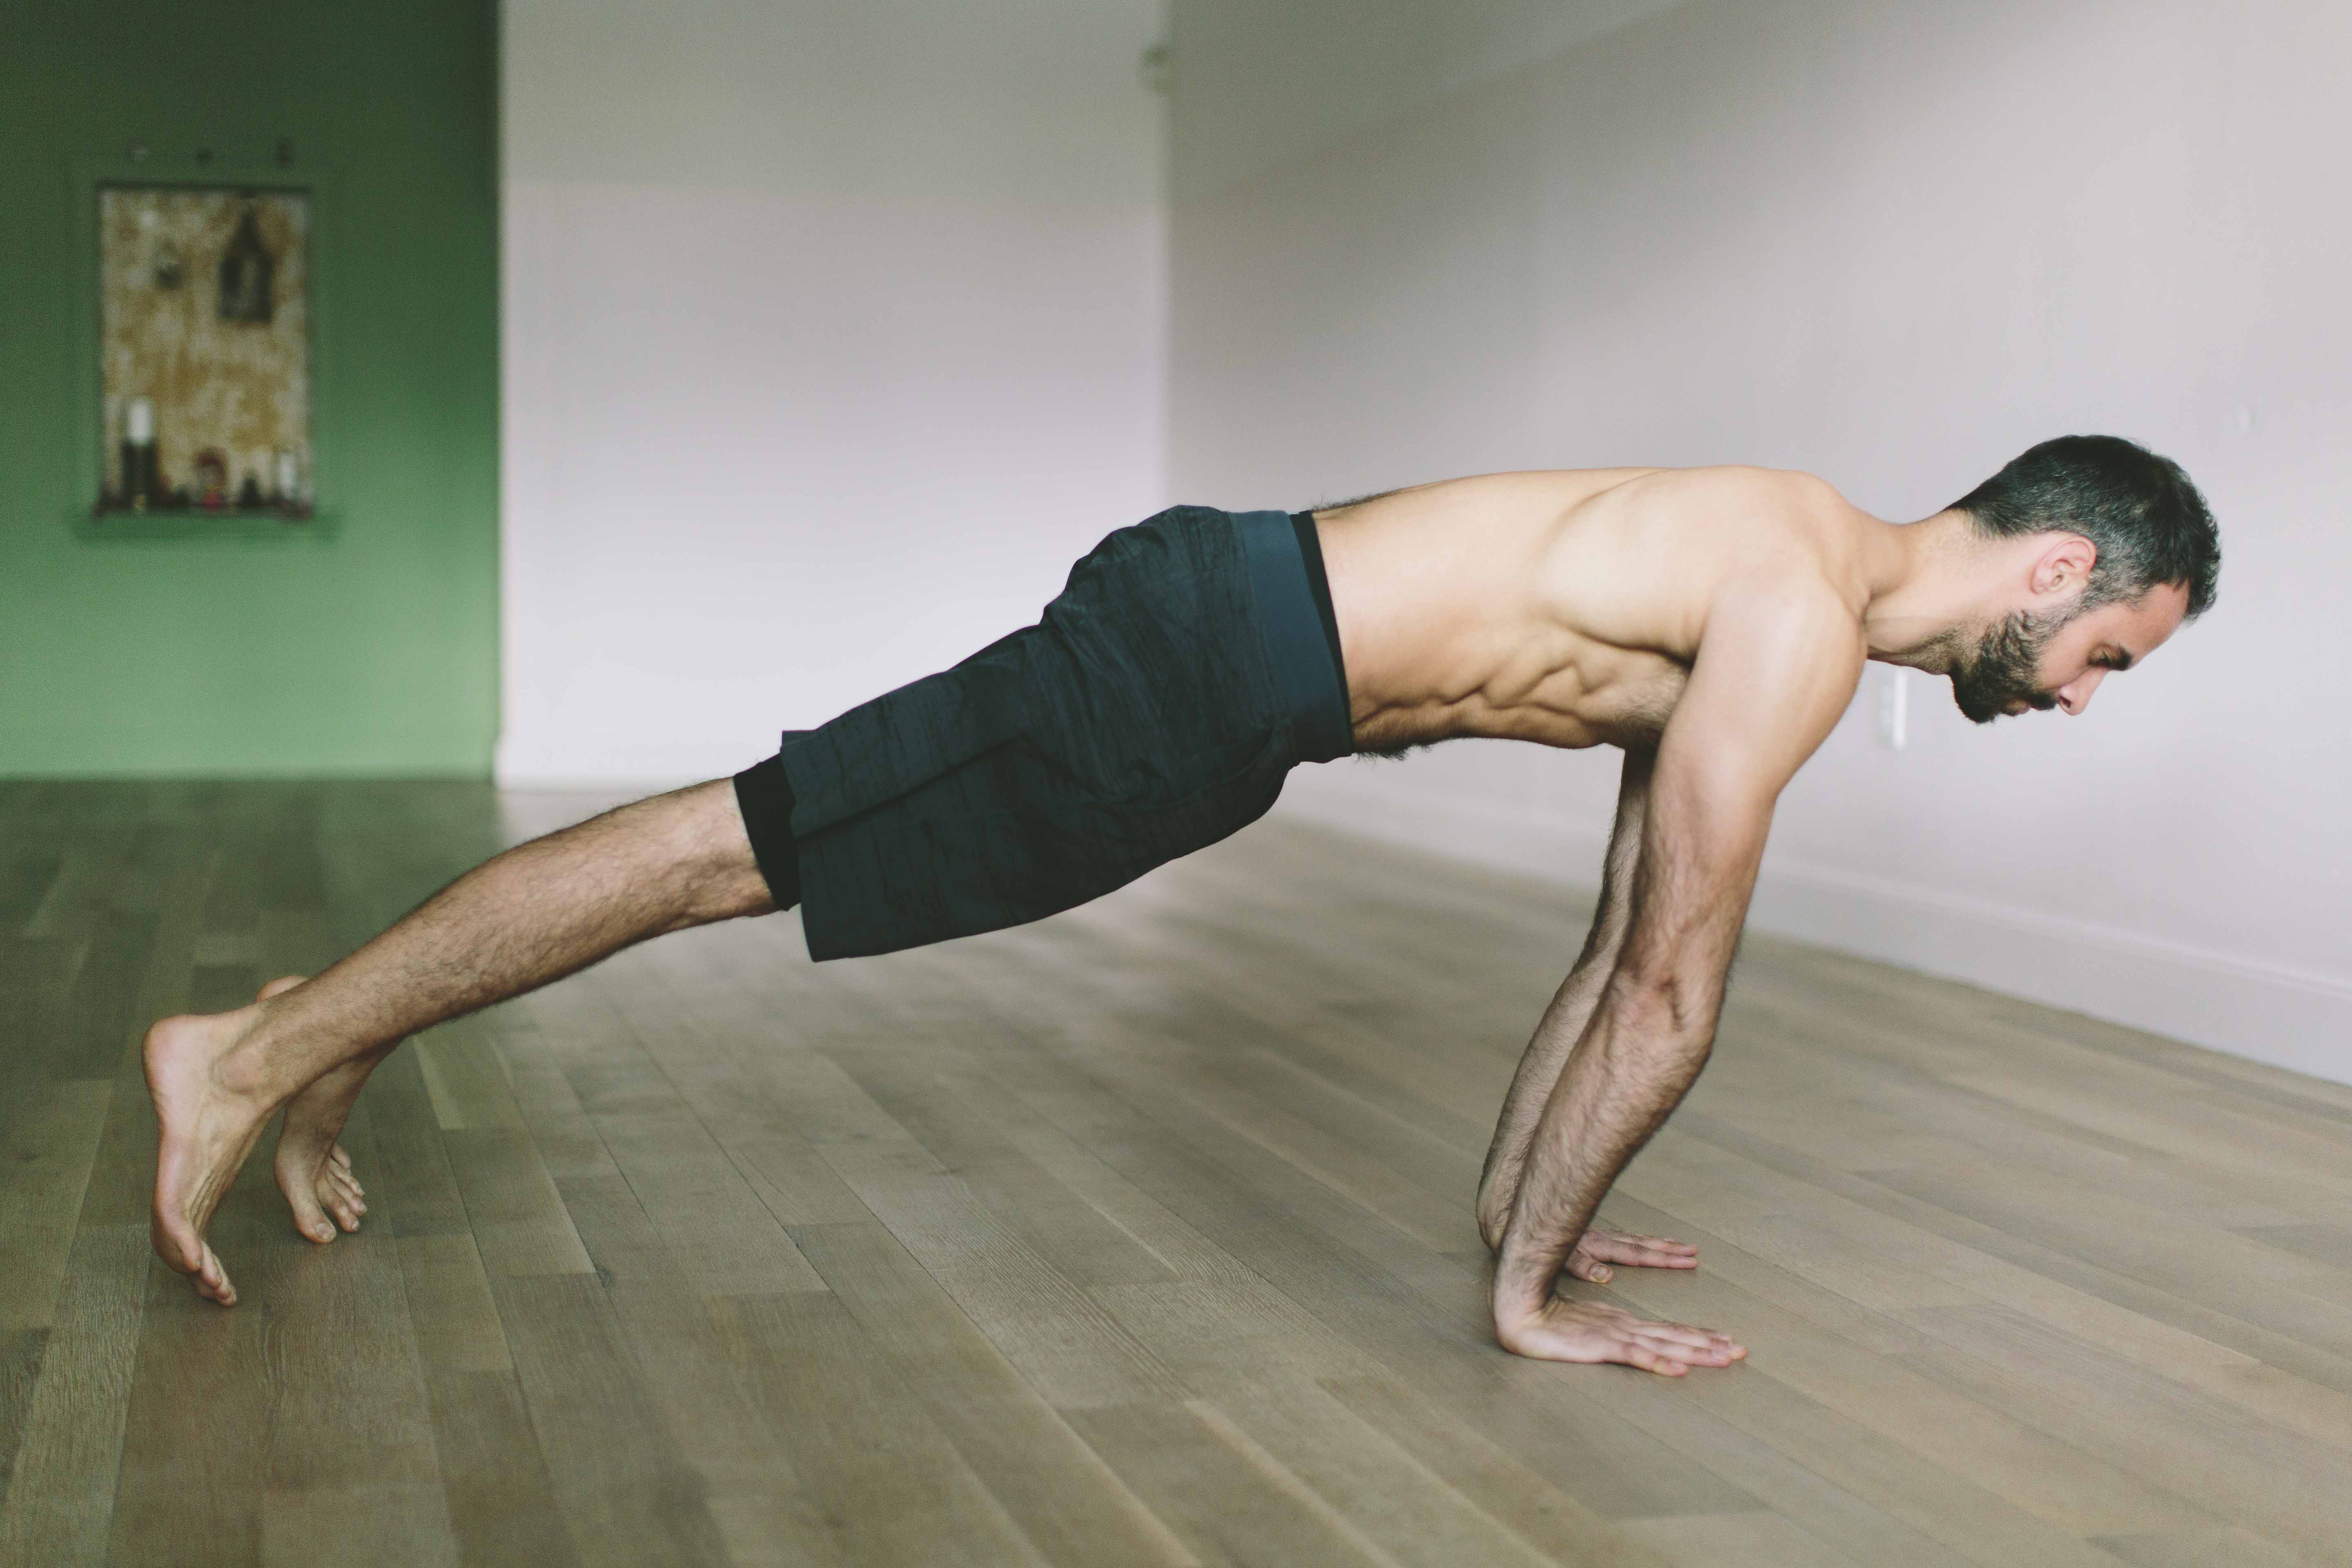
Wrist Strengthening
Begin on your hands and knees with your hips a little behind your knees and wrist a bit forward of your shoulders. Lift your palms just a small amount off of the floor and, with the exception of the base knuckle of the thumb, keep all of your knuckles firmly weighted into the ground. The palms don’t need to lift very high for this to be effective. Also be sure that your legs, especially the hamstrings, stay relaxed and that your feet are not pulling away from the floor. The difficulty of this exercise is completely scalable. The most difficult position would be doing the palm raises with hips directly over knees and shoulders directly over wrists. And the easiest would be hips behind knees and hands very close to knees.
Scapular Pushups
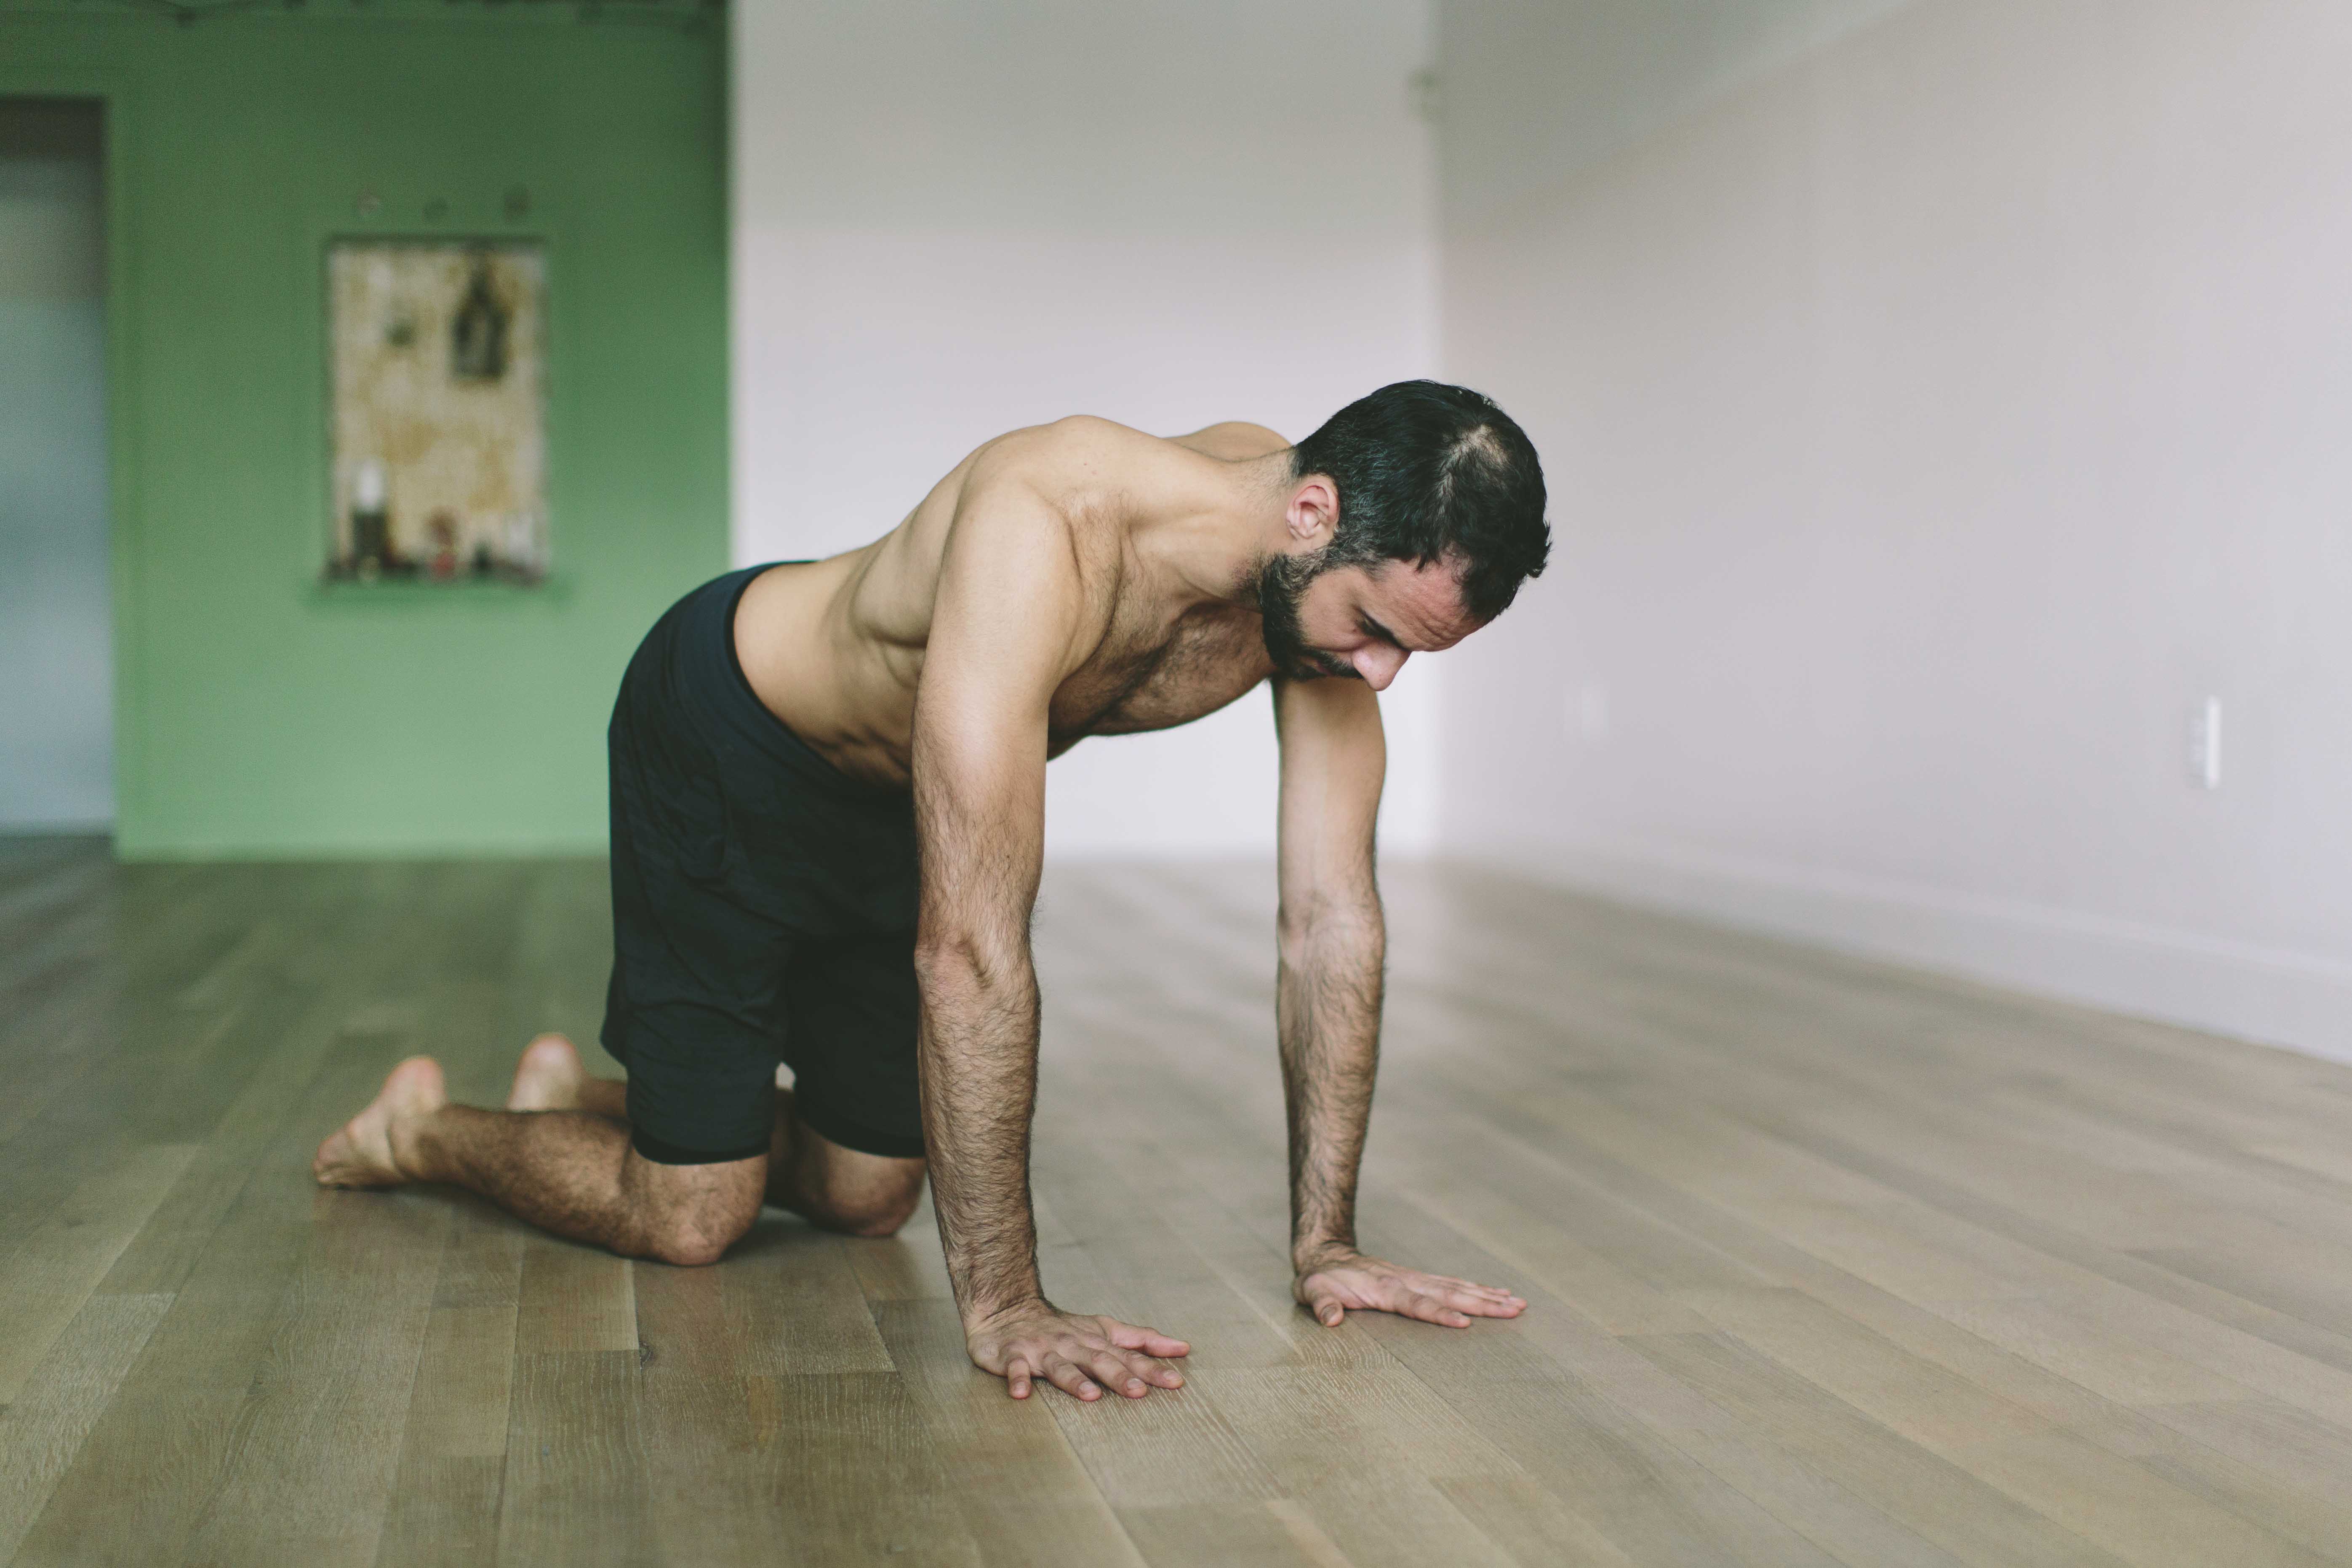
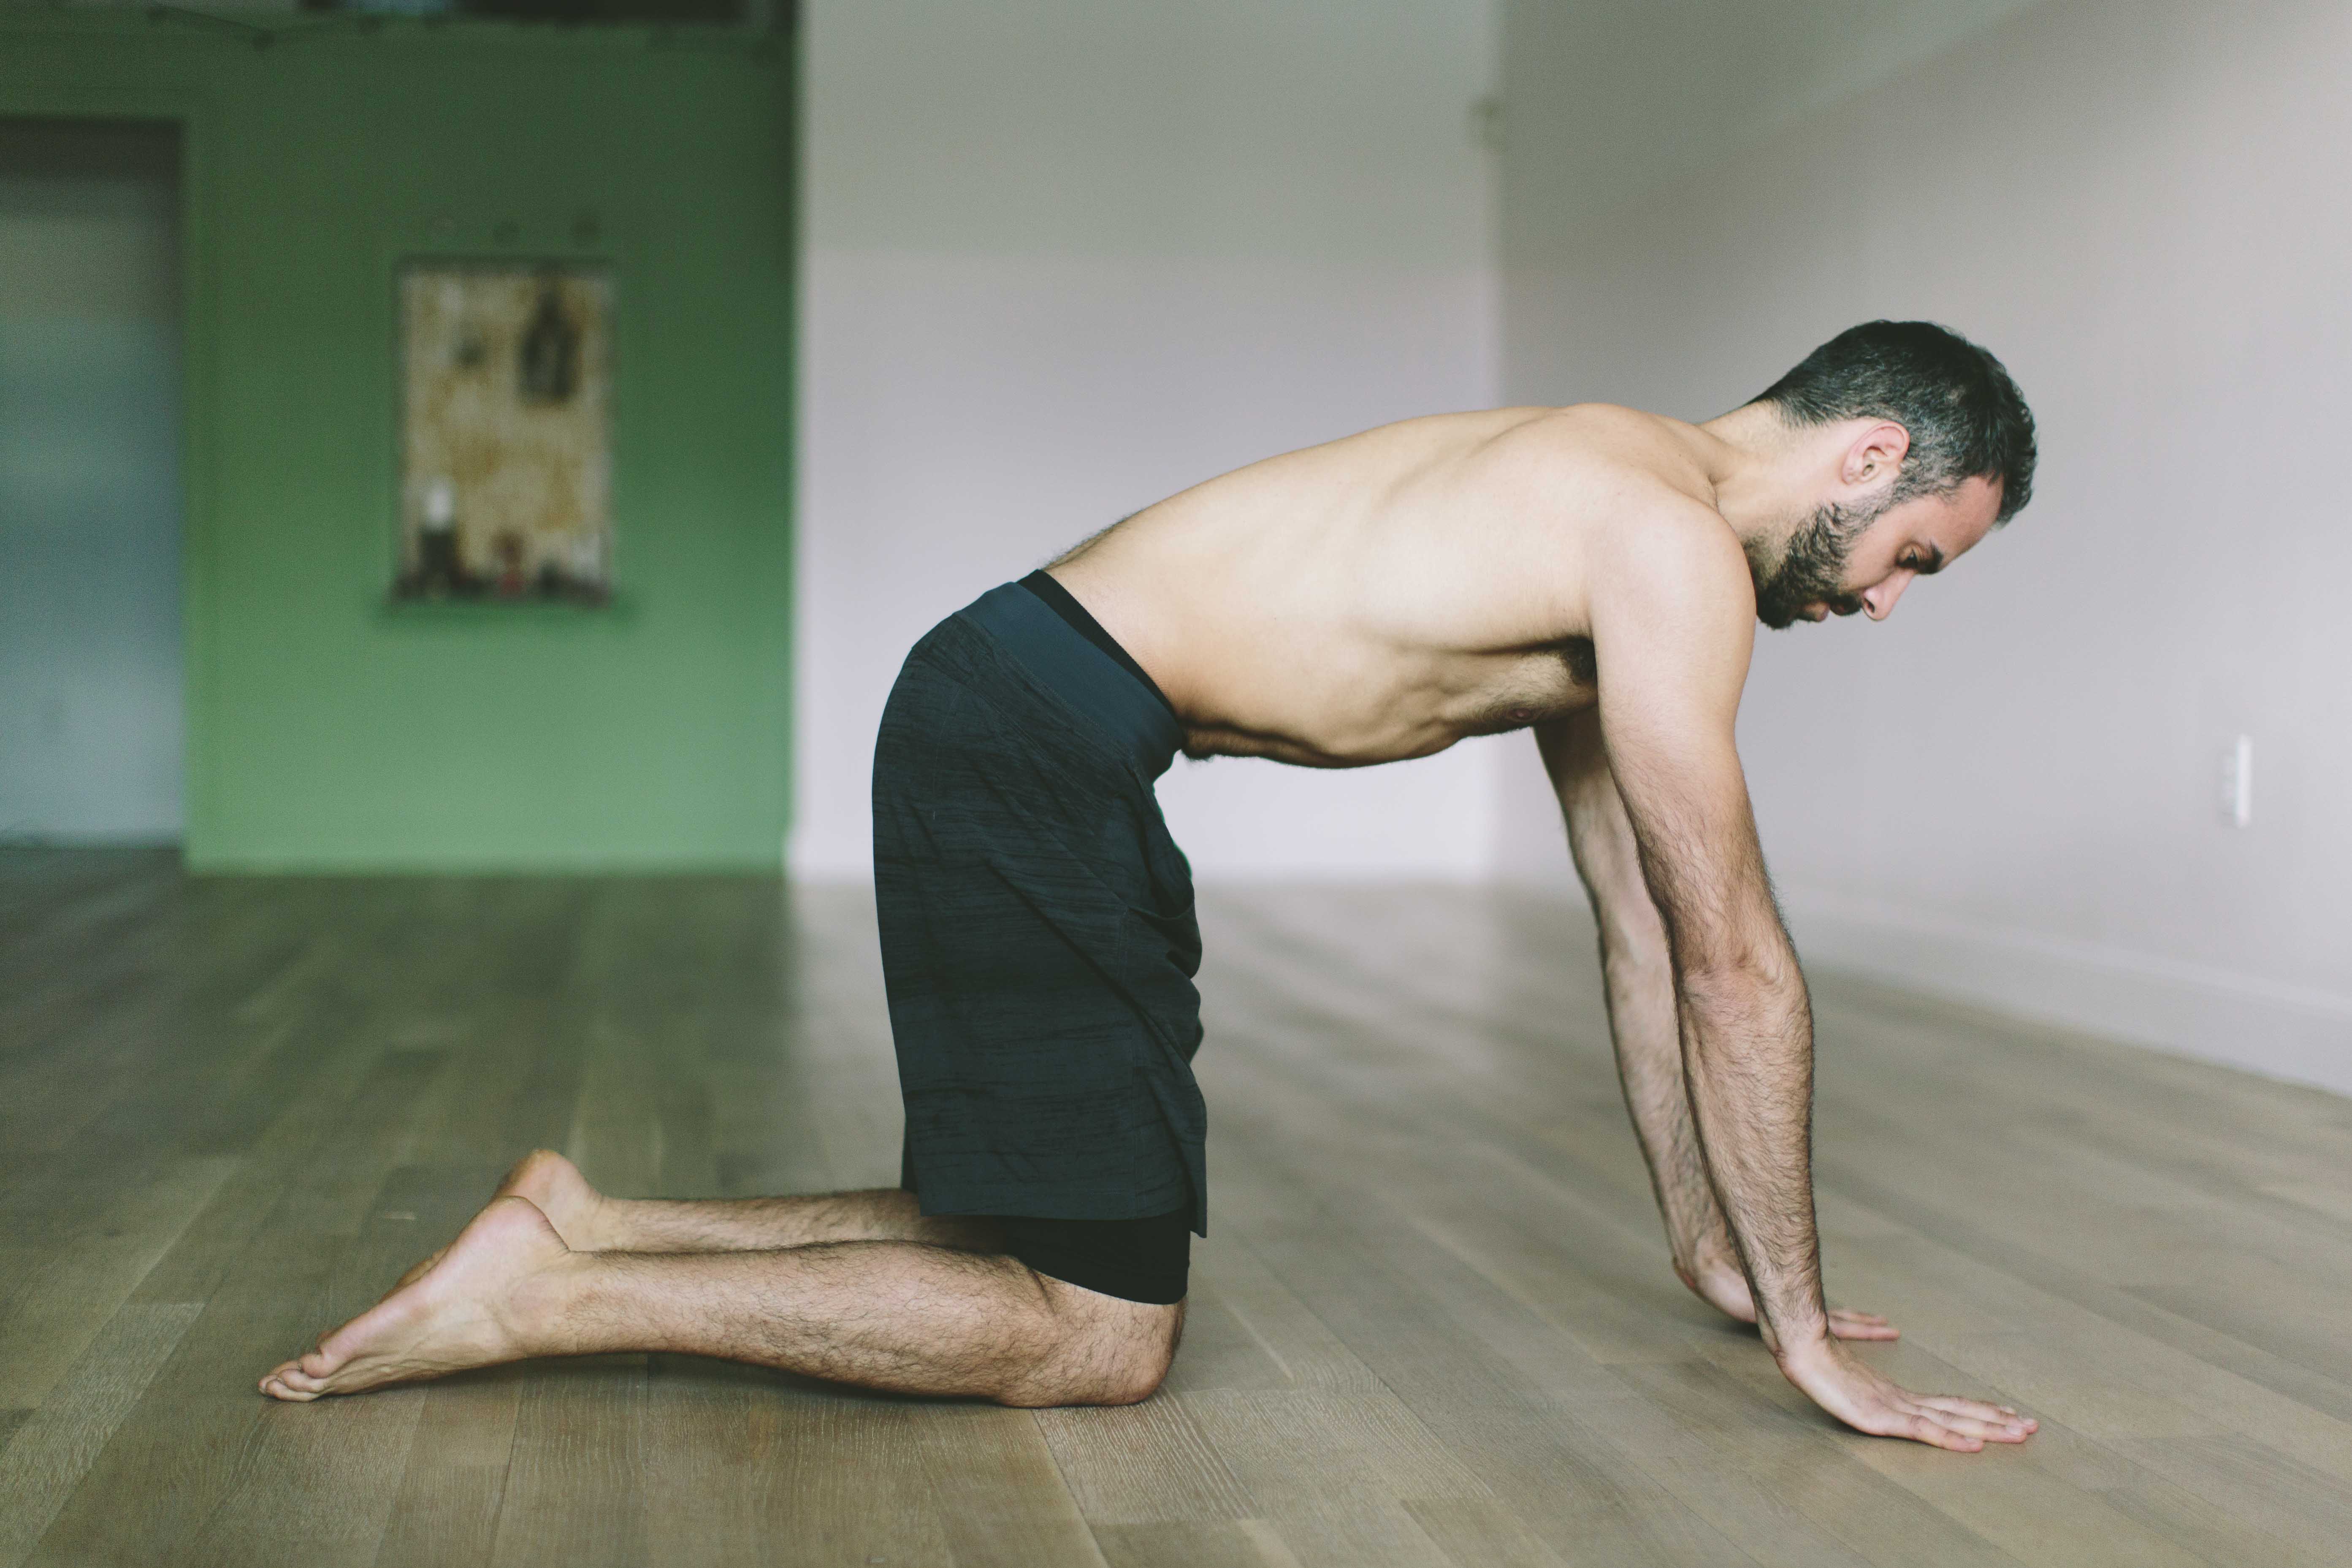
Start on all fours with shoulders over wrists and hips over knees. Keeping the elbows completely straight, squeeze the shoulder blades toward one another just like you would in Cow Pose, but keep the pelvis still.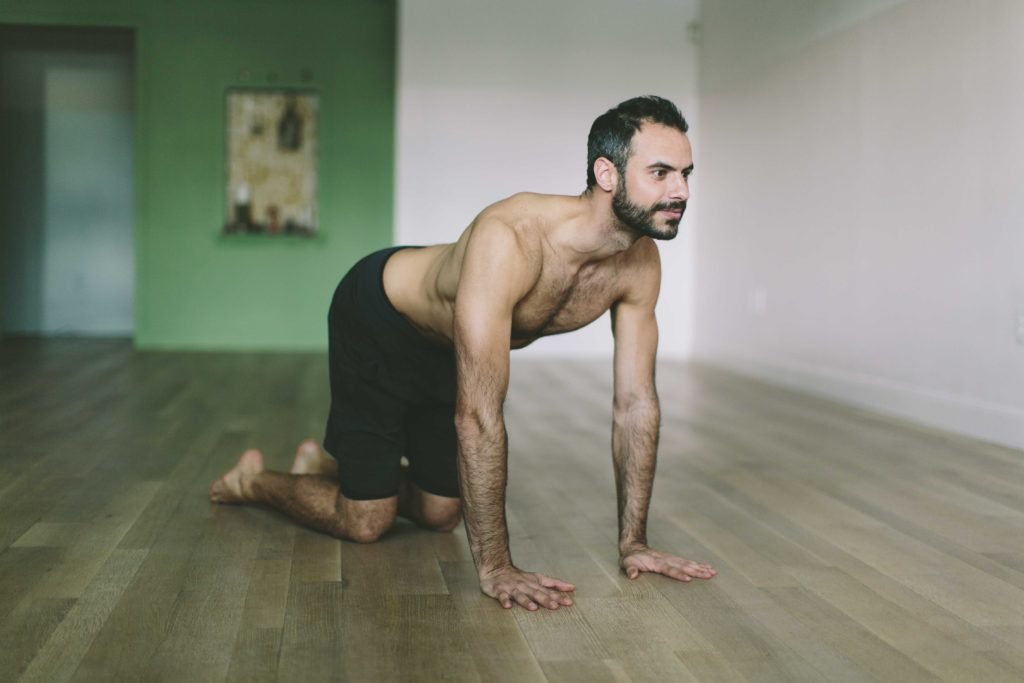
Then push the shoulder blades away from one another like you would in Cat Pose and again, keep the pelvis still. Your basically trying to isolate the thoracic spine portion of what you would do in Cat and Cow. Really work to exaggerate the should blade movement as much as possible, pulling them tightly together and the pressing them as far apart as you can. Remember, keep the elbows straight.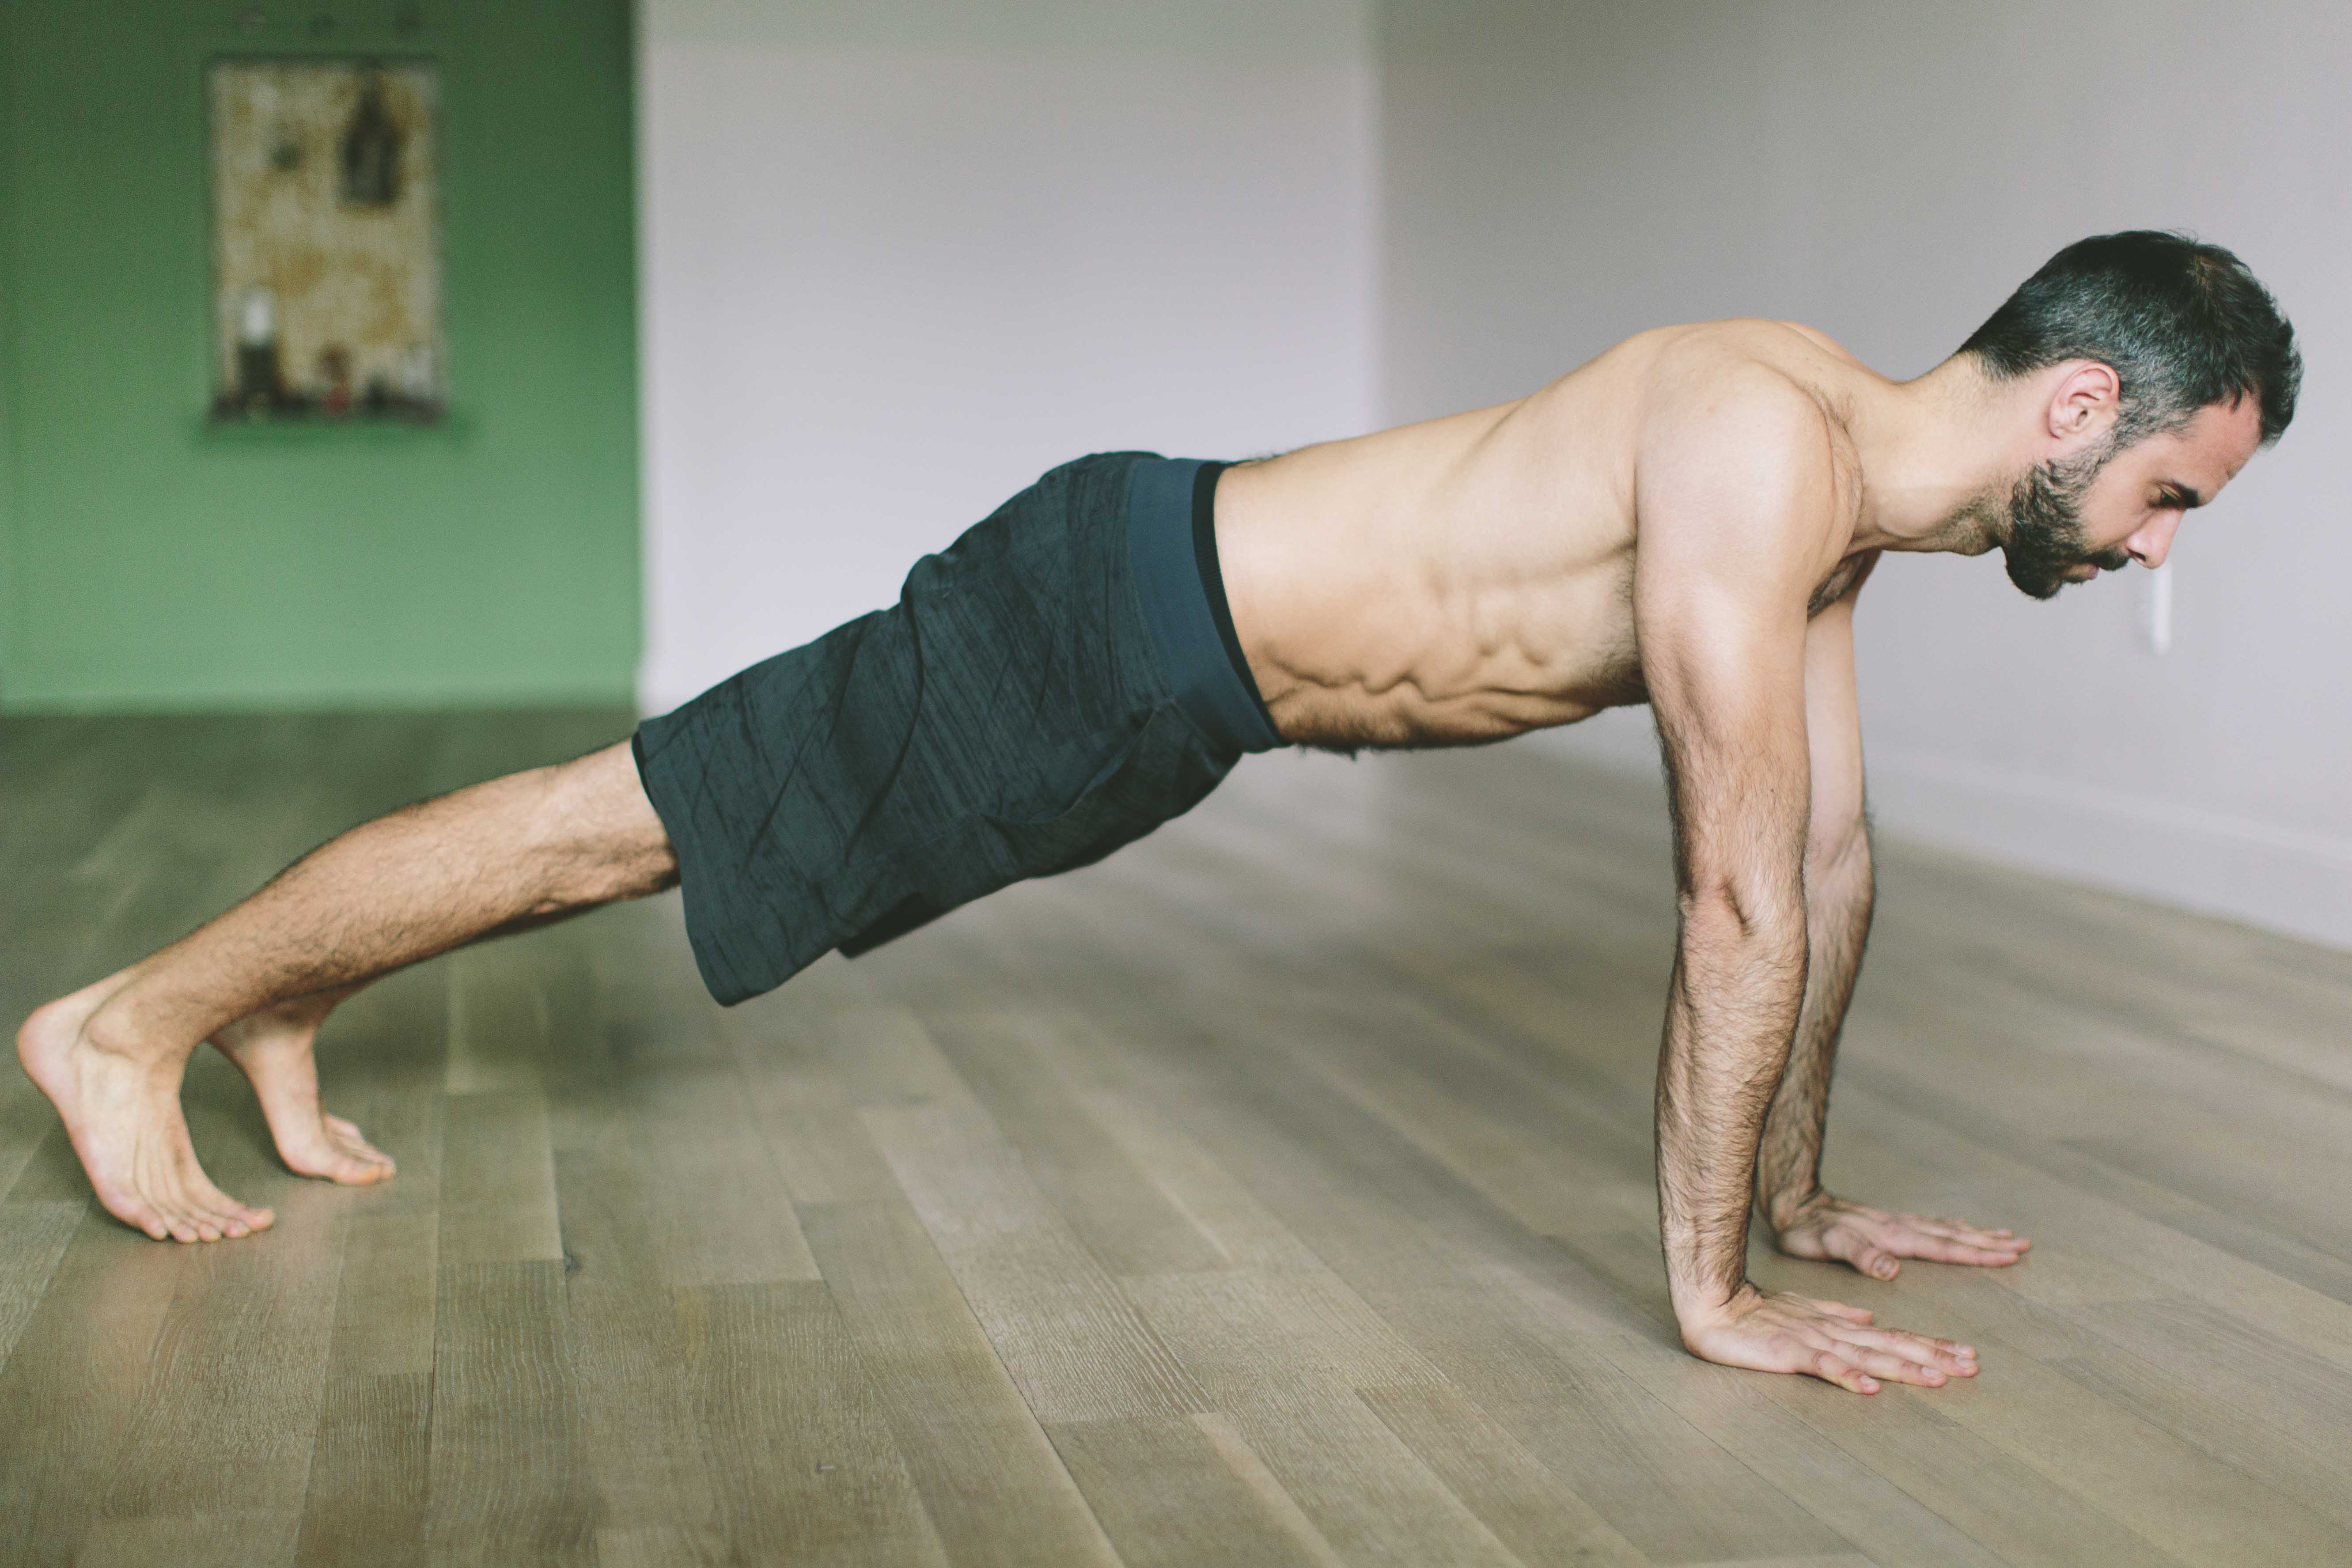
Do take this one more step, do the same as above but in plank, with the knees off the ground. Try to keep the hips at the same height the entire time. So when the shoulder blades come together, you’ll actually lift the hips slightly so they don’t drop. Keep the navel lifting up towards the spine so that the core stays tight and you don’t overarch in the low back.
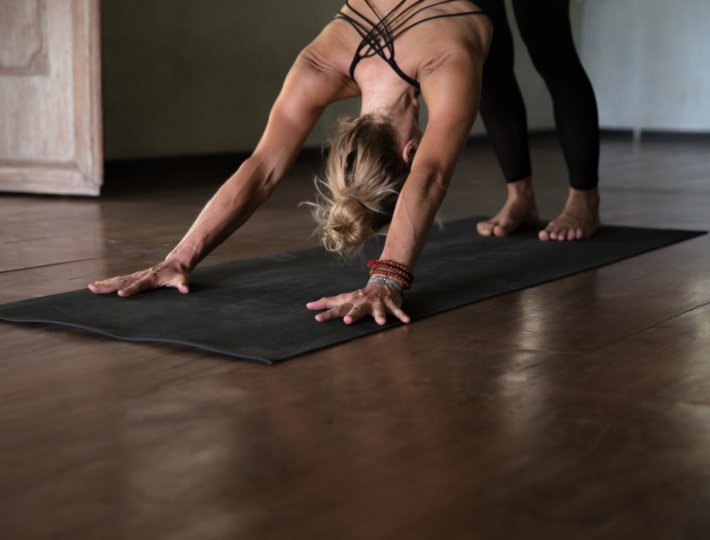
Downward Facing Dog
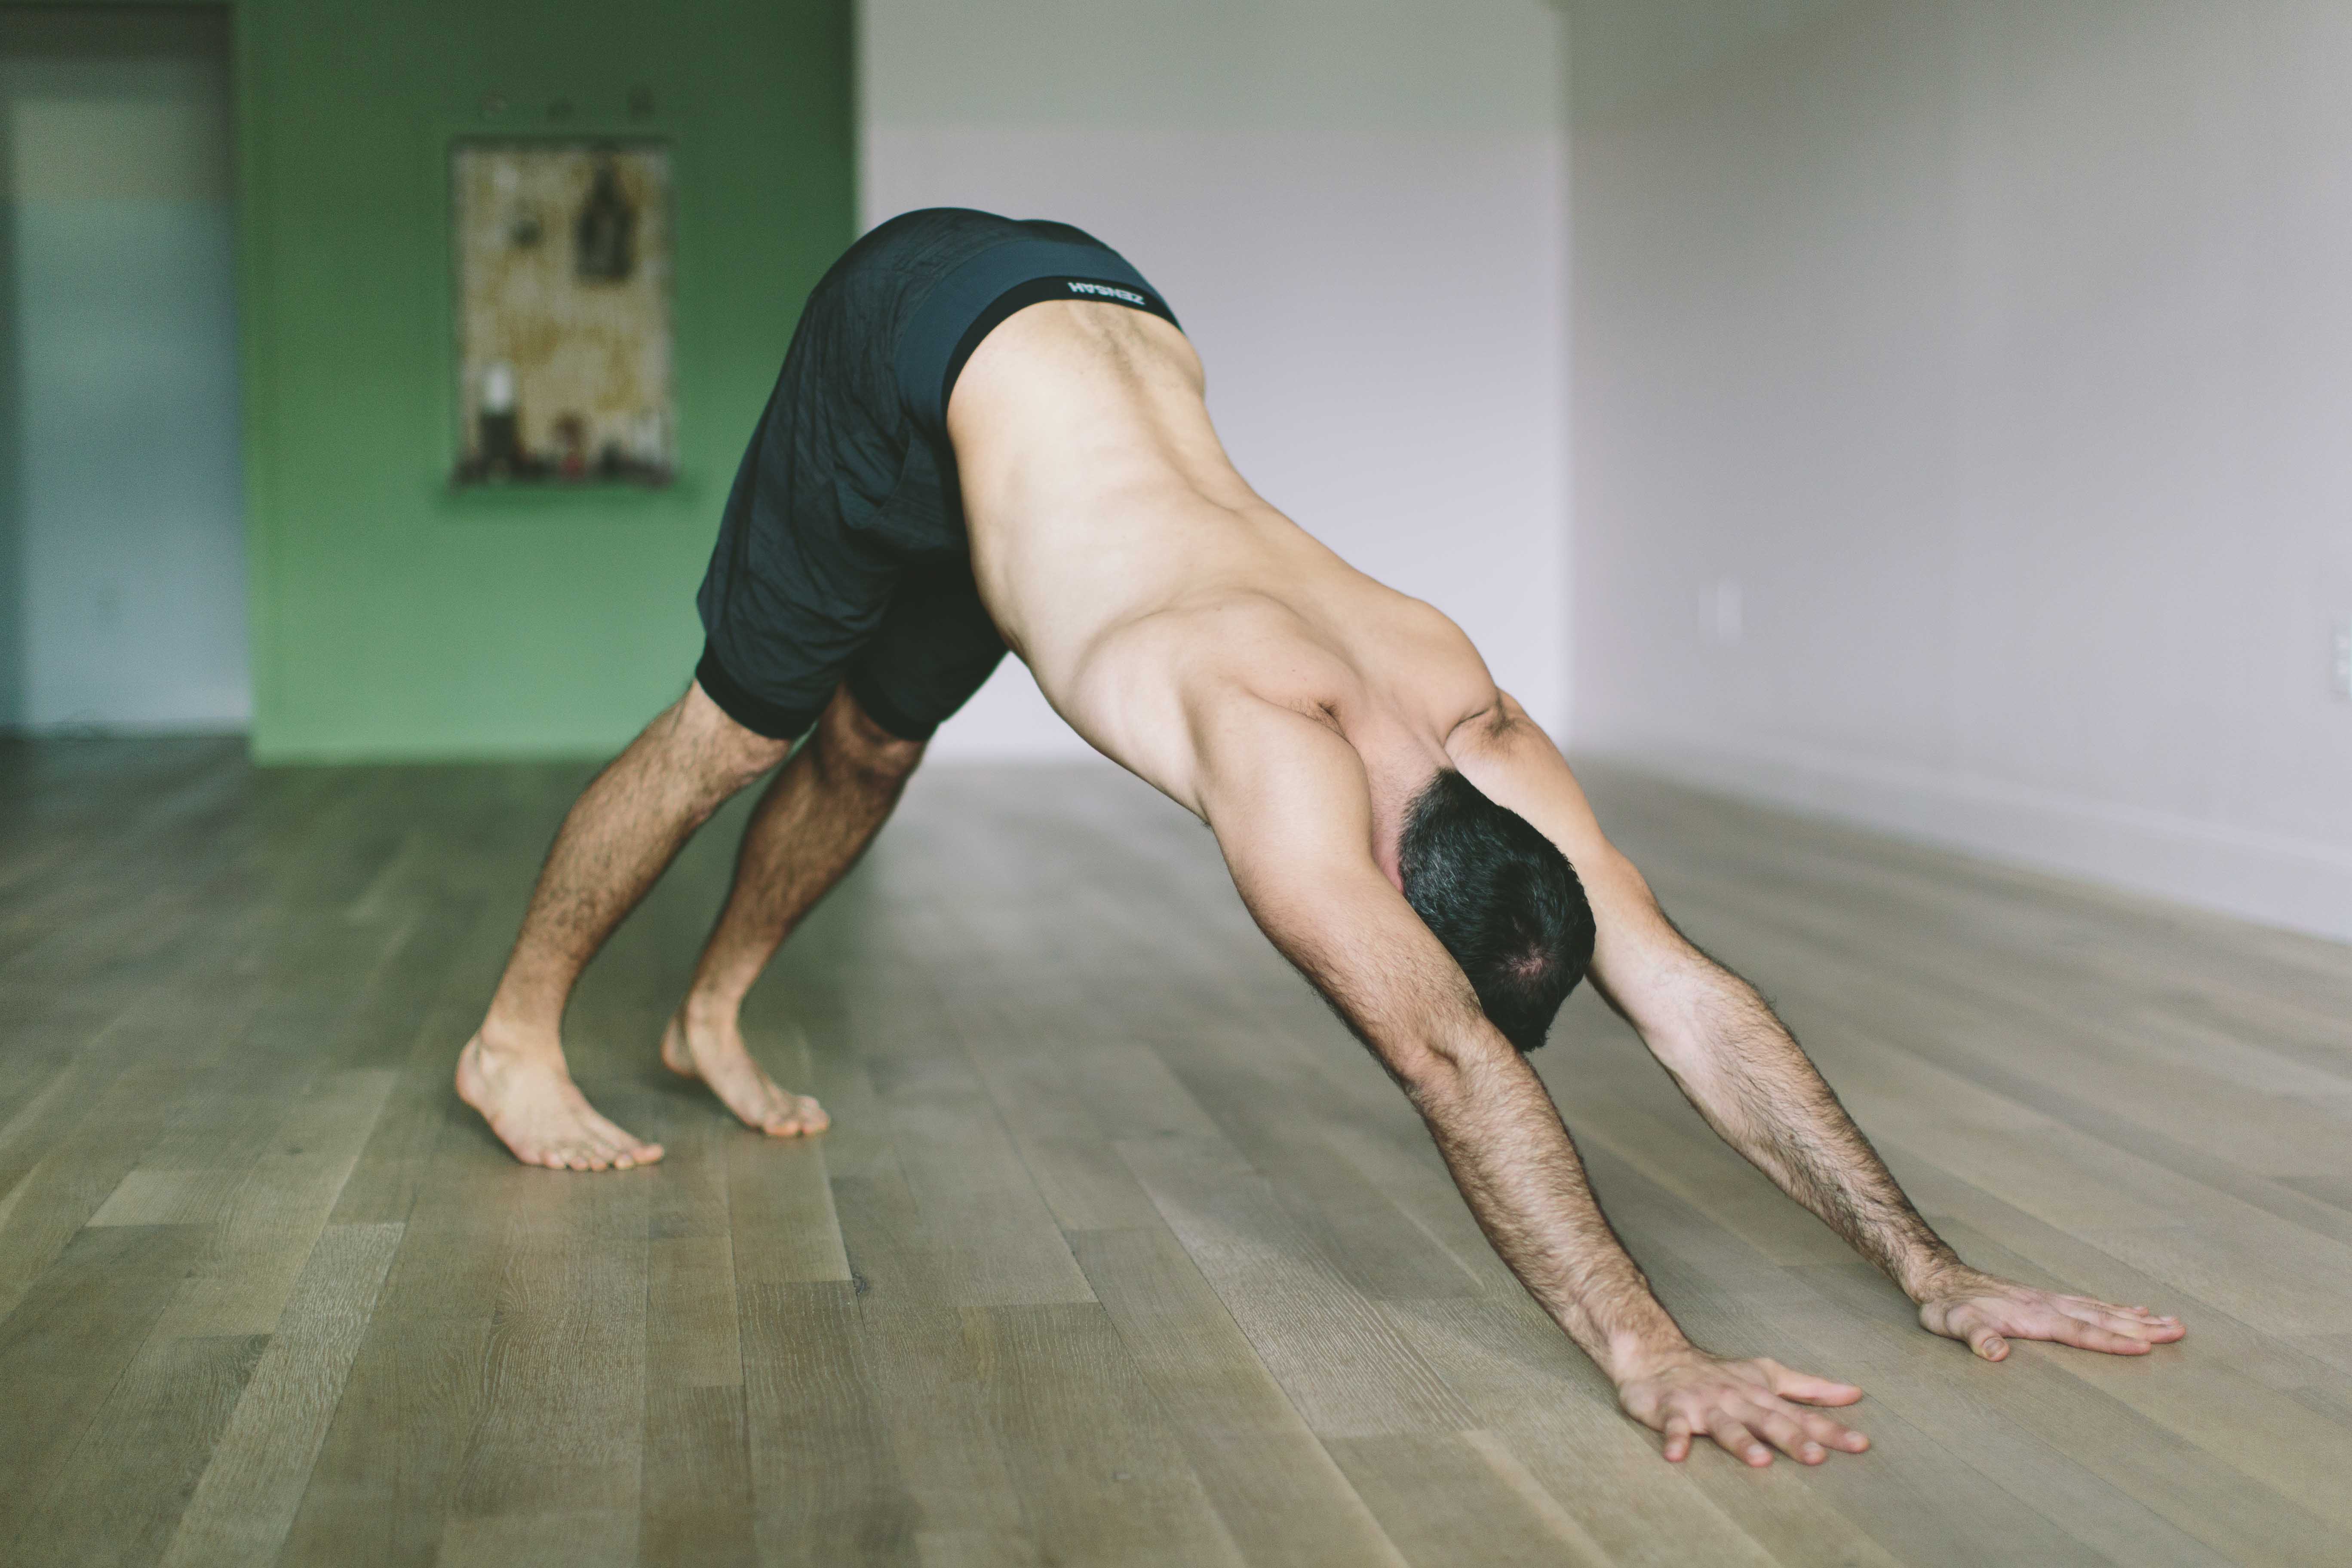
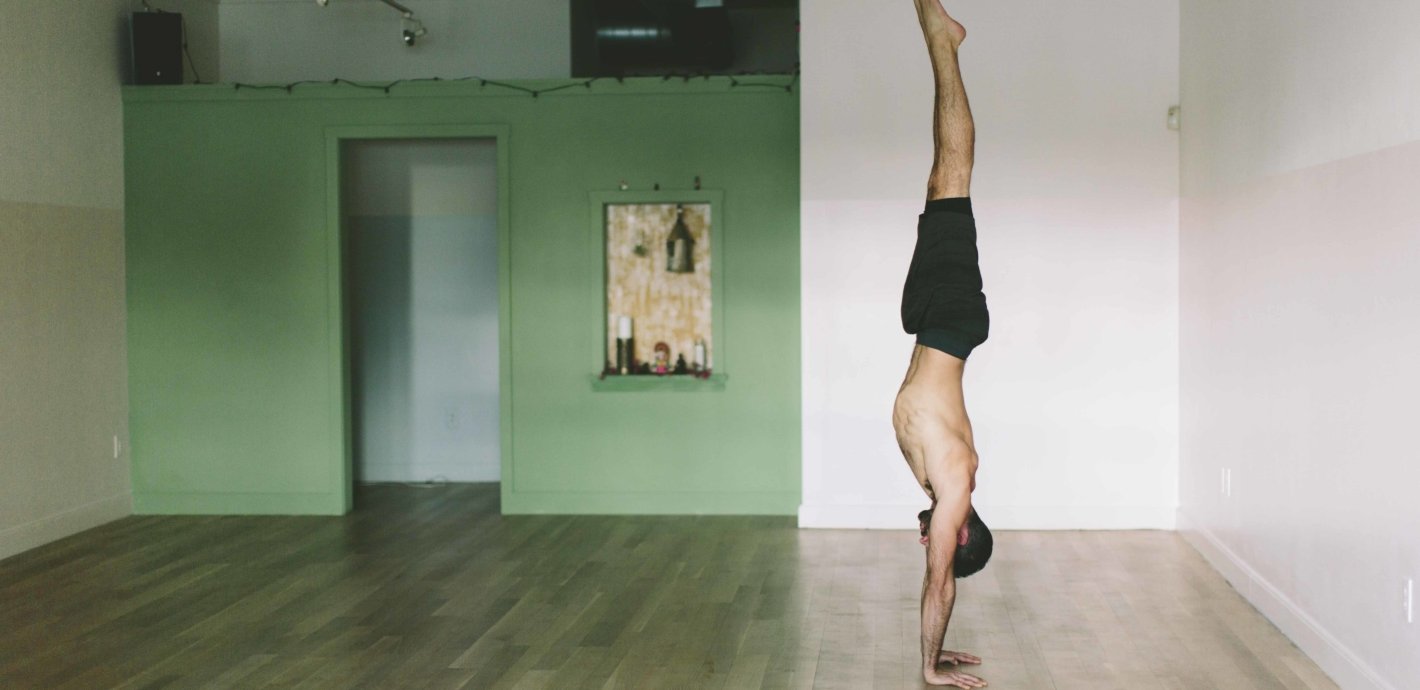
A very familiar pose, I’m sure! The main point here is to feel the exact same action in the shoulders as you did in the variation of Child’s Pose described above. Don’t try to over exaggerate pressing the chest toward the thighs to try to get the head towards the floor. Rather, keep a strong external rotation on the shoulder so as to make the shape of the armpit hollow instead of flat. And from that rotation, push strongly down in to the hands in order increase the length of the line drawn from your wrists to your hips. It’s this push through the hands and elevation of the shoulder that you’ll need later in handstand.
Handstand Press Lean
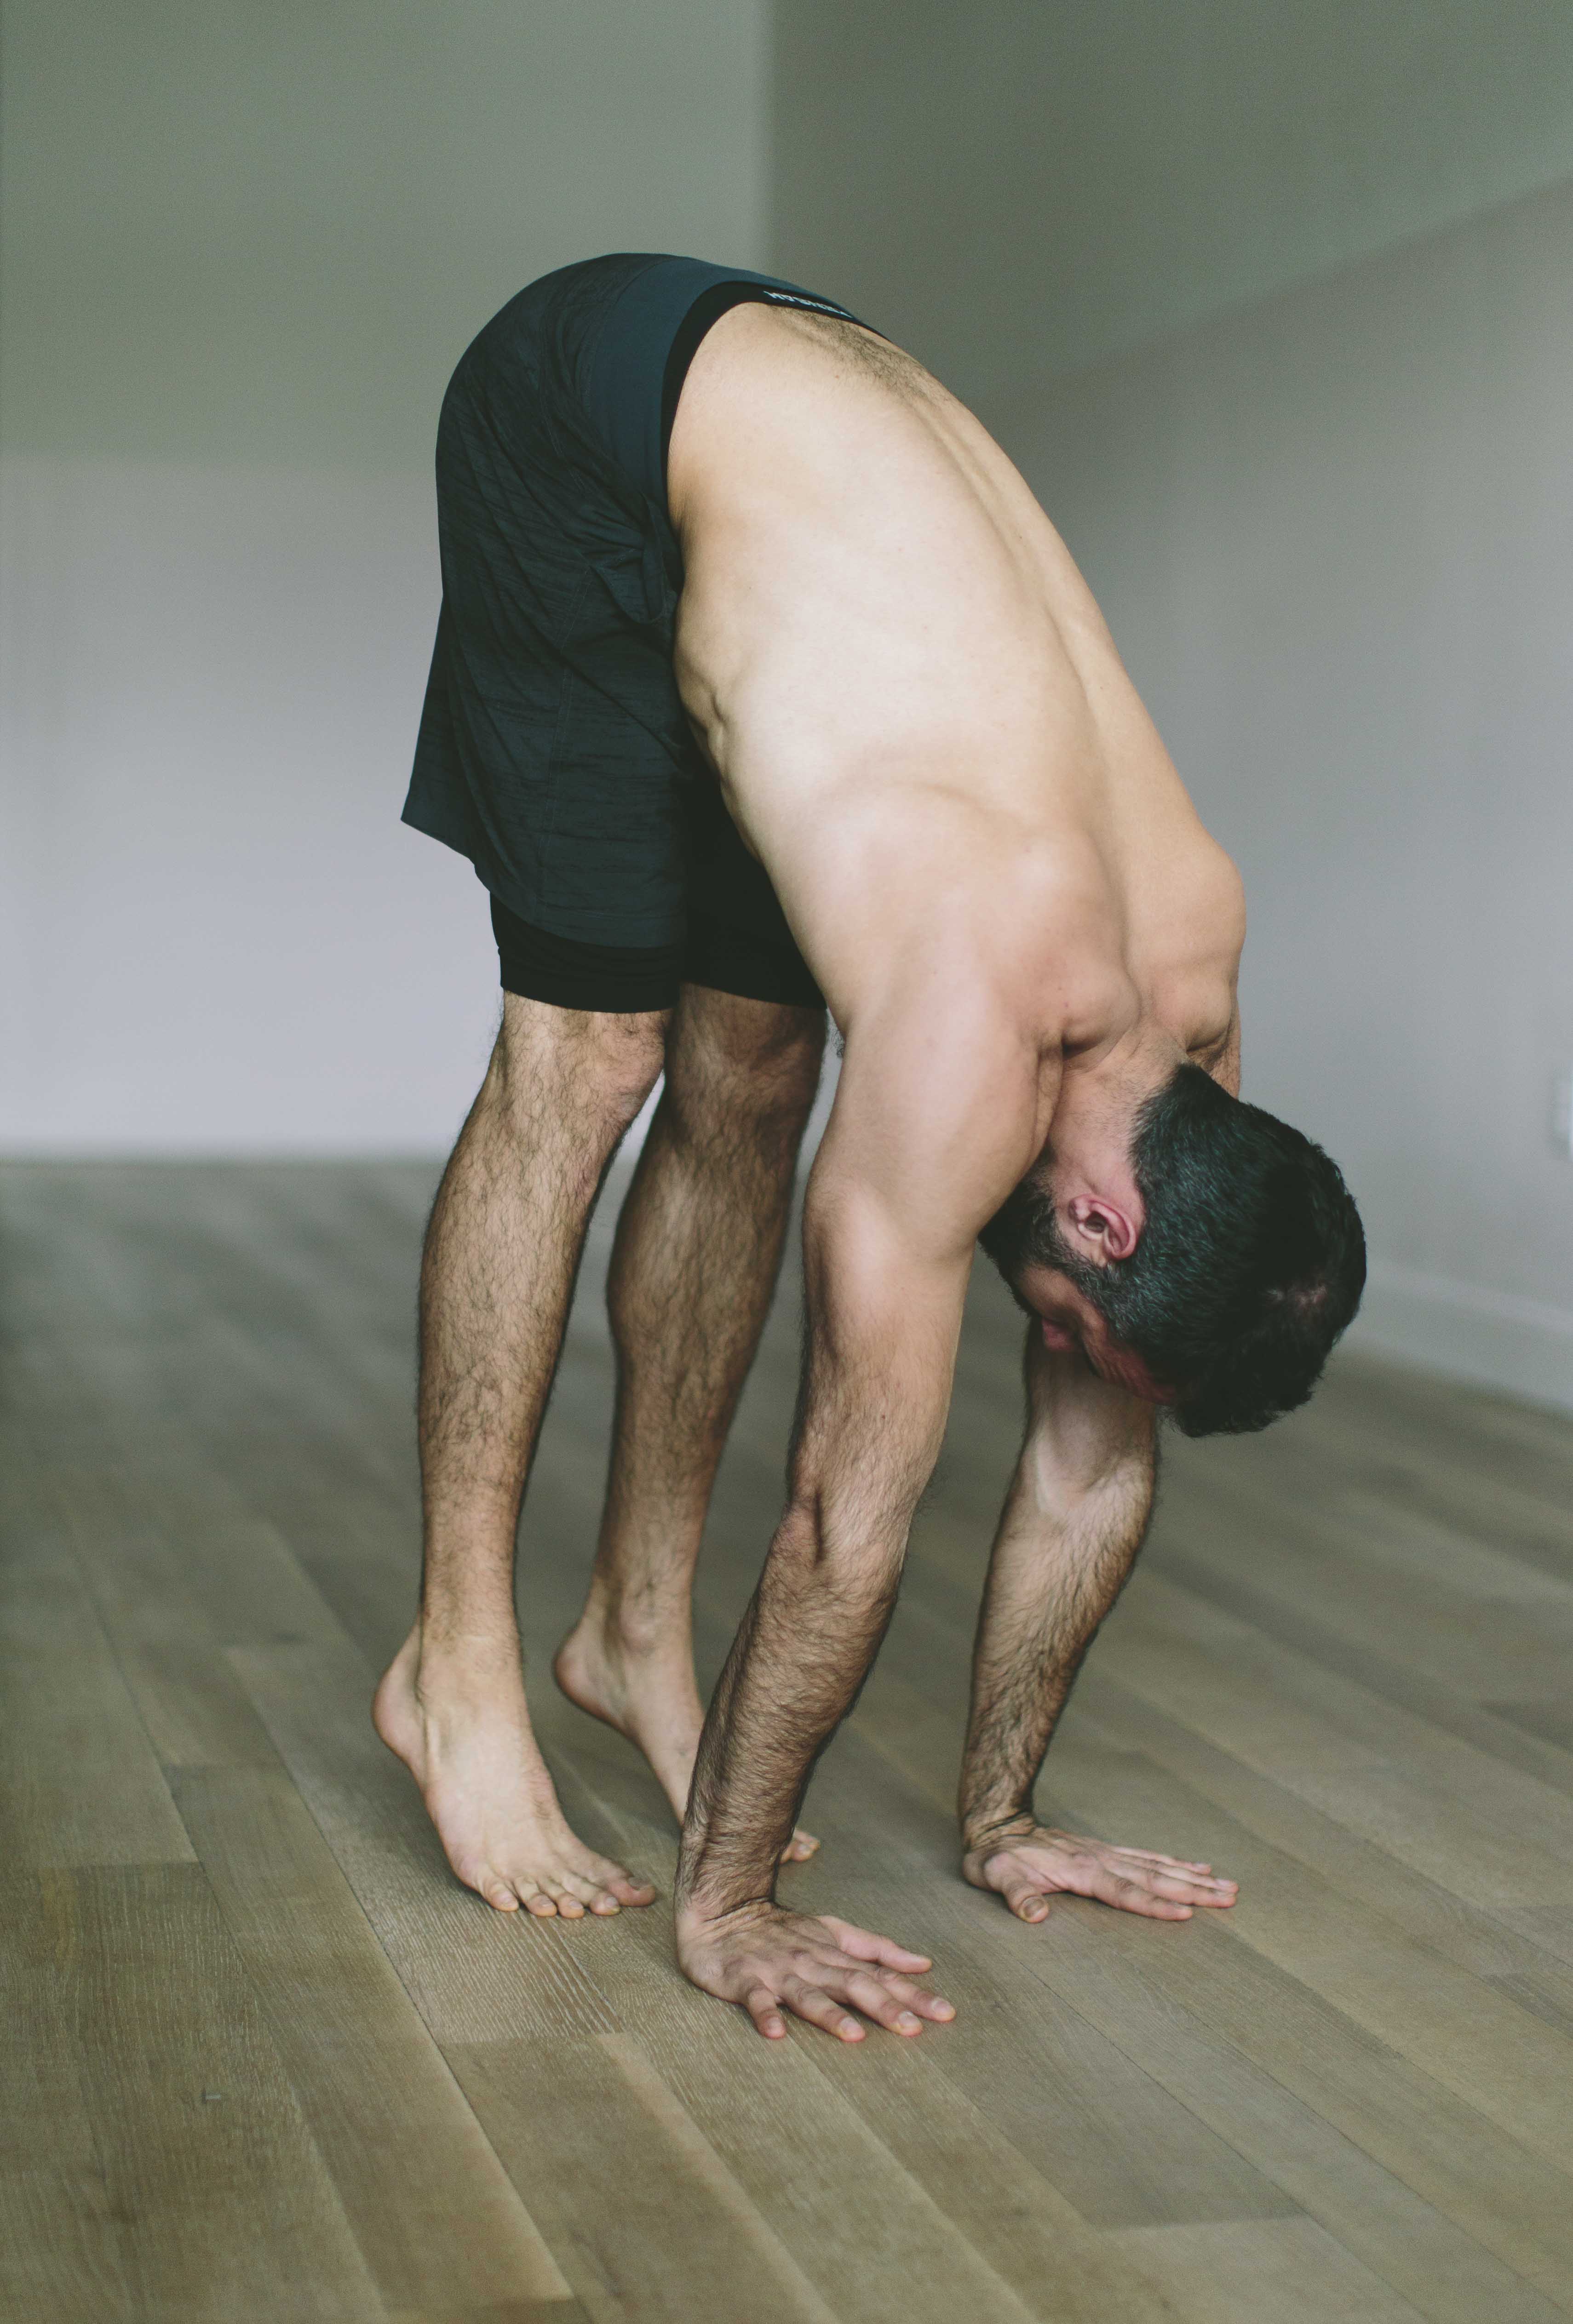
From a standing forward fold, place your palms flat on the floor about three to four inches in front of your feet and shoulder distance apart. A slight turn out of the hands can be helpful. If you’re unable to have your palms flat on the floor with your legs completely straight, place a wooden or cork block underneath each hand (a very dense foam block could suffice as well). Now lift as high as you can on to your tip toes while simultaneously shifting the weight forward into your hands and off of your feet. As you practice, you’re aiming to get the distribution of weight more and more into your hands over time. The key thing here to be aware of is the position of the shoulders.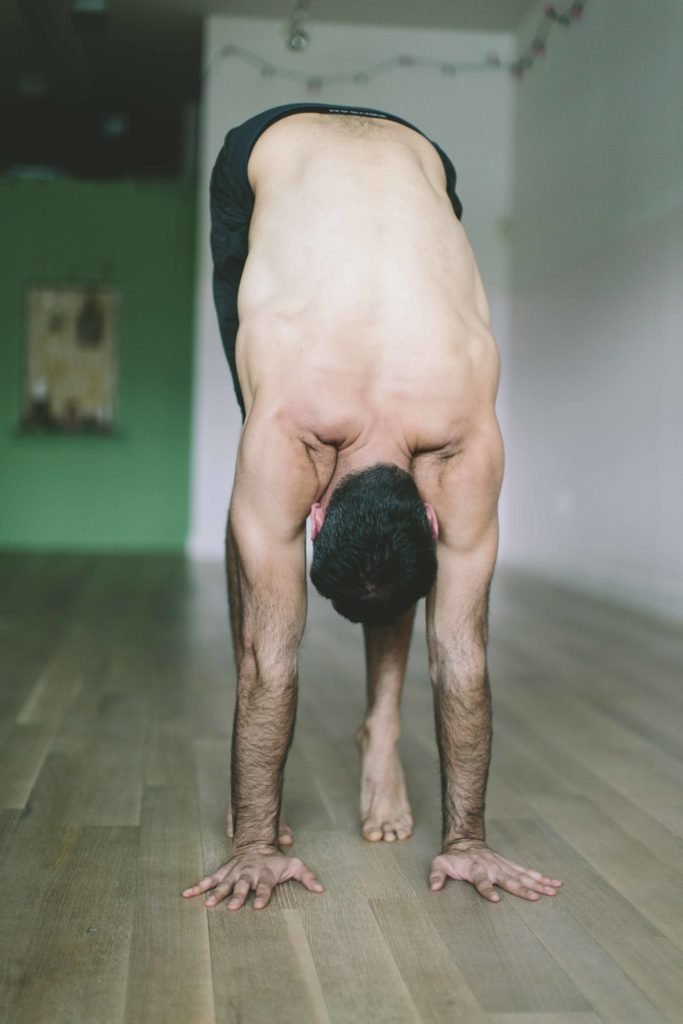
There should be external rotation and the shoulders and the scapula should be protracting (think hollow armpits, not flat). And you should also be pressing down so hard with the hands that the shoulders elevate as well (yes, as in up toward the ears!). That piece of alignment is to much to fully tackle in the scope of this article, but hopefully the pictures will help in understanding this concept. There should be both width across the shoulder (from the protraction and external rotation), and at the same time an elevation of the shoulders up towards the ears. Just like in Child’s Pose and Downward Facing Dog as described above. This is difficult! But it needs to be addressed right away when starting to bear more weight on the hands.
Supine Body Line Exercise
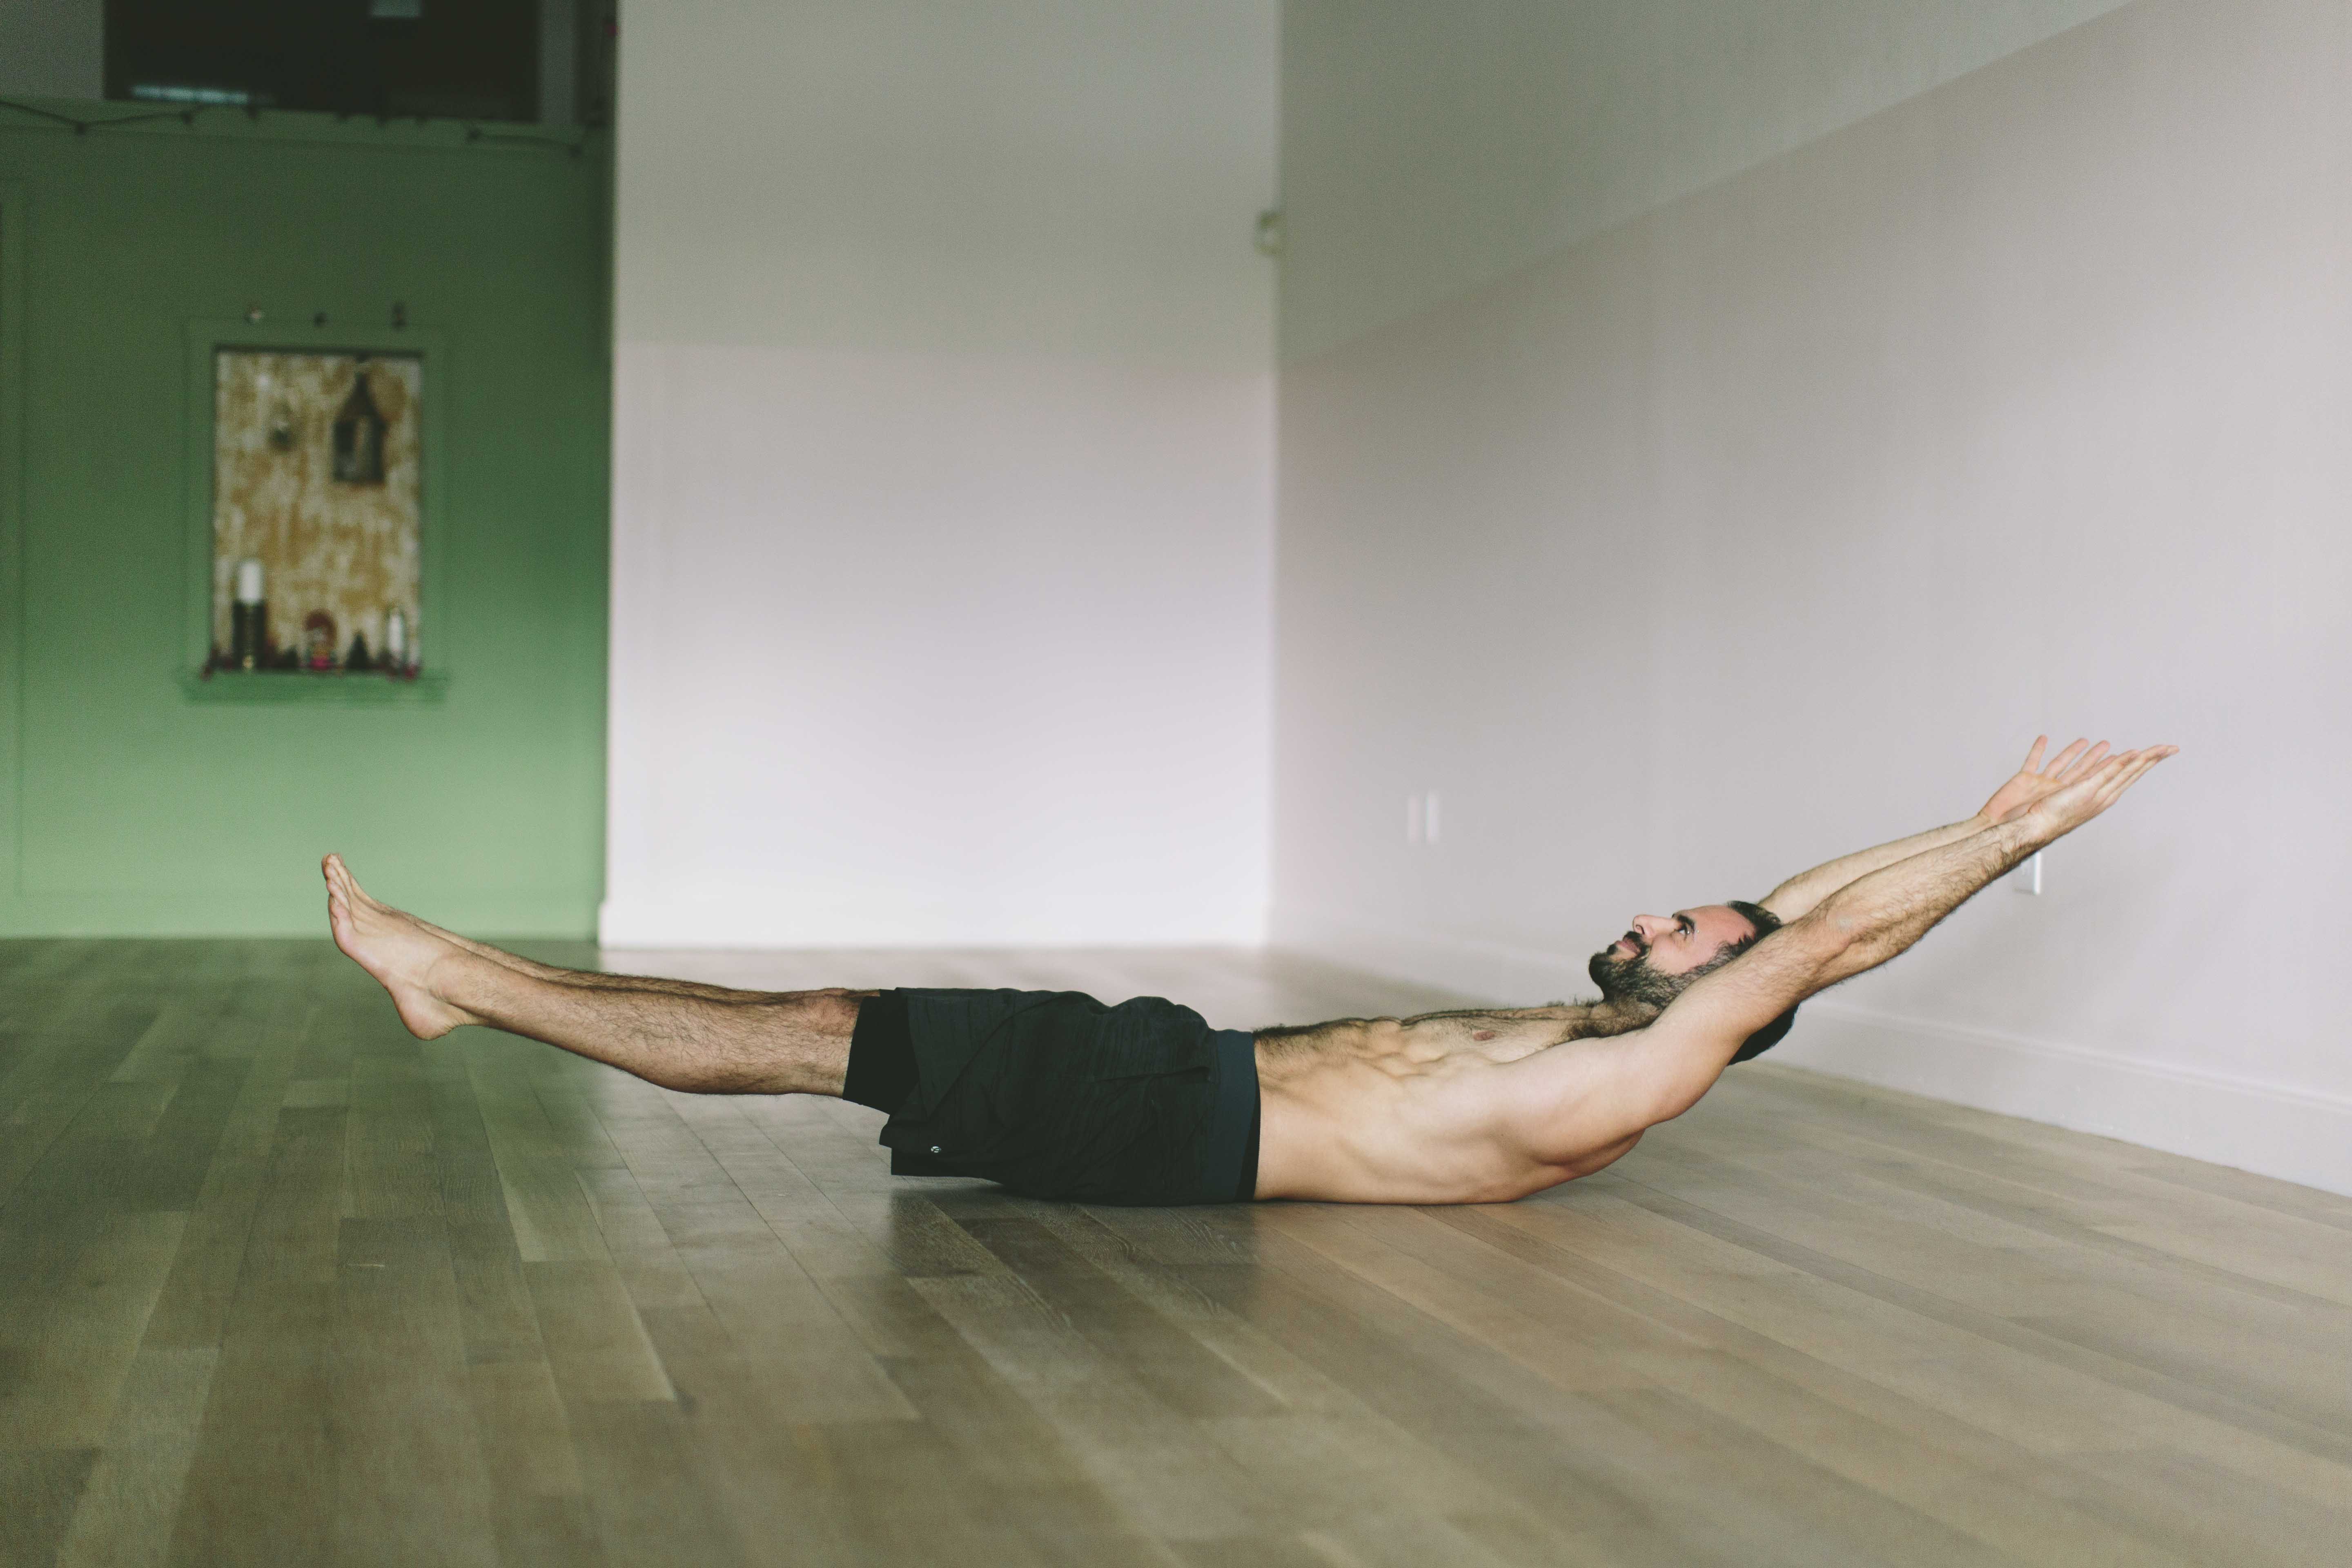
In gymnastics, this is simply known as hollow body position. Start lying on your back with both your feet and hands reaching straight up into the air with no bend at the elbows or knees (if possible). Press your lower back in to the ground by pulling your belly button down toward the ground. If you’re unsure about that movement, relax your legs back down on to the floor and take on hand to your lower belly until you can start to feel that the navel pulling to floor is what initiated the lower back pressing to the floor, as opposed to doing it by squeezing the glutes or by distending the belly upward. Then, from the start position of legs and arms up, slowly begin to lower your legs towards the floor as far as you can go without loosing any contact of your lower back and the floor. Get comfortable with holding this position and in time you will be able to get lower and lower. When you’re ready to add on, raise your arms overhead so that they are along side the ears and lift your head and shoulders off the floor while lowering the legs. Again, stop just before you feel that you’re about to loose contact of the lower back and the floor and hold.
Prone Body Line Exercise
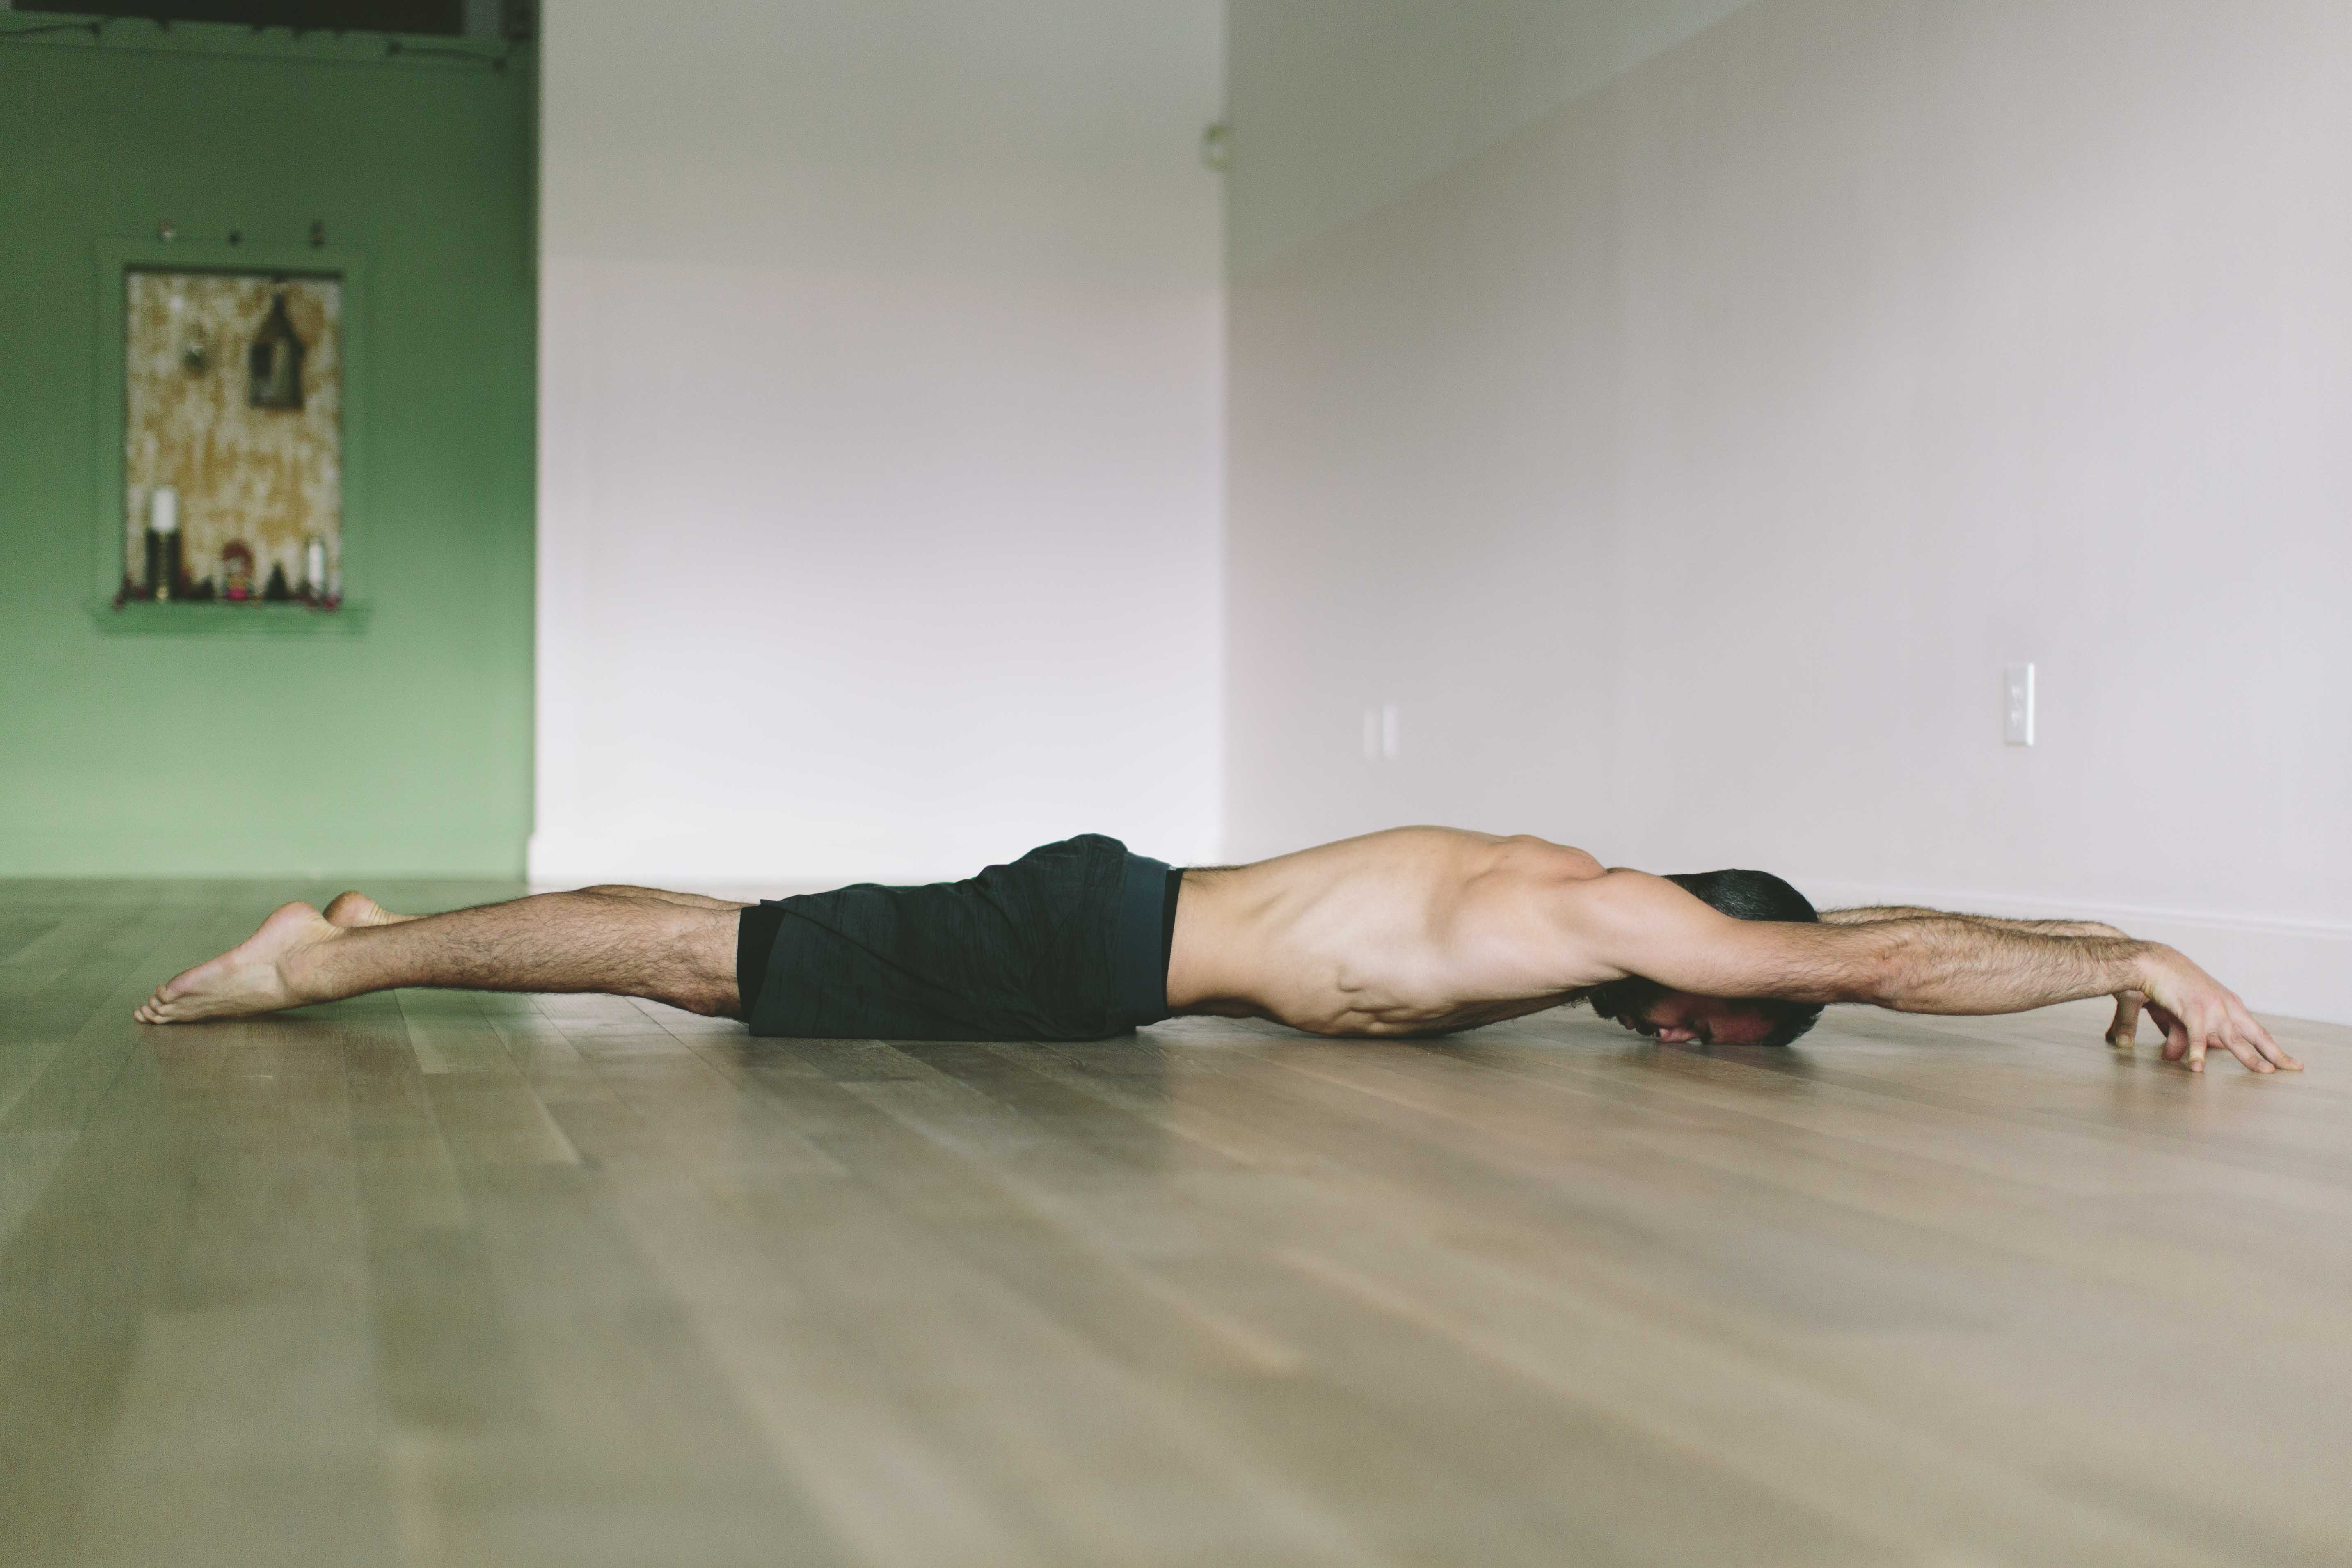
This is the hollow body position again but lying face down. With the arms extended overhead, you can either be on the fingertips or have the palms flat on the floor. Personally, I like being up on fingertips so that I can feel the shoulder integration described over and over in the above exercises. From there, initiate a posterior rotation in the pelvis (i.e. tuck/lengthen the tailbone down) by initiating the movement from the navel pulling towards the ceiling. This will deliberately reduce your natural lumbar curve. This is the same core activation as in the previous exercise just flipped upside down. Once you’re comfortable with this, lift the nose a half inch from the floor and see if you can start to lessen the weight in the hands without losing any of the posterior tilt of the pelvis. Eventually aim to lift the hands fully away from the floor while keeping the pelvis totally still.
Along with the shoulder positioning in Child’s Pose, Downward Dog, and the Handstand Press Leans, the positioning of the lower back in this exercise is right up there in level of difficulty with regard to being able to tell weather or not you are positioned correctly without the feedback of a partner or pictures of yourself performing the exercise. When in doubt, think more posterior rotation!
Handstand Variations Facing Away from the Wall
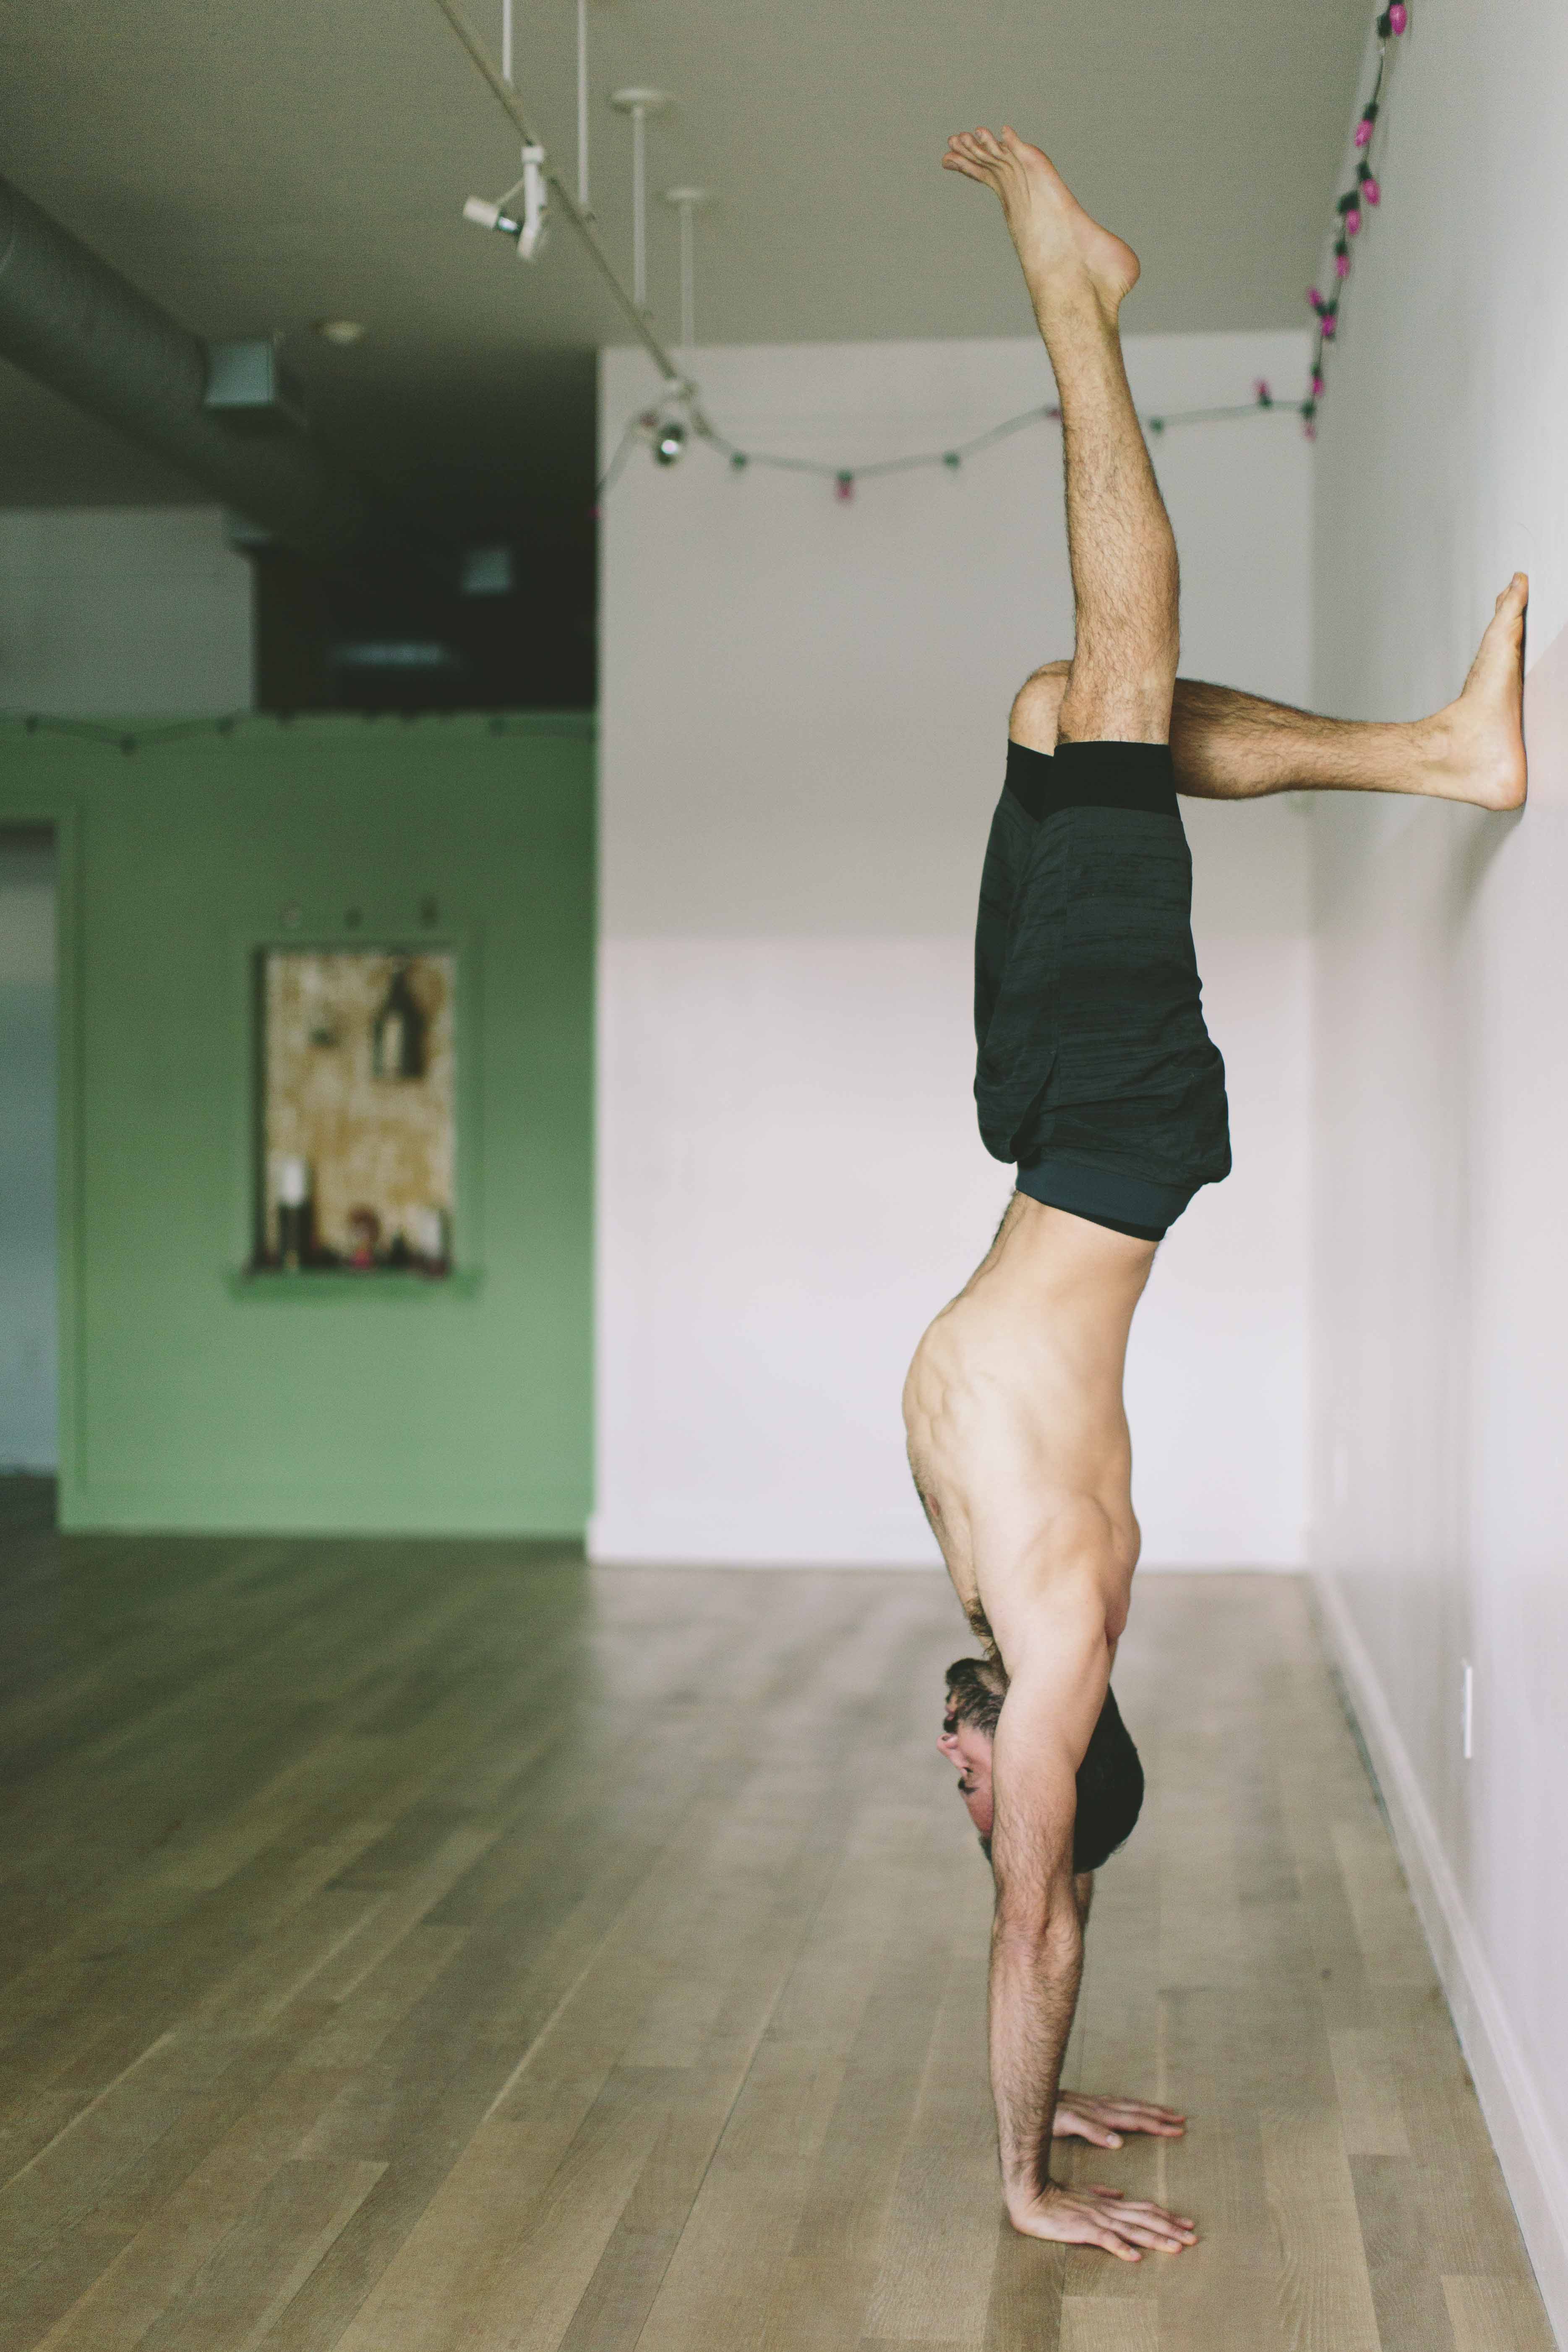
Facing a wall (note, once you’re upside-down, you’ll be facing away from the wall), set your hands down on the floor shin bone distance away from the wall. Kick up in to handstand using the wall for support. Once you’re up there, bring one leg away from the wall and point the toes straight up toward the ceiling. Then bend the knee of the leg that is on the wall and come to the tiptoes of that foot. Utilizing the techniques you learned from the hollow body exercises regarding core awareness and pelvic alignment, attempt to bring less and less weight in to the supporting foot on the wall, eventually finding some moments with the foot just off of the wall. Really work a straight body line by stacking ankles over hips over shoulders over wrists. If you find that you falling back down to the floor when attempting to balance, bring more weight in to your fingertips and knuckles so your weight goes forward (toward the wall) rather than back.
Handstand Variations Facing the Wall
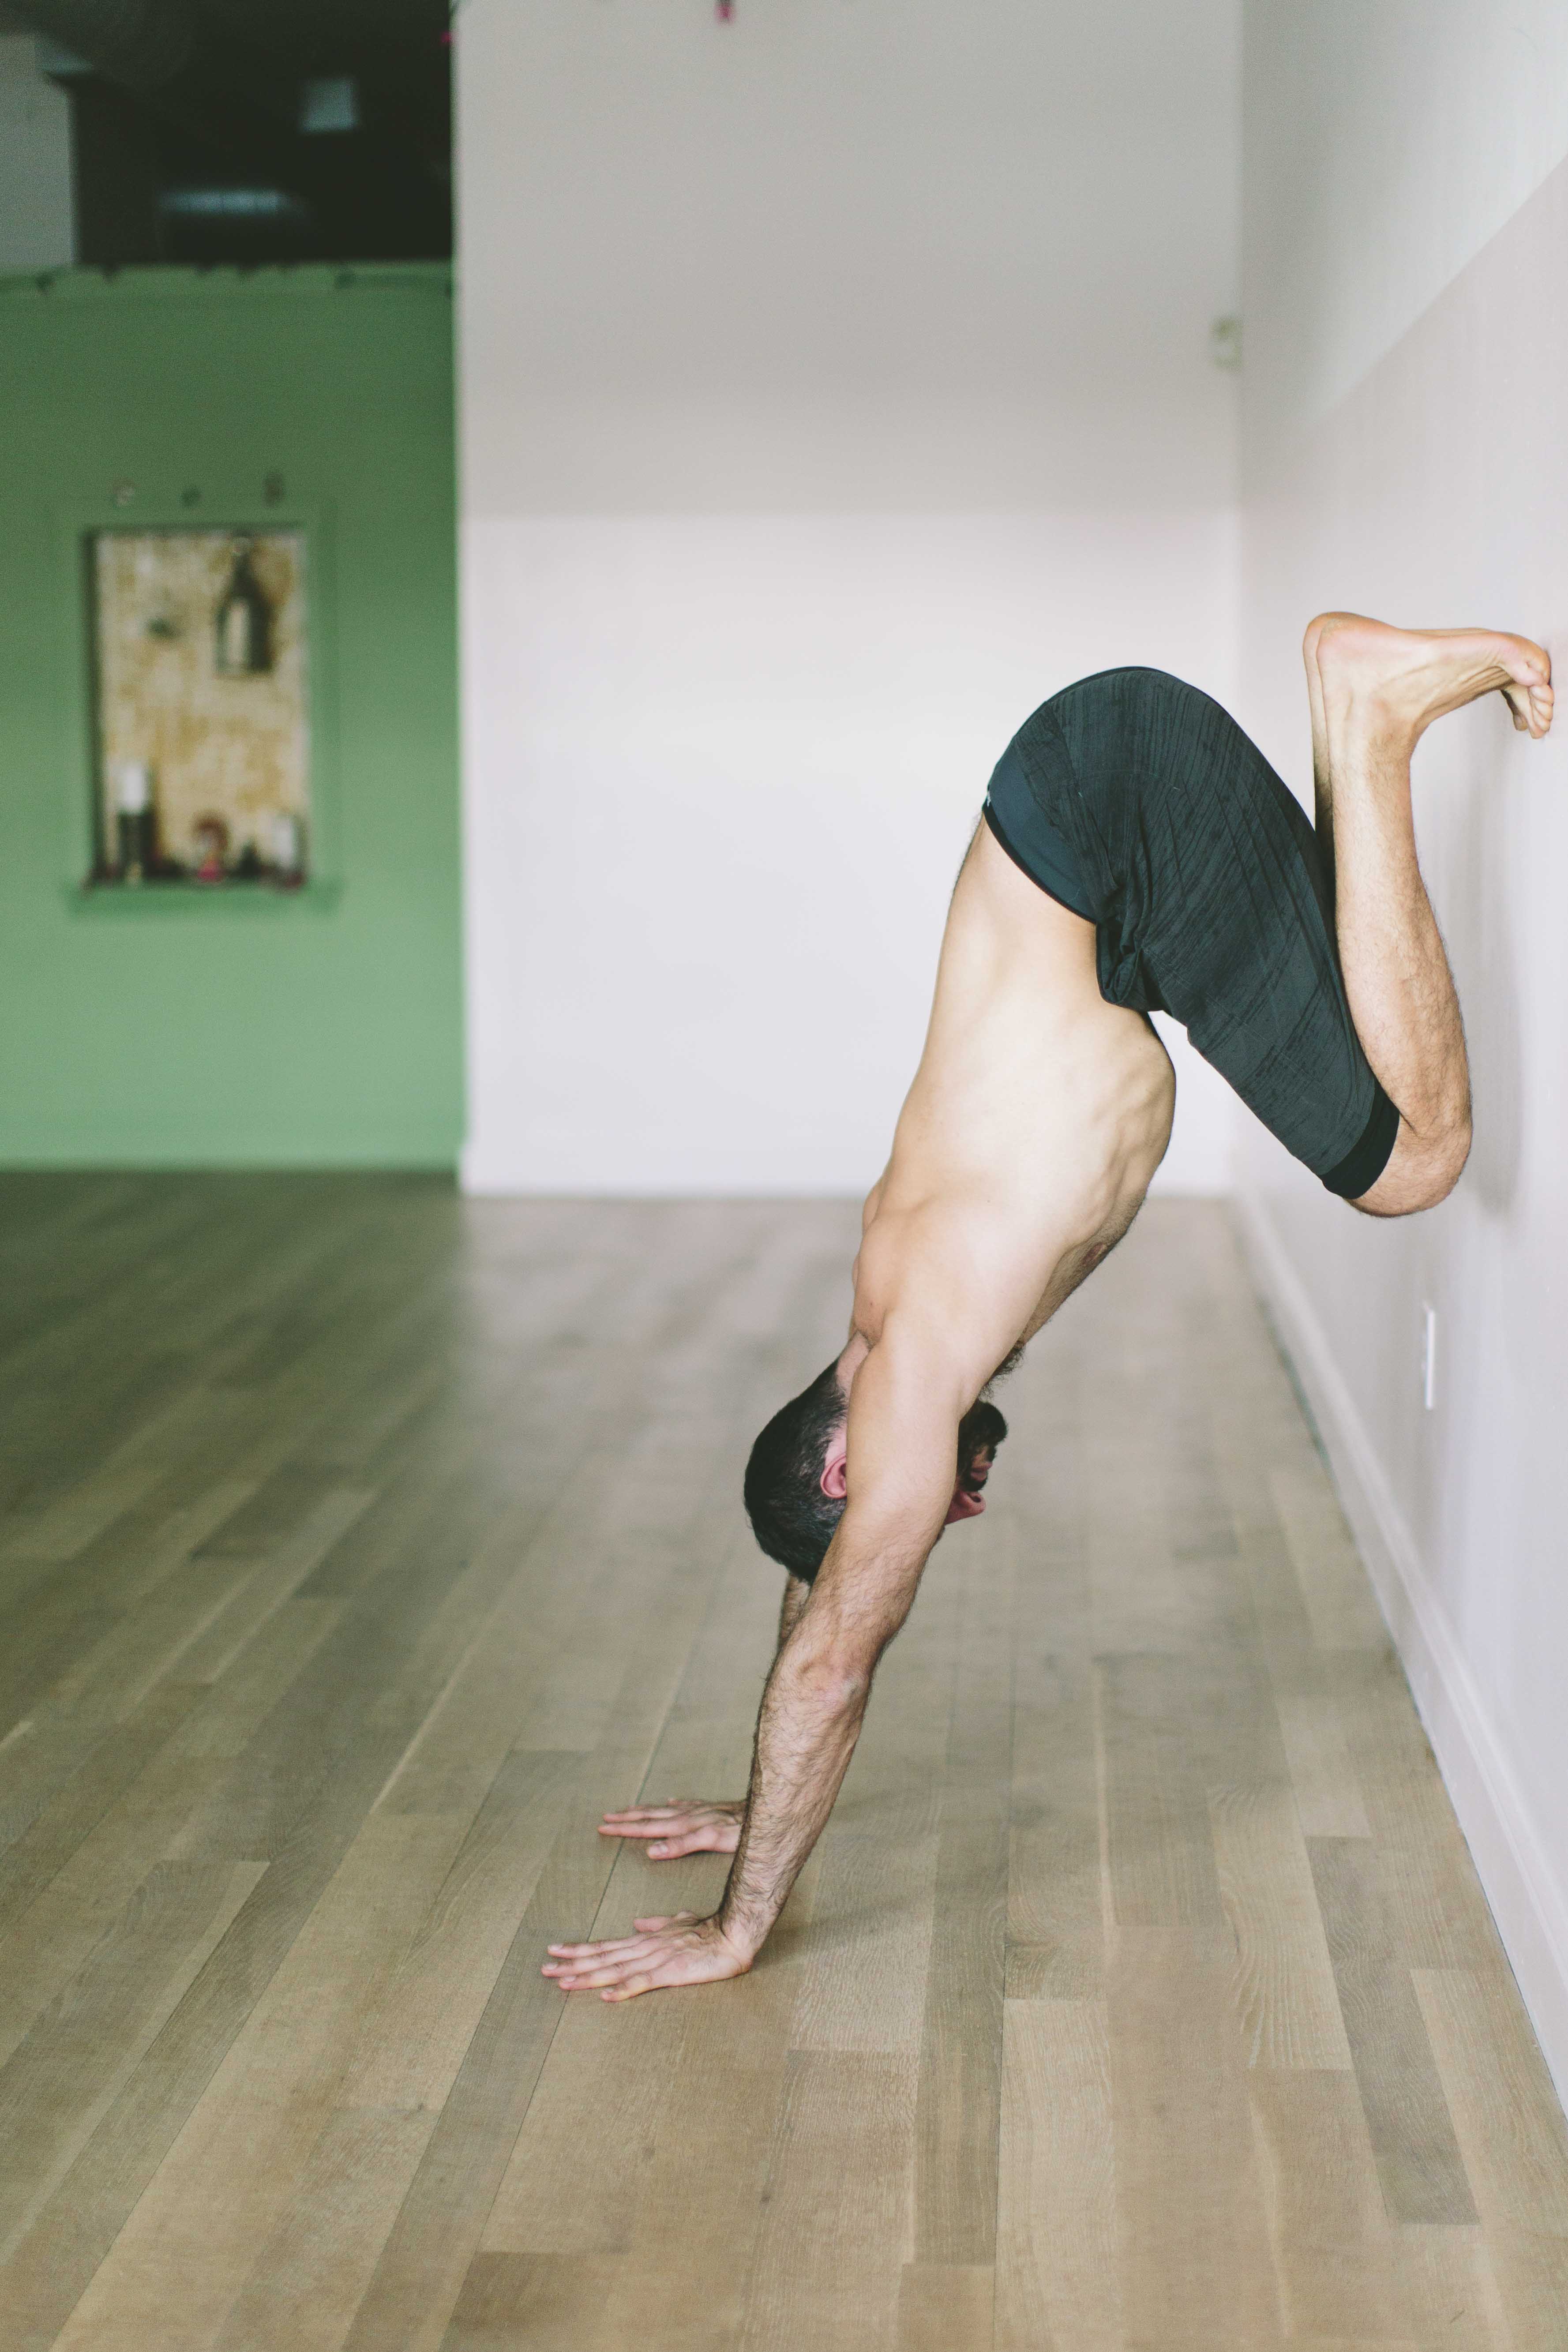
The entry-level variation for this looks basically like an inverted Child’s Pose. You can start in a bent-knee forward fold with your feet 18-24 inches away from a wall and your hands another 8-12 inches in front of that. Take one foot and place it on the wall at about hip height. Bring your butt back so that it’s almost resting on your heel and push your hands very strongly down in to the floor with your elbows completely straight. As you start to push your top foot more firmly in to the wall, you should feel a counter-pressure build between the hands and top foot so that your bottom foot gets lighter on the ground. At this point, lift your bottom foot off the floor and place it next to the other foot on the wall. Once in this position, there should be a straight line from your wrists all the way up to your hips, and you’ll be crouching back with the legs and you butt very close to your heels.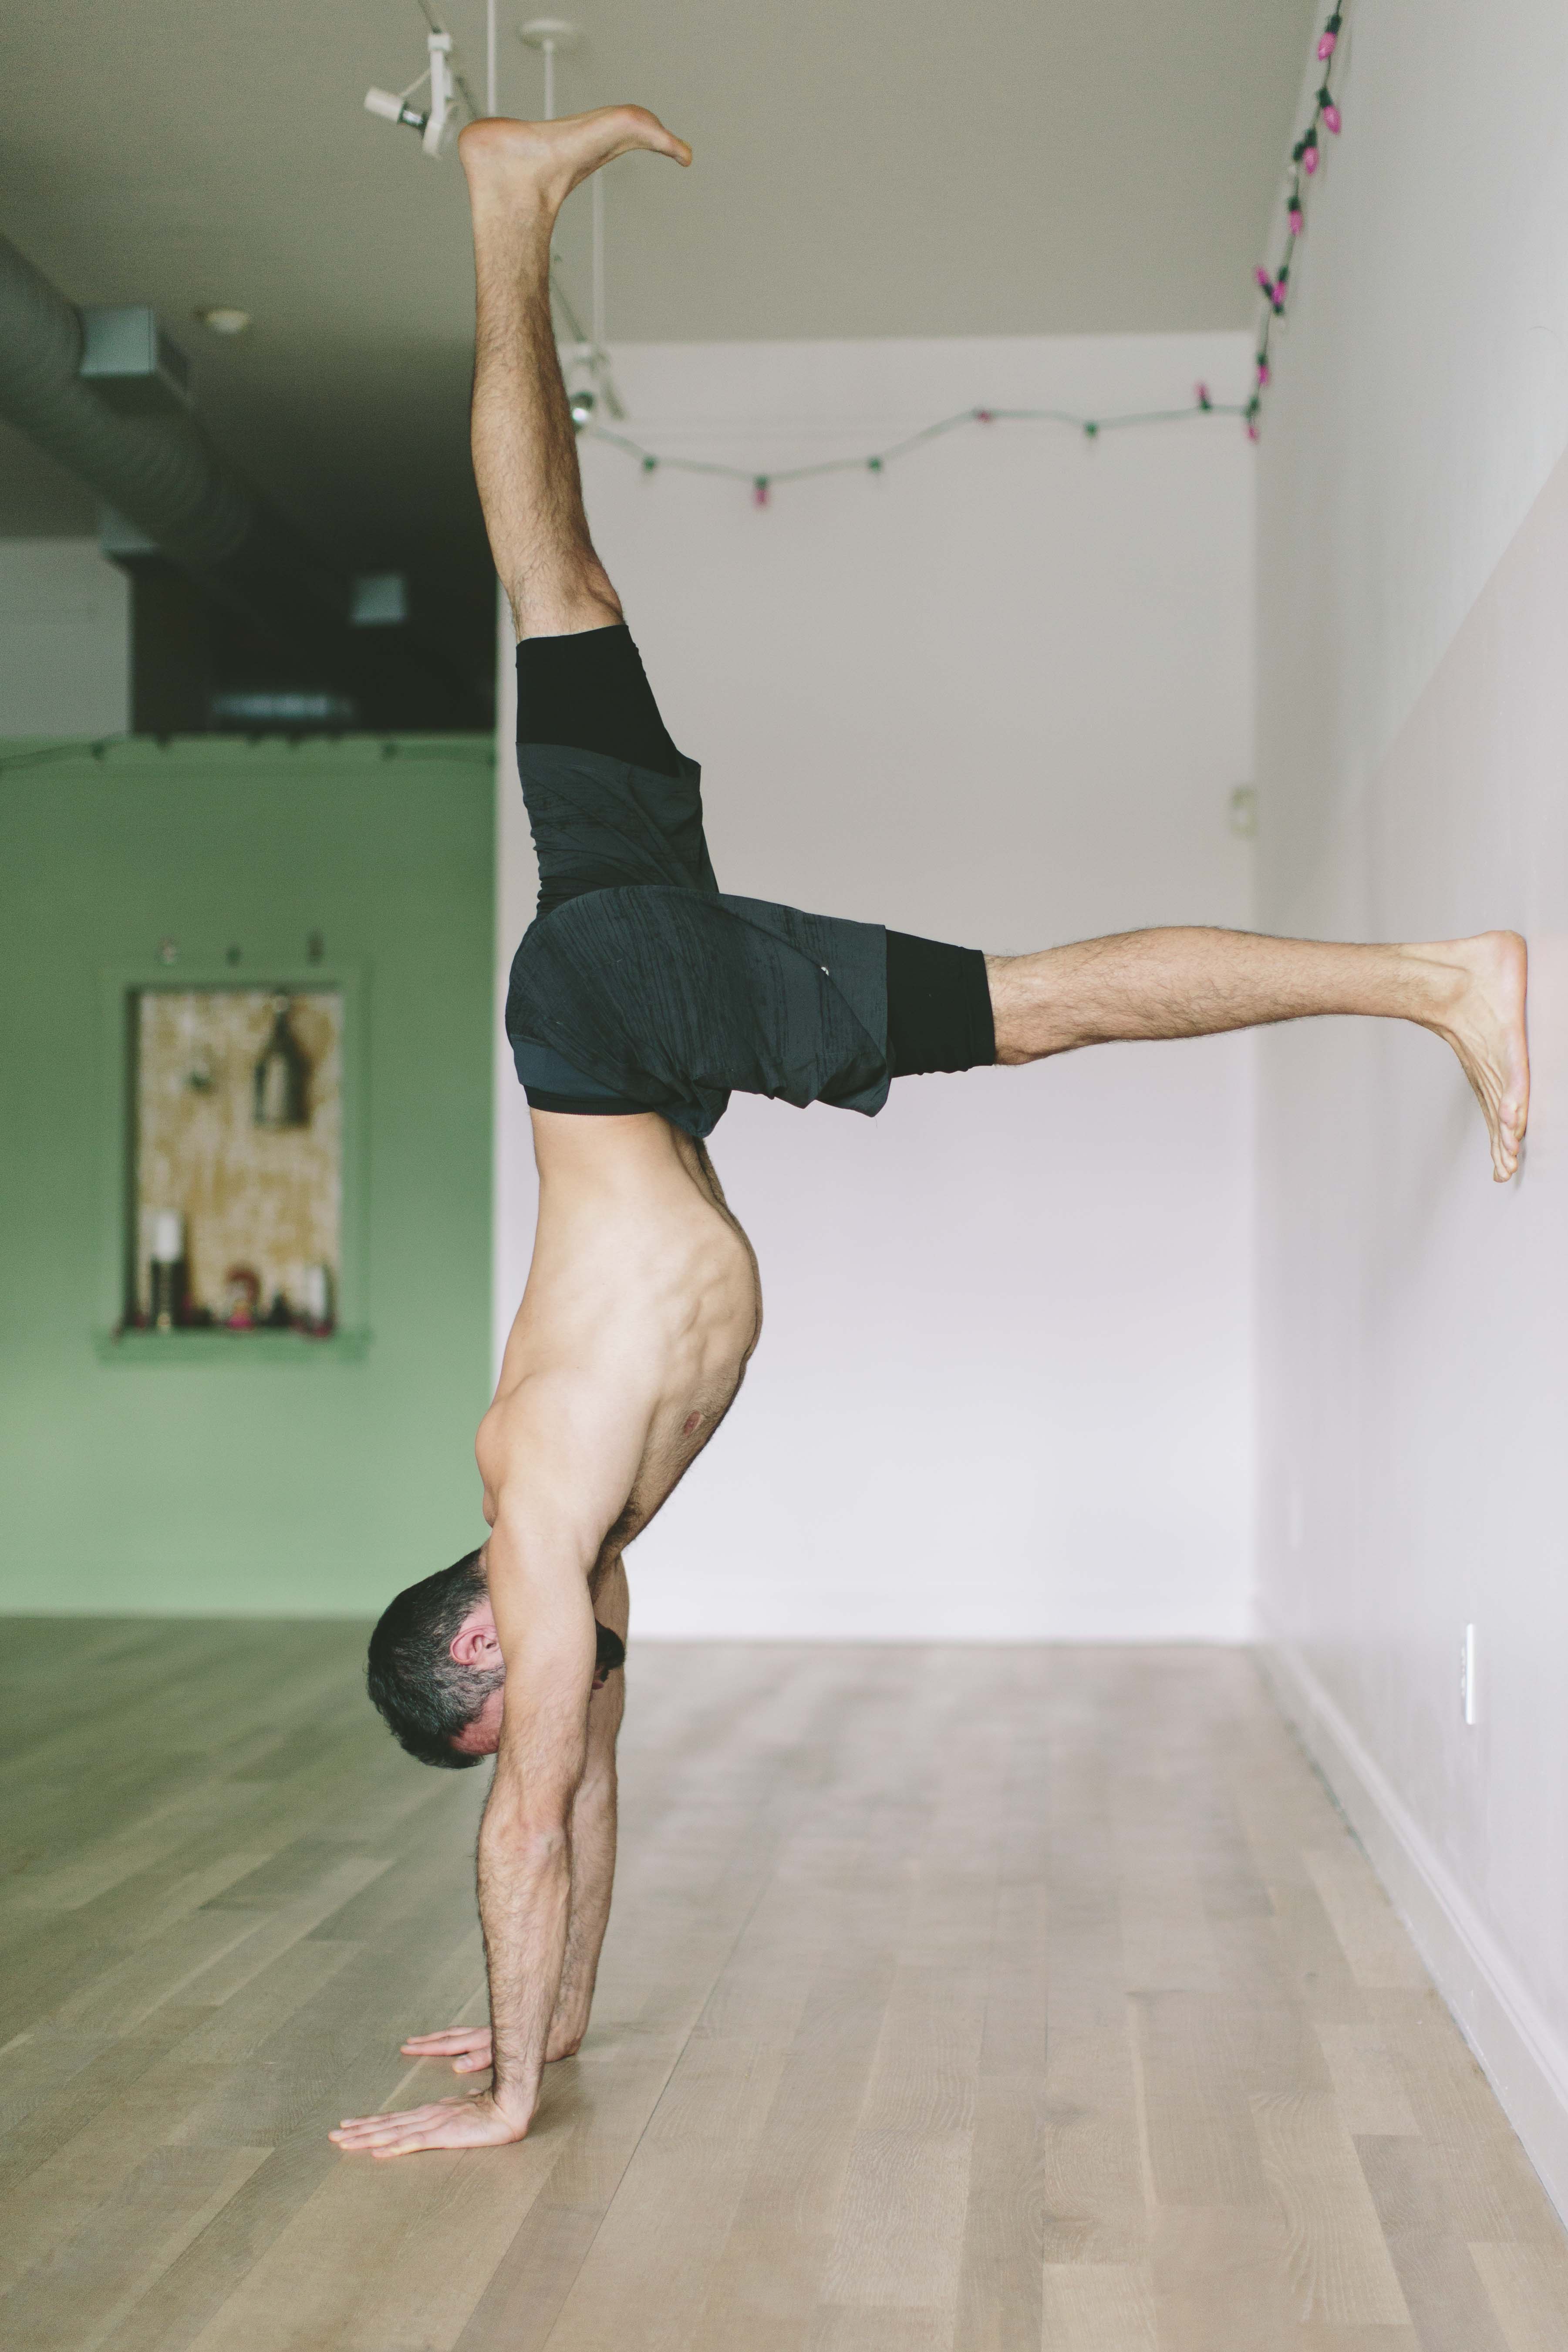
The second variation would be to place your hands down the floor one leg length away from the wall. Come to a very short Downward Dog with your feet either at the wall or a foot or so away from the wall. Then, as before, walk one foot up the wall to about hip height and then bring your other leg up to meet it. From this L-handstand position, lift one leg straight up toward the ceiling. You should now be in one straight line from your top ankle down to your hips to your shoulder to your wrists, and your just lightly making contact with the other foot on to the wall to maintain balance. If you’re comfortable here, put more weight forward in to your fingertips and come to the tiptoes of the foot that’s on the wall in order to eventually bring the toes just off of the wall so you’re balancing freely with the legs still split.
Wrist Soothing Forward Bend
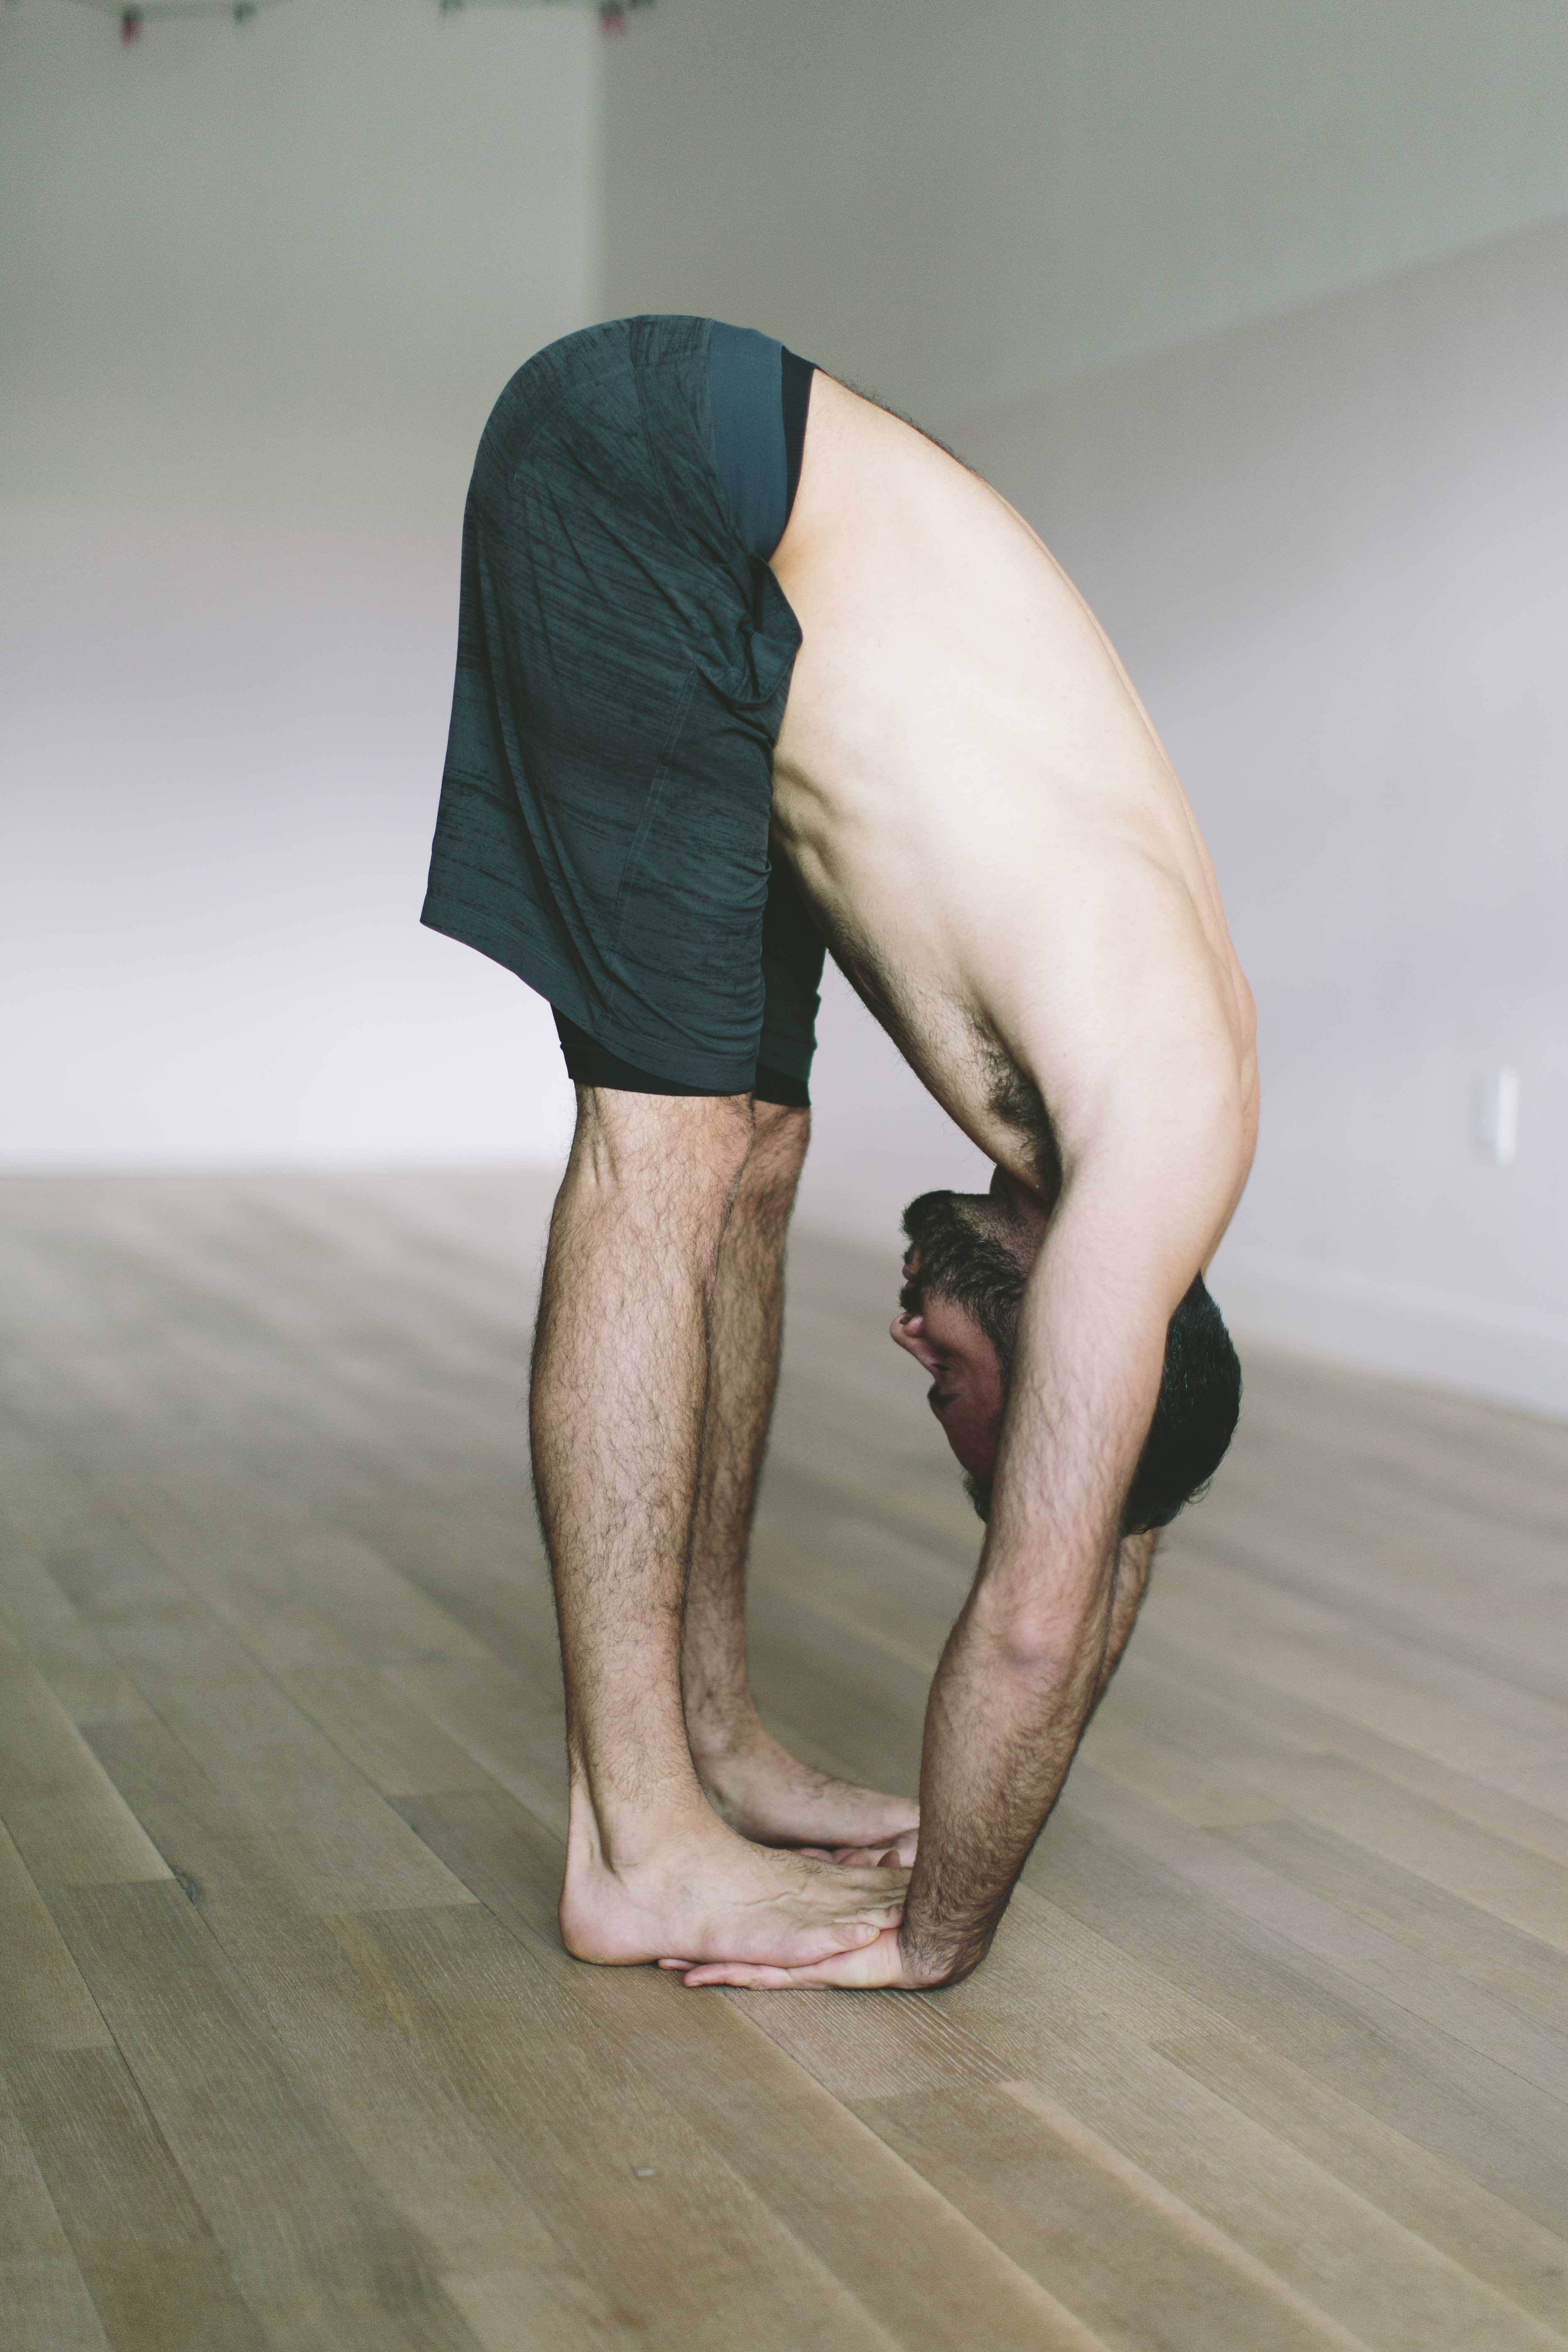
Fold forward over your legs and separate your feet two fists distance apart. Allow the knees to bend as much as you need here. Place the hands underneath your feet with the palms face up and make sure that the toes are all the way up to the creases of your wrists. This will insure that you get the proper fit of the hands underneath the feet.
You should feet that the ball of the foot at the joint of the big toe is pressing firmly into the soft spot of the hand just inside the webbing between the thumb and index finger. By leaning your weight further forward to the balls of your feet, you can intensify pressure/massage on the hands.
Photos by Hailey Wist at Magu Yoga


Comments (0)